*Note - Marketo only allows you to use a webhook with a trigger campaign, and not a batch campaign.
-
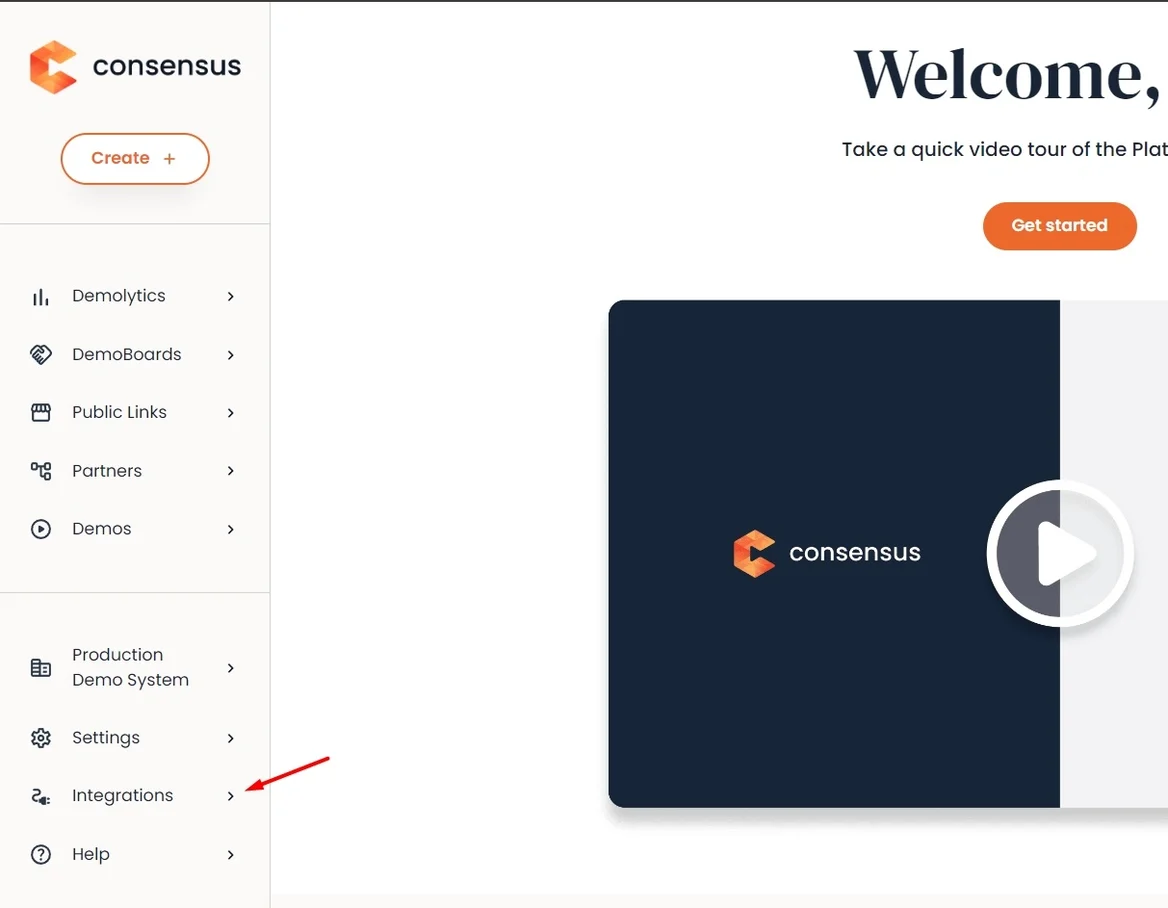
To get started, log in to Consensus and click on Integrations in the lower left-hand corner:
- Next, click on “API Credentials”:
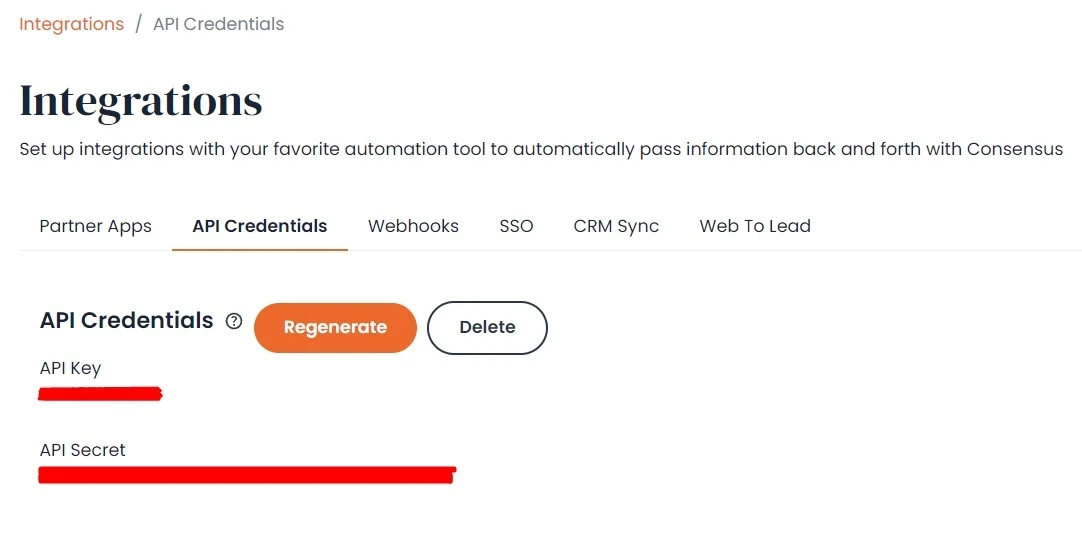
- If API credentials have been previously generated for your account, you’ll see an API key and API secret that you’ll need later on in the process:
- If no credentials are listed, click the “Generate” button to generate a new key and secret.
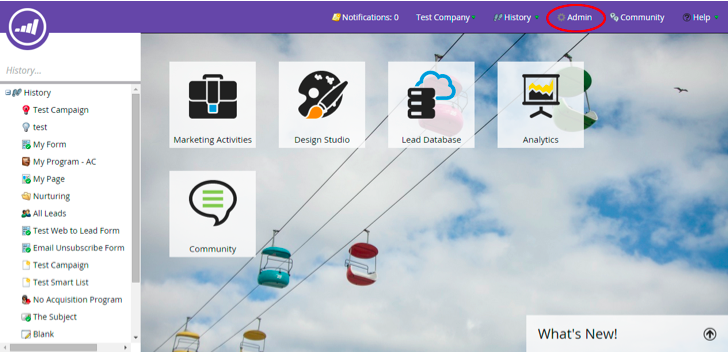
- Next, log in to Marketo and click on the “Admin” link at the top right of the page:
-
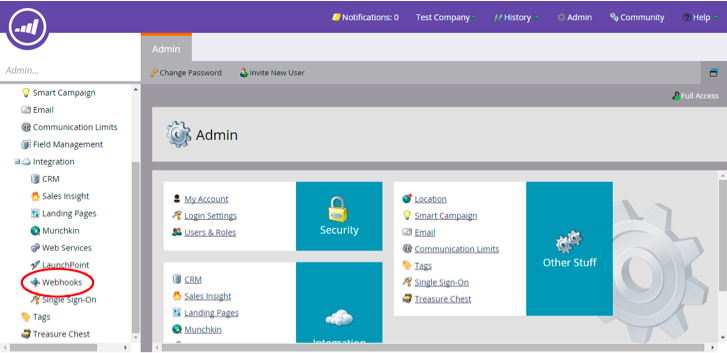
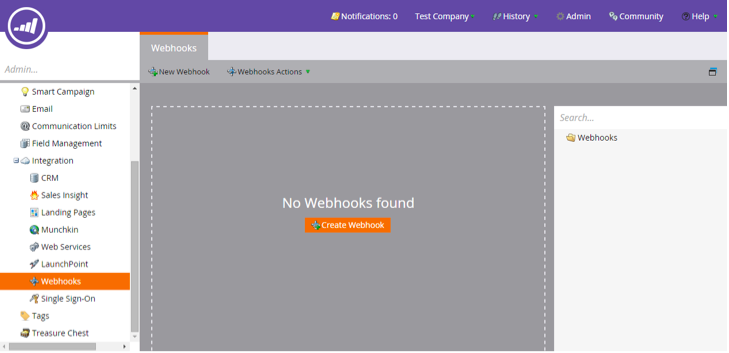
Scroll down to the “Webhooks” link listed in the left-hand sidebar:
- Next, click on the “Create Webhook” button in the center of the page:
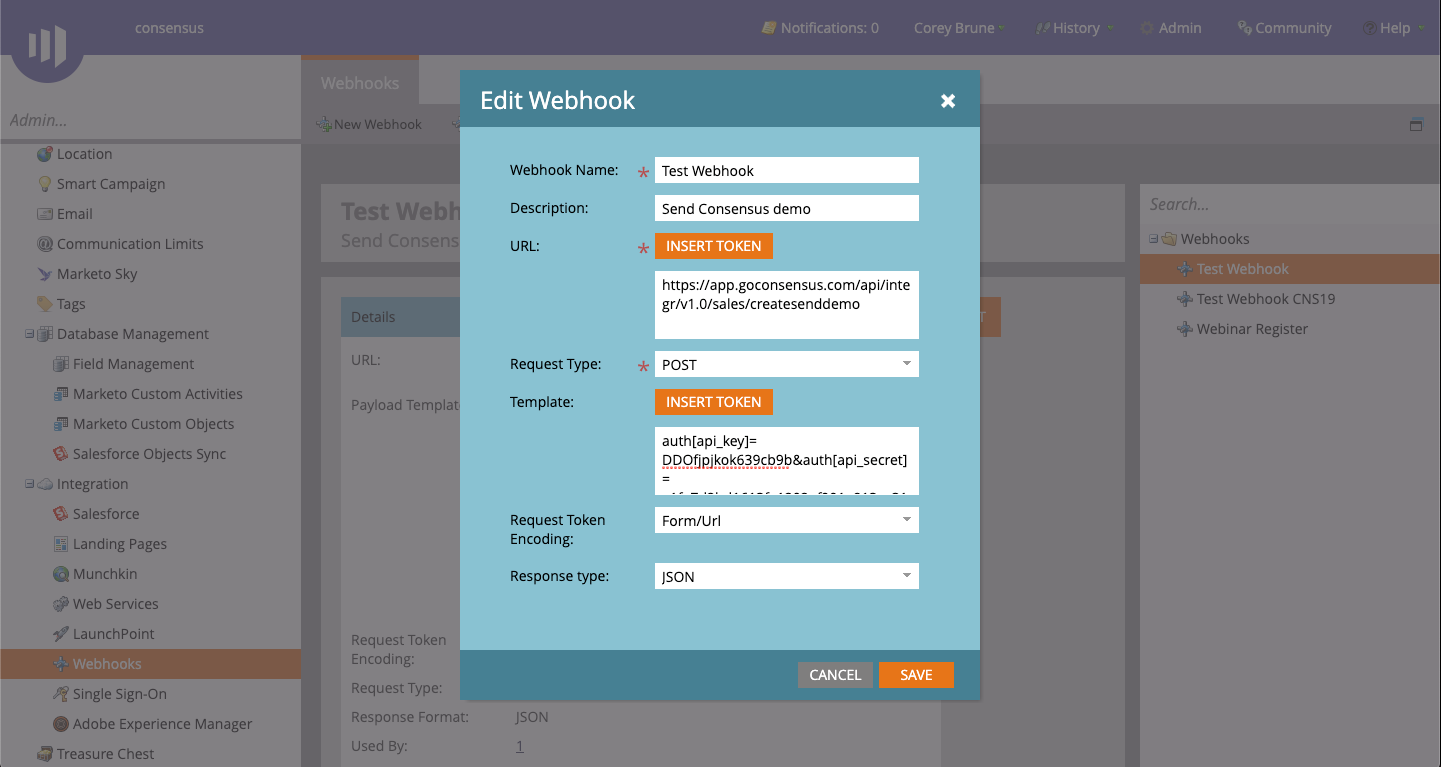
- Enter the following values and options for the webhook:
- Webhook Name: Send a demo (this can be whatever you choose)
- Description: Send a Consensus demo (this can be whatever you choose and is optional)
- URL: https://app.goconsensus.com/api/integr/v1.0/sales/createsenddemo
- Request Type: POST
- Request Token Encoding: Form/Url
- Response Type: JSON
For the Template field, copy and paste the following text while replacing the bold text with what is needed as shown in the key further below:
auth[api_key]=[api_key]&auth[api_secret]= [api_secret]&auth[user_email]=[user_email]&auth[source_name]="service name"&[demo_uuid]=[demo_uuid]&[organization]=&[opportunity]=SomeOpportunity&title=SomeTitle&[share_to][contact_email]=&[share_to][first_name]=&[share_to][last_name]=&[share_to][title]=&[message][subject]=Marketo Test Webhook&invites[0][message][body]=A Test of the webhook integration&invites[0][message][bcc]=[bcc]
Make sure to copy the text as is. Doing so will prevent any line breaks from being introduced.
[api_key] - The API key obtained from Consensus.
[api_secret] - The API secret obtained from Consensus.
[user_email] - The email address of the Consensus user (i.e. sales rep).
[demo_uuid] - The UUID of the demo you would like to send.
[subject] - The subject of the email that will go out with the demo.
[body] - The body of the email that will go out with the demo.
- HTML tags are supported, including the <br> tag which will create line breaks. The {dc{demobutton}dc} tag may also be used to indicate the placement of the demo button. If it is not used, the button will be automatically appended to the end of the email. If you would like to personalize the email with fields from Marketo, use the “Insert Token” button while your cursor is placed within the template code where you would like them to appear.
- The following is an example of what you might use for the body:
- Hi {lead.First Name:default=edit me},<br><br>Here's the personalized product demo I mentioned in our conversation. I think you'll find this really helpful. Please let me know what you think after watching it.<br><br>{dc{demobutton}dc}<br><br>John Smith
[bcc] - Whether the Consensus user (i.e. sales rep) should receive a copy of the email that goes out. This can be set to 0 (no copy) or 1 (copy).
- Optionally, if you would like to provide other Consensus users with access to the data and notifications generated from demos that will be sent, you can append the following to the end of the code above: &invite_request[notify][0][email]=[notify_email]
[notify_email] - The email address of a Consensus user who will also receive notifications and be granted access to the data generated.
The page should now look similar to the following:
- Click “Create” to create the webhook.
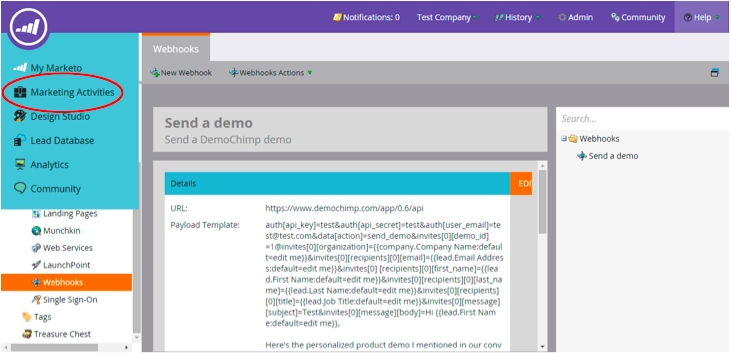
- Now that a Marketo webhook has been created, you can trigger it as part of a smart campaign. To do so, click on the Marketo logo at the top left of the page and then click “Marketing Activities”:
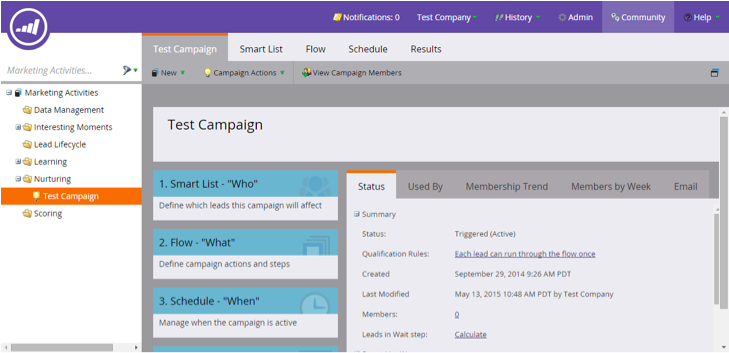
- Next, click on a smart campaign. In the example below, we will use the “Test Campaign”:
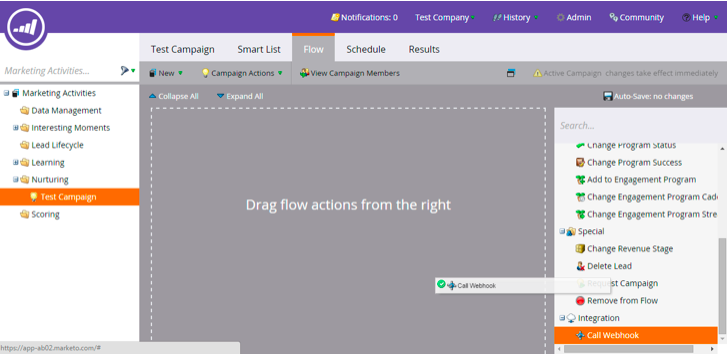
-
Next, click on “Flow” at the top of the page, scroll through the right-hand sidebar until you find “Call Webhook”, and drag and drop it into the center of the page where it says “Drag flow actions from the right” as shown below. If your smart campaign already has flow actions, drag it into a proper sequence based on when you would like the webhook to be called.
-
Now, choose the webhook you just created from the drop-down box next to “Webhook”:

Marketo is now integrated with Consensus, and demos will be sent to leads that meet the criteria of your smart campaign