
Single sign-on (SSO) lets your team sign in to Consensus with the same company login they already use for everything else, and it gives your admins control over how people get in. This guide walks you through connecting your identity provider (IdP) to Consensus using SAML 2.0, deciding whether to require SSO, and what your users see when they sign in.
| Before you start You'll need to be a Consensus admin, and SSO needs to be enabled on your account. If you don't see an SSO tab on your Integrations page, contact your Consensus account team or Support and we'll switch it on. You'll also want access to your identity provider (Okta, Microsoft Entra ID / Azure, Google Workspace, or any SAML 2.0 provider) so you can create the Consensus app there. |
| Quick path |
- Open Integrations > SSO in Consensus.
- Copy your Consensus account details into a new SAML app in your identity provider.
- Add your IdP's metadata back in Consensus, then click Save.
- Test signing in with Sign in with SSO.
- If you want to require SSO, turn on Disable Direct Login and choose your Strict SSO Type.
| Find your SSO settings |
Everything for SSO lives in one place, so it's a good idea to keep this page open in one tab while your identity provider is open in another.
- Click Integrations in the lower left-hand navigation.
- Select the SSO tab at the top of the page. You'll see the SAML 2.0 settings for your account, as shown below:
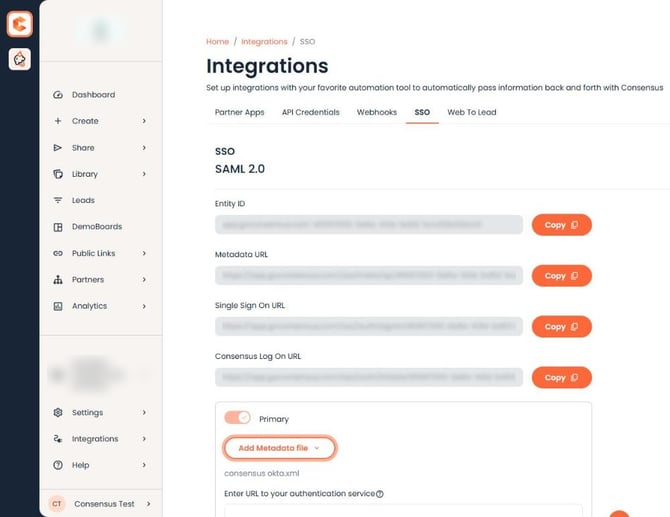
Integrations > SSO tab
If the SSO tab isn't there, SSO hasn't been enabled for your account yet. Reach out to your Consensus account team or Support to get it turned on.
| Copy your Consensus details into your identity provider |
The top of the SSO tab holds the details your identity provider needs to recognize Consensus. They're generated just for your account, and each one has an orange Copy button, so you won't need to retype anything.
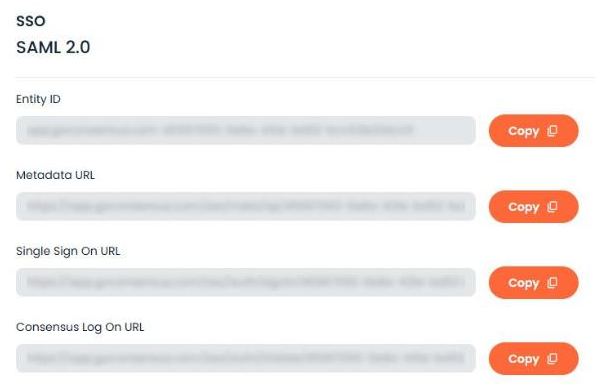
Your account's Entity ID and SSO URLs
Here's what each one is for when you set up the Consensus app in your identity provider:
- Entity ID — identifies Consensus to your IdP. Most providers call this the Audience URI or SP Entity ID.
- Metadata URL — a link to Consensus's SAML metadata. If your IdP can import metadata from a URL, this fills in most of the setup for you.
- Single Sign On URL — where your IdP sends users after they authenticate. Providers often label this the ACS URL or Reply URL.
- Consensus Log On URL — a link that starts a Consensus sign-in through SSO. It's handy for an app tile in your IdP's dashboard or a bookmark for your team.
Once your identity provider has these, create the Consensus app there and generate its metadata. That's what you'll bring back to Consensus in the next step. For provider-specific steps, see our Okta and Azure guides.
| Add your identity provider's metadata |
With the app created in your identity provider, it's time to complete the connection on the Consensus side. You can upload a metadata file or point Consensus to a metadata URL, whichever your IdP gives you.
- In the identity provider box, click Add Metadata file. You'll see two options:
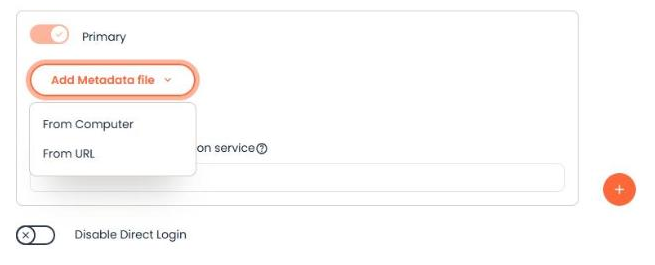
Add Metadata file menu
- Choose From Computer to upload the XML file you downloaded from your IdP, or From URL to paste your IdP's metadata URL. Once a file is uploaded, its name appears just below the button.
- In Enter URL to your authentication service, paste your identity provider's SSO login URL. This is where Consensus sends users to sign in.
- Scroll down and click Save.
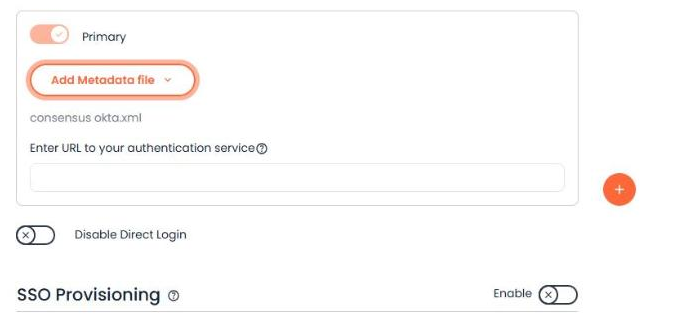
Identity provider details and the Disable Direct Login toggle
You'll know it worked when a user assigned to the Consensus app in your IdP can click Sign in with SSO on the Consensus sign-in page and land in their account. We'd recommend testing with one or two people before you change anything else on this page.
| Decide whether to require SSO |
With SSO connected, your users can sign in either way: through SSO, or with their Consensus email and password. If you'd rather everyone goes through your identity provider, you can turn off direct login.
| Before you turn this on Make sure SSO sign-in works for at least one test user, and that each user's email in Consensus matches the email your identity provider sends. Once direct login is off, password sign-in and password resets stop working for anyone covered by SSO. We also recommend keeping at least two admins on your account so nobody gets stuck if someone leaves. |
- Turn on Disable Direct Login.
- Add a login message. This is what people see if they try to sign in with a password, so it's a good place to point them to your SSO portal or IT team.
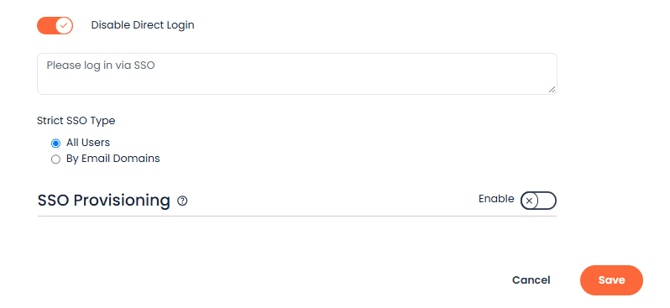
Disable Direct Login with a login message
Your message is also included in the welcome email for any new users you add after direct login is turned off, so new team members know to sign in with SSO from day one:
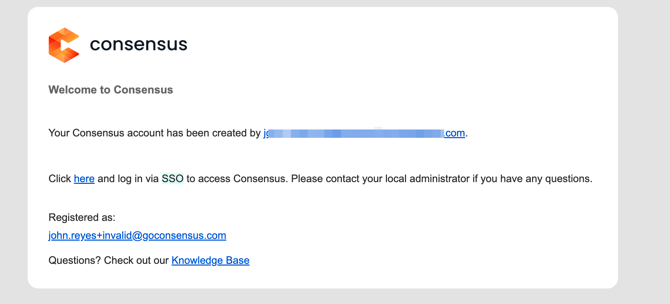
Welcome email for a new user once SSO is required
| Choose who has to use SSO |
Once Disable Direct Login is on, the Strict SSO Type setting lets you decide who it applies to.
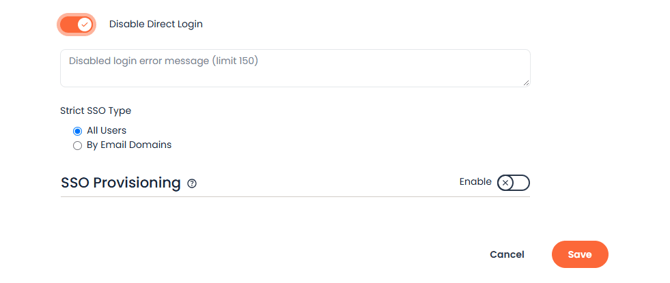
Strict SSO Type options
- All Users — the default. Everyone on your account has to sign in through SSO and sees your login message if they try to use a password.
- By Email Domains — only users whose email domain you list have to use SSO. Anyone with a different domain can still sign in with their email and password.
By Email Domains is a great fit when people outside your organization use your account, such as partner or reseller groups, agencies, or consultants. Your team signs in through SSO, and everyone else keeps their direct login.
- Select By Email Domains.
- Add each domain that should require SSO, for example yourcompany.com. You can add as many as you need if your team uses more than one domain.
- Click Save at the bottom of the page.
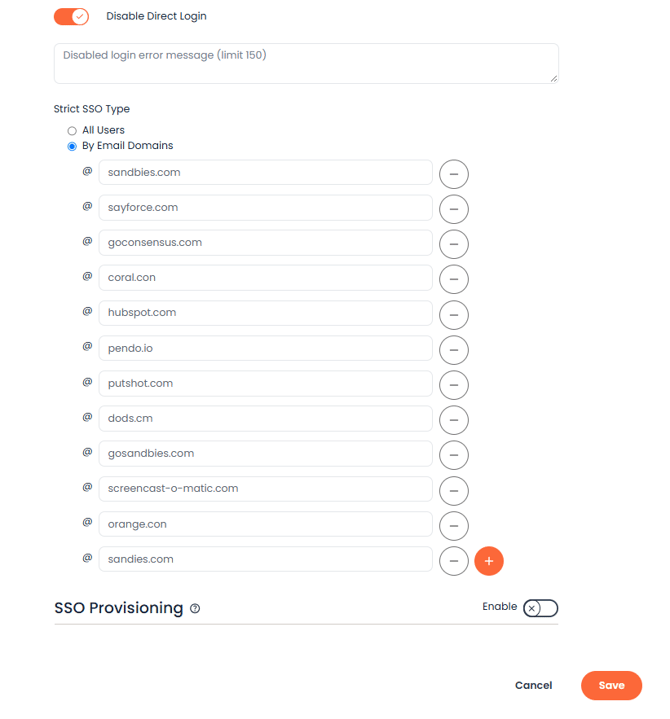
Adding email domains under By Email Domains
| Tip: cover subdomains with a wildcard Use an asterisk (*) to cover multi-level email domains. For third-level domains (like name@team.yourcompany.com), add *.yourcompany.com. For fourth-level domains, add *.*.yourcompany.com, and so on. |
You'll know it's working when a user on a listed domain sees your login message if they try a password, and can sign in with Sign in with SSO.
| What your users see when they sign in |
Depending on your setup, your team can open Consensus straight from your identity provider's app dashboard, or start from the Consensus sign-in page. Here's what the second option looks like:
- On the Consensus sign-in page, click Sign in with SSO.
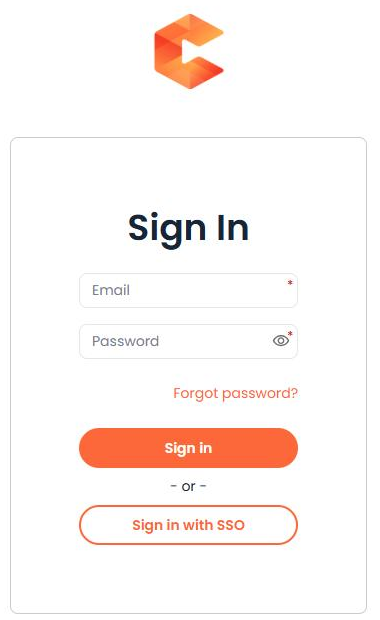
Consensus Sign In page
- On the Sign In via SSO screen, enter your work email and click Sign in.
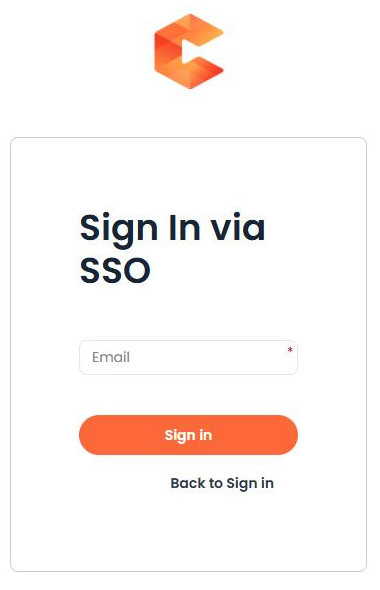
Sign In via SSO screen
- You'll be taken to your company's sign-in page. Once you authenticate there, you'll land right in Consensus.
That's it! Your team gets one less password to remember, and you stay in control of who can get in.
| Troubleshooting |
- I don't see an SSO tab on the Integrations page. SSO needs to be enabled on your account first. Contact your Consensus account team or Support.
- A user says their password reset email never arrives. If direct login is off for that user, password resets are turned off too, since they sign in through SSO instead. Ask them to use Sign in with SSO. If they can't get in that way, check that they're assigned to the Consensus app in your identity provider.
- A user can't sign in after an email or domain change. SSO matches people by email, so their email in Consensus has to match the one your identity provider sends. Update the user's email in Consensus, or contact Support if you're changing domains for many users at once.
- Nobody can sign in after we switched identity providers. Upload the new provider's metadata on the SSO tab. If you need people working in the meantime, an admin can temporarily turn off Disable Direct Login so users can sign in with a password while you finish the setup.
| FAQ |
Do new users still need to set a password? Not if direct login is off for them. They'll get a welcome email telling them to sign in with SSO. If direct login is still on, they can set a password or sign in with SSO, whichever they prefer.
Can partners or contractors keep signing in with a password? Yes. Set Strict SSO Type to By Email Domains and list only your company's domains. Anyone on another domain keeps their direct login.
What if every admin on our account leaves? Contact Consensus Support and we'll help you get admin access back for the right person. To avoid that situation, keep at least two admins on your account, especially before you require SSO.
Can SSO create and remove users for us? SSO handles sign-in. To create, update, and deactivate users automatically from Okta, set up SSO Provisioning for Okta.
| Keep Exploring |
How to set up Okta SSO Authentication in Consensus · How to configure Azure SSO · How to Set up SSO Provisioning for Okta