Video walkthrough here>> Microsoft Word - Mail Merge Demo Link
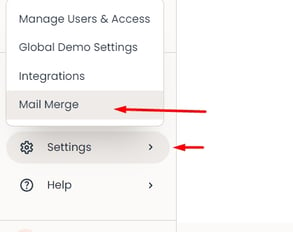
Log into Consensus WebApp, click the Settings (![]() ) in the lower left corner, choose Mail Merge, and then Create New.
) in the lower left corner, choose Mail Merge, and then Create New.
Complete the next form: Link Name and Select a Demo. Once the demo is selected, pick Other (User Defined) from the drop-down list under Mail Merge Format. Next, fill out the fields for first name, last name, email, company, and title. The last item is to select users or groups for notifications. Once this is complete, click Create the Link:
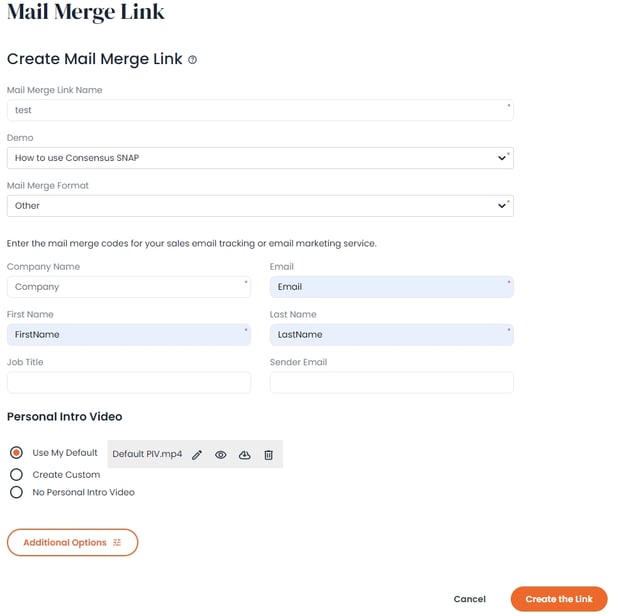
Click CREATE the LINK, and on the next screen, copy the Mail Merge Demo Link. We will need this link for Word Mail Merge:

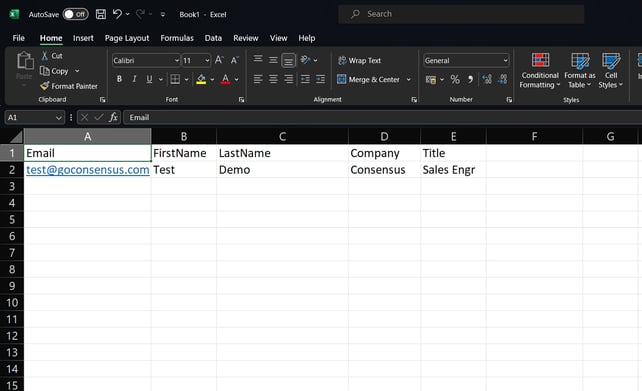
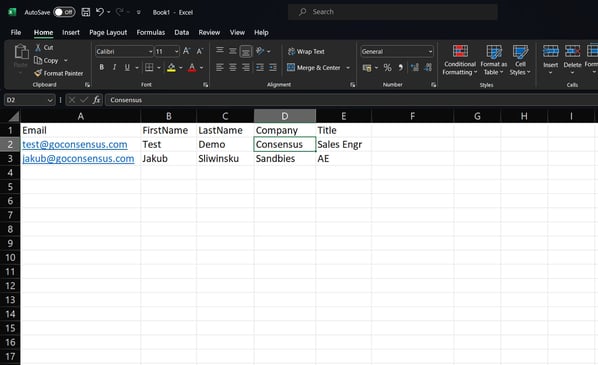
If you don’t have a recipients spreadsheet, open Excel and use a format similar to the one below. This is used by Word when producing the mail merge:
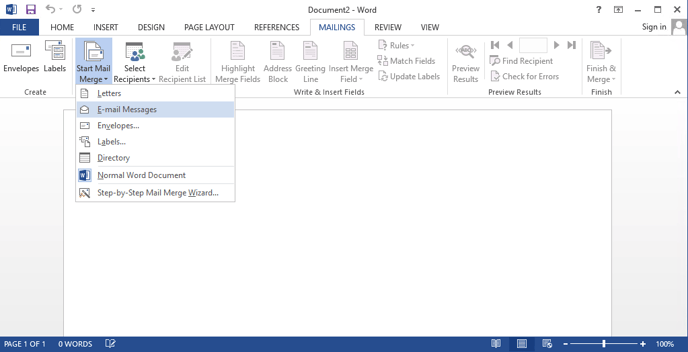
Open Word, click Mailings and pick the type of Mail Merge. In this example, we will use Email Messages:
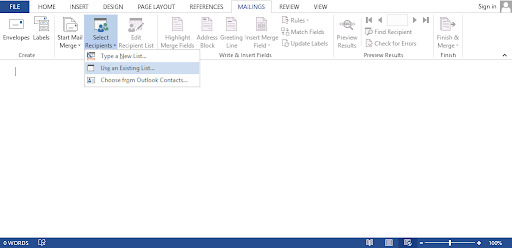
Click Select Recipients, choose Use an Existing List and pick the Excel spreadsheet from above:
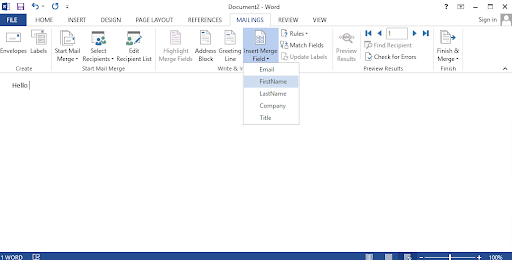
Now you can start writing the document. Click Insert Merge Field to add any variables, such as the person’s name:
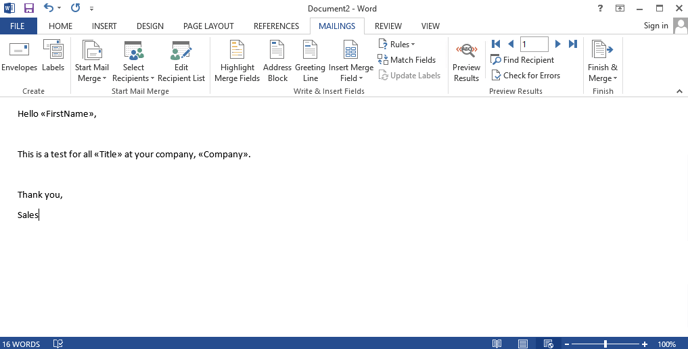
Here is a sample mail merge with Merge Fields:
We can now add in the link from Consensus. Copy and paste that link into the Word doc:
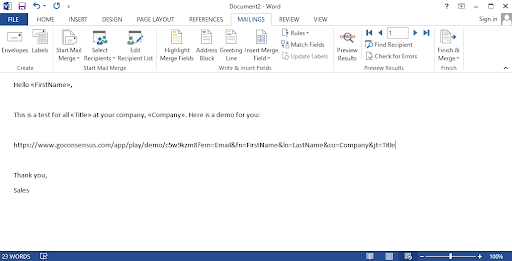
We need to replace the variables (Email, FirstName, LastName, Company and Title) from Consensus with Word Mail Merge. Click Insert Merge Field and replace the Consensus values with the corresponding Merge Field. The link should look similar to the image below.
NOTE: do not type in the values (ex: <<FirstName>>) since Word will not substitute the variables unless you pick one of the Merge Fields. Your mail merge is now ready to send.
Choose Finish & Merge:

Fields Containing Spaces
Microsoft mail merge fields need to be URL encoded if sending via email. If any columns contain a space, you will need to create a new field that is encoded. Fortunately, Excel has a function, ENCODEURL which will replace all non-ASCII characters with the ASCII equivalent.
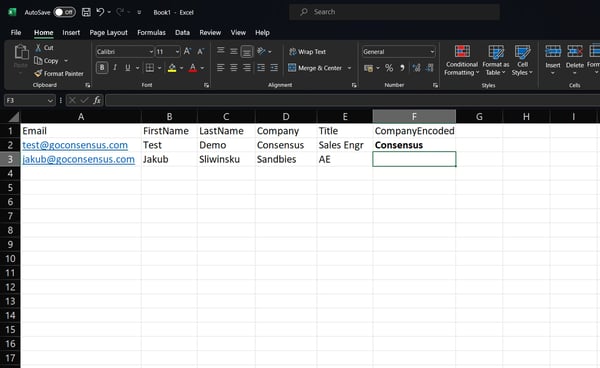
In this example, we are encoding the Company field, but this function may be applied on any field containing spaces or other non-ASCII characters.
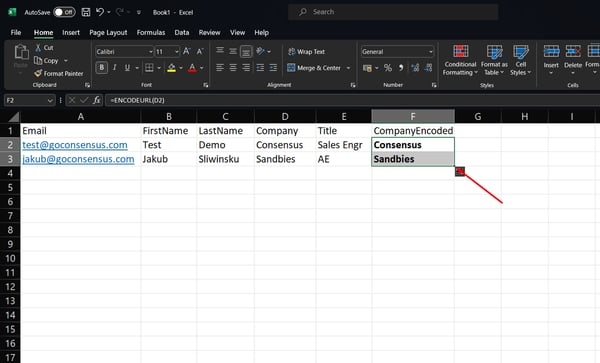
Next, add another column, and use the function, ENCODEURL like this:
=ENCODEURL(D2). Note: Your column and row may vary.
Once the function is setup, simply drag the lower right-hand corner of the cell down for as many rows as needed.
Inside of Microsoft Word, make sure you choose the encoded column when using mail merge.