Try creating a Demoboard in an Interactive Product Tour
Creating a DemoBoard for a client inside Consensus is simple. When you create a DemoBoard in Consensus, the platform will create a unique URL that will be tied directly to each prospect you add within that organization. This allows Consensus to automatically generate Demolytics for each prospect as soon as they watch the demo(s).
Start by going to Share > DemoBoard within the Left Hand Navigation:
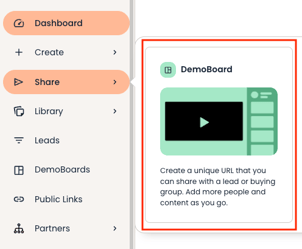
This will bring you to the Create DemoBoard page, where you can add information about your recipients and the demos you want to send them.
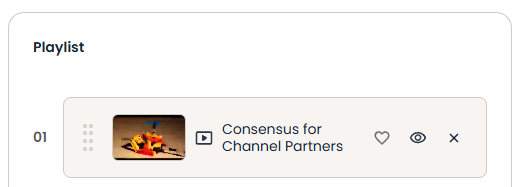
Start by selecting which demo you want in your DemoBoard. Simply click on the Demo to add it to your DemoBoard Playlist.
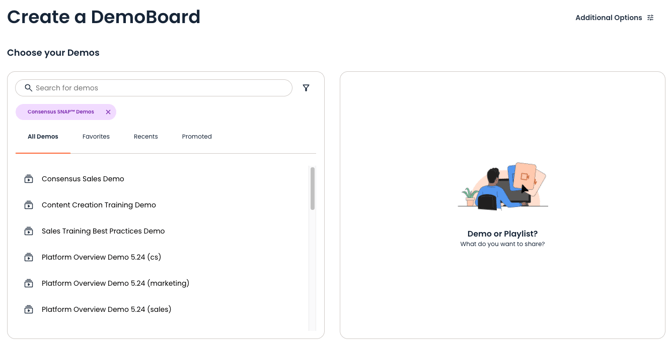
- All Demos: Select from a list of all demos you have access to
- Favorites: Quickly select from a list of your favorite demos! (see image above) You can favorite any demo once it’s added to your Playlist or right from within the Demo Library, simply by selecting the “heart” icon
- Recents: Once you’ve started creating DemoBoards, we’ll save the last 20 demos you’ve used so you can quickly and easily jump back and reuse them!
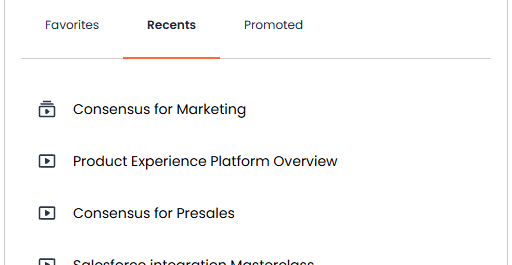
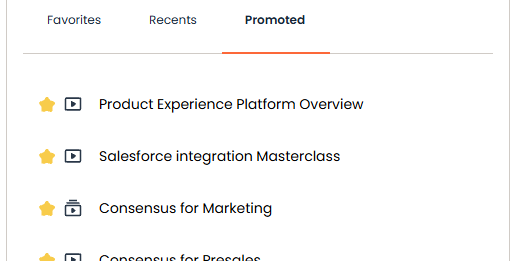
- Promoted: Your Admins can promote demos to show here, so if you have a large list and are not sure which demos to use, you know you can always trust the promoted demos! These demos will also be represented by a Star icon within the Demo Library.
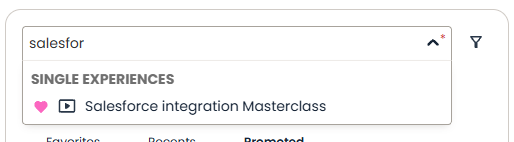
- Search: Don’t have the demo you need in any of those demo lists? You can always search the demos you have available to add to your Playlist as well.
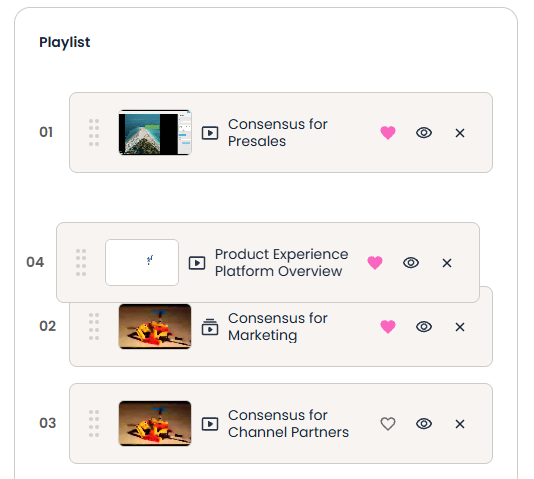
As you add demos, you will see your Playlist start to form. You can easily drag and drop the order of your playlist to align with the order you want your recipients to view them.
NOTE: You can add a maximum of one Advanced Branching Demo, but include up to 15 Single Experience and/or Standard Personalized Demos in your Playlist
Now let’s add our Recipient info. Start by adding your recipient's email to the email block:
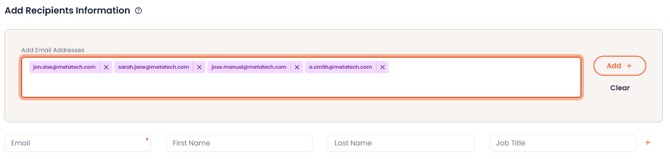
- NOTE: You can also add each recipient individually if needed
Once you add your recipients, Consensus will try to autofill the Organization and First & Last names of recipients based on their email, where possible.

Simply add or tweak any names needed, and you're set!
Now we’ll add additional DemoBoard information to help personalize the experience even further.

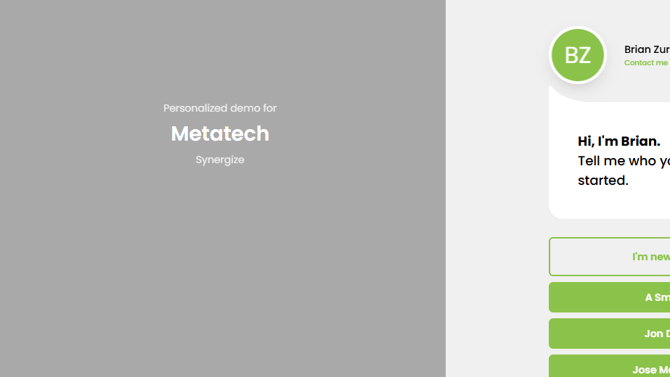
- Organization & Subtitle: These fields are used to personalize the Cover Page of the DemoBoard.
- NOTE* Consensus will automatically fill out the Organization field for you based on the email prefix of the first recipient email.
- jon.doe@metatech.com >> Metatech
- NOTE* Consensus will automatically fill out the Organization field for you based on the email prefix of the first recipient email.
- DemoBoard Name: This is used within the Consensus App to allow you to easily identify the DemoBoard within the Track DemoBoards pages.
- NOTE* If you don’t fill this out, Consensus will automatically create a DemoBoard Name for you using “Organization - First Demo Name”.
- CRM IDs
- This gives you the ability to add an Account and Opportunity ID that can be used when connected to another system via API.
- NOTE: These IDs are optional
Optionally, you can add a Personal Intro Video that plays within the Cover page of the DemoBoard. This allows you to add a personal touch for your recipients that they will see before they enter the DemoBoard.
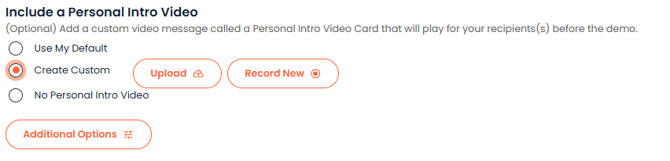
- Use your Default Personal Intro Video which can be recorded within your “My Profile” page
- Create a Custom Personal Intro Video to use within a given DemoBoard
- Or you can decide not to use a Personal Intro Video
Additional Options: Consensus gives you several additional options to set up your DemoBoard for success. You can find these right at the top of the Create DemoBoard page.

- Notifications & Access: A 'notifier' can either be a specific rep or reps on your team, or a group that has been created within your account. These notifiers will receive the same notifications you receive when a prospect views, shares, or interacts with the DemoBoard. Simply add notifiers by selecting them within the dropdown. Anyone set as a Notifier can also be set to display their Contact Information within the DemoBoard, ensuring viewers know who to reach out to with questions.
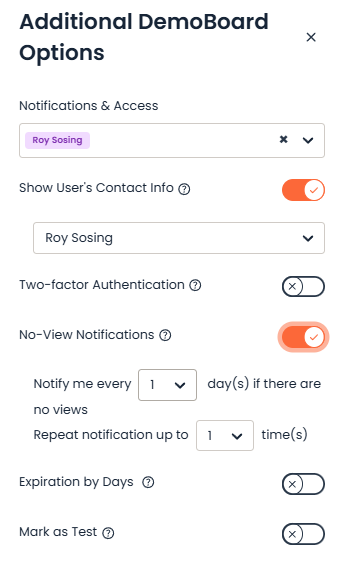
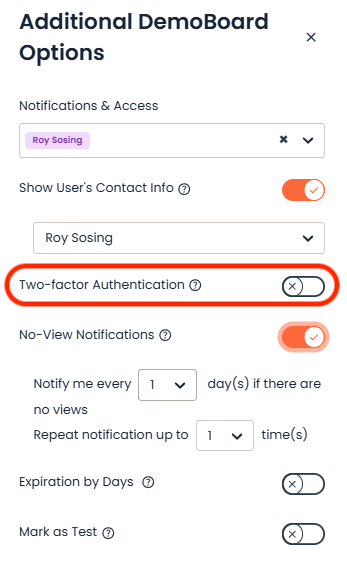
- Two-factor Authentication: This allows you to require viewers to verify who they are. As they select their name within the Cover Page of the Demo, an email will be sent to the email associated with them in the demo with a PIN they can use to access the DemBoard.
- No-view Notification: This feature allows you to set a cadence and the number of times you’d like us to notify you if nobody watches this DemoBoard. This is a great way to easily track which DemoBoards are not getting engagement, to know who to reach out to.
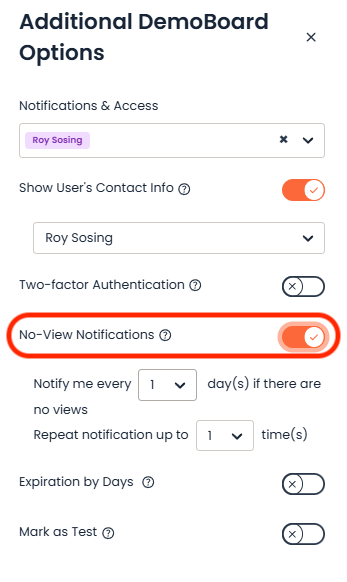
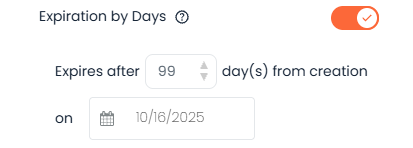
- Expiration by Days: Have time-sensitive information in your DemoBoard. This allows you to set a date at which Viewers will no longer be able to access the DemoBoard. This date can be disabled or pushed back as needed at any time.
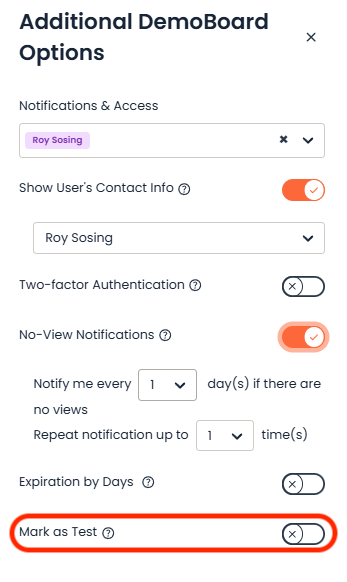
- Mark as Test: This option allows you to mark the DemoBoard as a test, enabling it to be easily removed from reporting if you are simply testing the Consensus capabilities and the DemoBoard is not intended for production use.
Once your Additional Options are set, you'll simply click 'Create DemoBoard'!
That's it! Now you'll have the ability to choose from three different DemoBoard Calls to Action you can use to add to your prospect outreach, whether it is through email, chat, text, or however you are communicating with them:
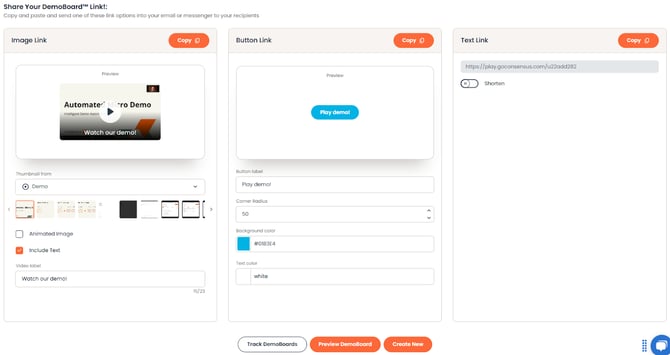
Image Link (Recommended)
The Image Link allows you to link the DemoBoard URL to an image pulled from either your Personal Intro Video or from the first video of your selected Demo.
- For Static Images, you can add text and a play icon overlay.
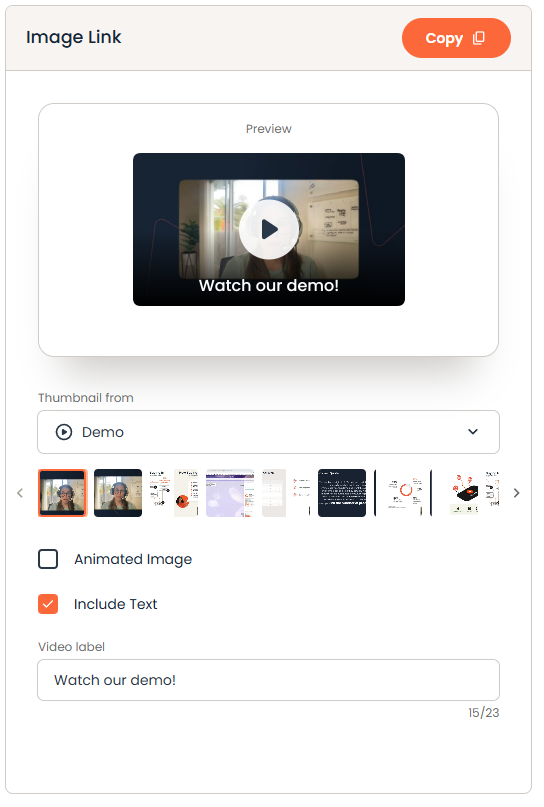
- Alternatively, you can use an animated GIF version (shown above) with your Personal Intro Video or the first video in your selected Demo.
TIP: GIF links can increase clickthrough rates of up to 26%! (learn more here)
Button Link
The button link allows you to create a custom button that links to your DemoBoard.
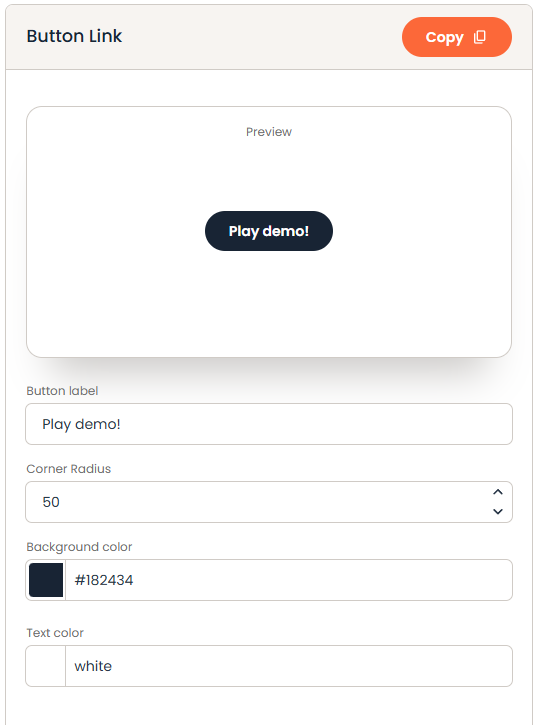
- Set the text you want to display within the Button
- Set the corner radius for how rounded the button is
- Adjust the Button fill and Button Text colors
Text Link
The Text link allows you to get the direct URL for your DemoBoard. Several applications, such as LinkedIn, do not support images within their messages. For these types of apps, you can use the direct link.
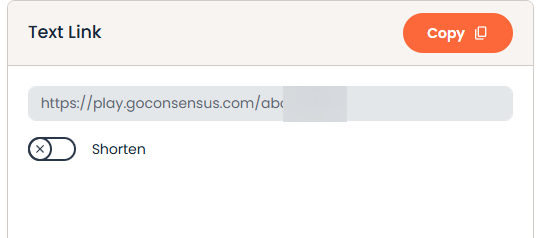
- Use the Shorten option to create a bit.ly link for your DemoBoard, making it look cleaner within text-only messages.
NOTE: Several applications, such as LinkedIn, do not support images within their messages
Once you've found your perfect CTA, you're ready to copy and paste it into your email or other outreach method to start receiving notifications when your prospects start watching the demo(s)!