
Single Experience Demo Guide
Create a Single Experience Demo
A Single Experience Demo is the simplest demo type in Consensus — one continuous video with optional related documents and Tours. There's no per-feature rating or branching: every viewer sees the same content end-to-end. Use Single Experience when you want a polished, fixed walkthrough — overview videos, short-form pitches, and recorded webinars all fit well here.
Open the Demo Wizard
Click Create in the left-hand sidebar to expand the create menu, then choose Single Experience.
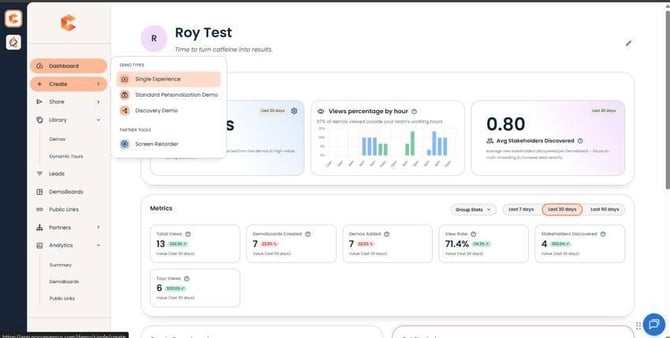 Create menu expanded — Single Experience option.
The Demo Wizard opens with six numbered steps plus a Publish step.
Step 1: Demo Info
Set the Internal Title (your team sees this in the Library and analytics) and External Title (viewers see this on the cover page). Description is optional and is searchable from the Demo Library — useful for tagging keywords.
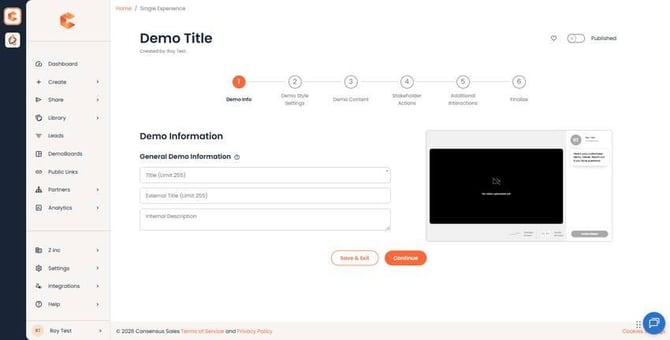
Step 1: Demo Info — Internal Title, External Title, optional Description.
Step 2: Demo Style Settings
Pick the DemoPlayer language, brand colors, logos, and contact info. Consensus supports 19 languages including English, Chinese (Simplified and Traditional), Czech, Danish, Dutch, Finnish, French, German, Indonesian, Italian, Japanese, Korean, Norwegian, Polish, Portuguese, Russian, Spanish, and Swedish.
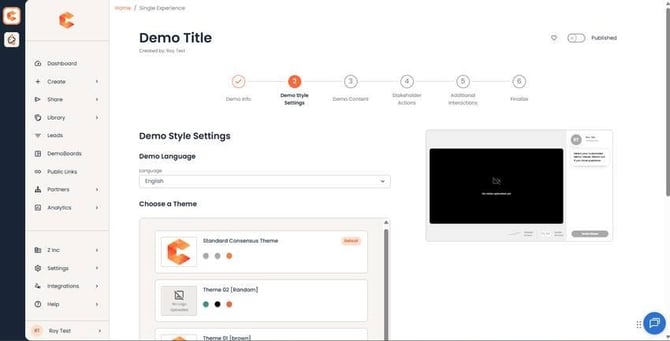
Step 2 (top) — language, theme, logos, color scheme.
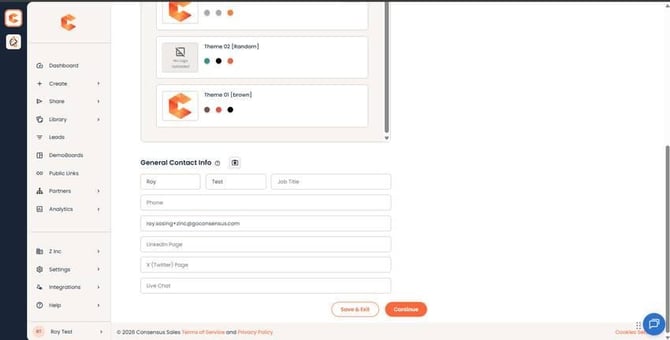
Step 2 (bottom) — Contact Info: company phone, email, social media.
For more on the four logo positions and color settings, see "Customizing Your Demo's Style Settings."
Step 3: Demo Content
Upload the demo's single video plus any related documents. You can also attach Tours to enhance the experience with interactive click-through moments. Multiple Related Docs are supported.
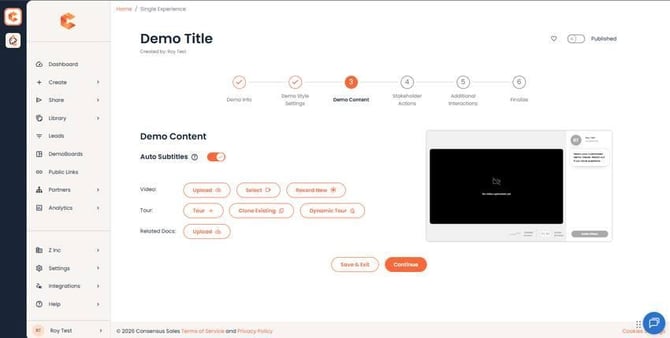
Step 3: Demo Content — main video, optional Tours, Related Docs.
Step 4: Stakeholder Actions
Choose where the Share Prompt appears in DemoBoards generated from this demo, and optionally enable BuyerBoard for this specific demo. The Share Prompt encourages viewers to invite other stakeholders.
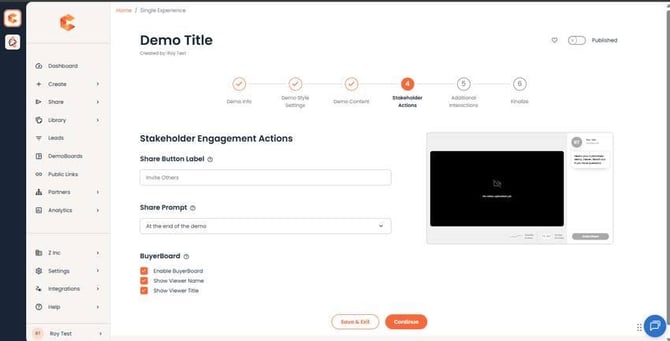
Step 4: Stakeholder Actions — Share Prompt placement and BuyerBoard toggle.
Step 5: Additional Interactions
Configure where the Lead Capture Form appears in Public Links and optional CTAs in the DemoPlayer. For Single Experiences we recommend placing the Lead Form at the end of the demo — viewers have already invested in the content.
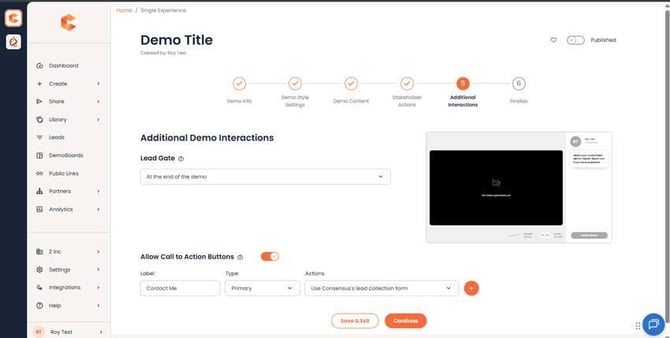
Step 5: Additional Interactions — Lead Form placement and CTA buttons.
You can add up to four CTAs in the DemoPlayer. The "Invite Others" CTA is added automatically on DemoBoards. CTAs linked to the Consensus Lead Capture Form do not appear on DemoBoards — they're only meaningful on Public Links.
Tip: The "Allow Call to Action Buttons" toggle controls whether CTAs appear in the DemoPlayer — toggling off hides all buttons regardless of style, while your configured buttons are preserved for later.
Step 6: Finalize
The Finalize step pulls together IDs, thumbnails, tags, and access.
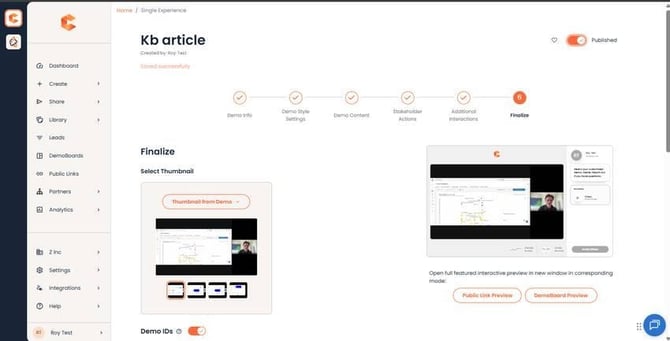
Step 6 (top) — Demo IDs and thumbnail picker.
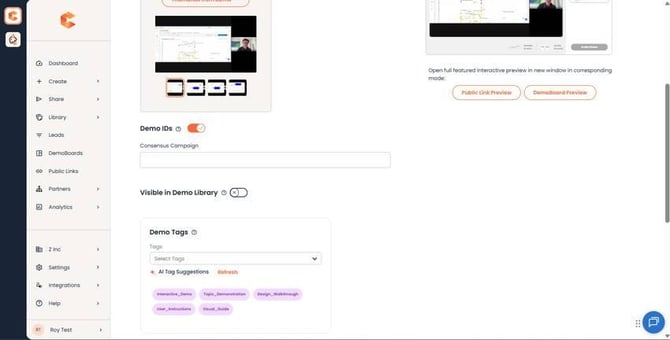
Step 6 (mid) — Tags and Folder.
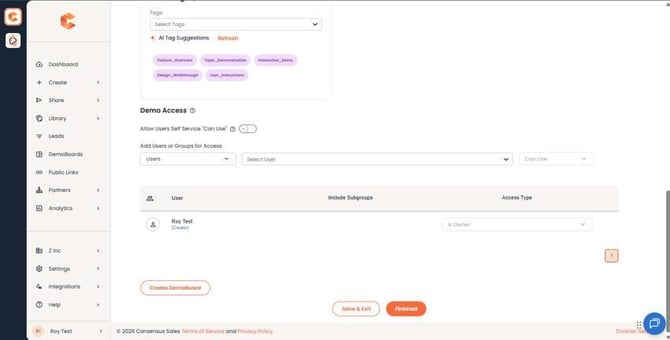
Step 6 (bottom) — Demo Access controls.
Demo Access
- Visible in Demo Library — when on, all Users can preview the demo and request access from the Library.
- Self-Service Can Use — automatically grant Can Use access when a User requests it from the Library.
- User / Group Access — explicit grants by User or Group with chosen access levels.
Publish your Demo
Until a demo is Published, no one can create DemoBoards or Public Links from it. Publishing also doubles as a kill switch — unpublishing the demo redirects existing viewers to a "Demo has expired" page.