Build your Group hierarchy in Consensus
Groups are how Consensus organizes users into teams — for managing demo access, scoping reports, and assigning Group Owners who can manage their own teams. Your Account is the top-level group; below that, you build any number of nested levels (typical levels: Divisions → Departments → Teams).
Plan before you build
Sketch your Group hierarchy in a spreadsheet before creating it in Consensus. Two principles to design around:
- Demo Access — every user in a Group has access to the Group's demos. Build Groups so every member legitimately needs the same Demo Access.
- Reporting — Demolytics can be filtered by Group. Build the hierarchy in a way that matches the report cuts you'll want (by region, by function, by team lead).
Open the Groups page
Settings (gear) → Manage Users & Access → Groups tab.
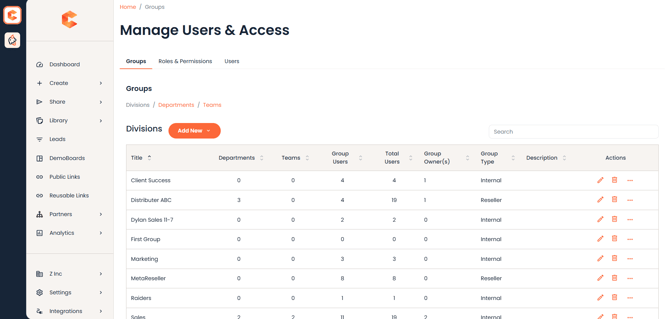 Groups tab — top-level Groups list with the Add New button.
Create your first Group
- Click Add New. The Create Group page opens.
- Configure these fields:
- Name — used in dropdowns, Demolytics, and User Management. Keep it short and unambiguous.
- Description (optional) — context for what the group is for.
- Group Member(s) — users whose activity rolls up to this Group in Demolytics.
- Demo Access — demos the Group has Can Use access to.
- Parent Group — where this Group sits in the hierarchy. Top-level Groups are Divisions.
- Click Save to create the Group.
Adding Subgroups
Open the Groups list, hover over the Group you want to add under, click the additional-actions icon (3-dots) in the Actions column, then choose Create Subgroup. The new Group is created with the parent already set.
Note: Groups with users or Subgroups attached can't be deleted. Move users and remove Subgroups first if you need to remove a Group.
Demo Access for Groups
You can grant Demo Access to a Group two ways:
- From the Groups page — edit a Group, click the Demo Access dropdown, pick demos to add.
- From the Demo Wizard (Step 6) — when finalizing a demo, grant access to a Group via the Demo Access dropdown. Use the Include Subgroups checkbox to extend access down the tree.
Adding users to a Group
Two paths:
- From the Group itself (Edit Group → Group Members dropdown).
- From the user's Edit User page (Manage Users → pencil icon → Groups & Access).
A user can only belong to one Group at a time. Users already in a Group show as disabled in the dropdown with their current Group in parentheses.
Group Owner permissions
Any user inside a Group can be designated Group Owner. They get three extra capabilities for their Group and Subgroups:
- Personal Demo Access — see and manage personal demos created by their Group members.
- Group Management — assign demos and other users as Group Owners.
- User Management — edit users (profile, password resets) inside their Group/Subgroups.
Filter Demolytics by Group
Once your hierarchy is in place, Demolytics gets dramatically more useful. In Sales Demolytics, click the Group dropdown, pick the Group(s) you want, and use Include Subgroups to roll up data from nested teams. Click Apply to filter.