Set up Okta SAML 2.0 SSO with Consensus
Connect Okta as your identity provider so users log into Consensus with their Okta credentials. This is the SAML-based authentication setup (separate from Okta SSO Provisioning, which auto-creates / updates user records).
In Okta
- In the Okta admin console, open Applications → Browse App Catalog and search for "Consensus." If a Consensus app exists in your tenant, add it. Otherwise create a generic SAML 2.0 application.
- In the new app's Sign On settings, choose SAML 2.0.
In Consensus
As a Consensus admin, open Settings → Integrations → SSO. If you don't see the SSO tab, contact your CSM to enable it.

SSO / Authentication settings — copy Entity ID and Single Sign On URL from here.
Exchange metadata
- Copy the Entity ID and Single Sign On URL from Consensus.
- In Okta, paste Entity ID as the Audience URI and Single Sign On URL as the Single Sign-on URL / ACS URL.
- Configure attribute statements per Consensus requirements (typically NameID = email).
- Save in Okta. Download or copy Okta's SAML metadata URL or X.509 certificate.
- Back in Consensus, paste Okta's metadata URL into the IDP Metadata URL field. Save.
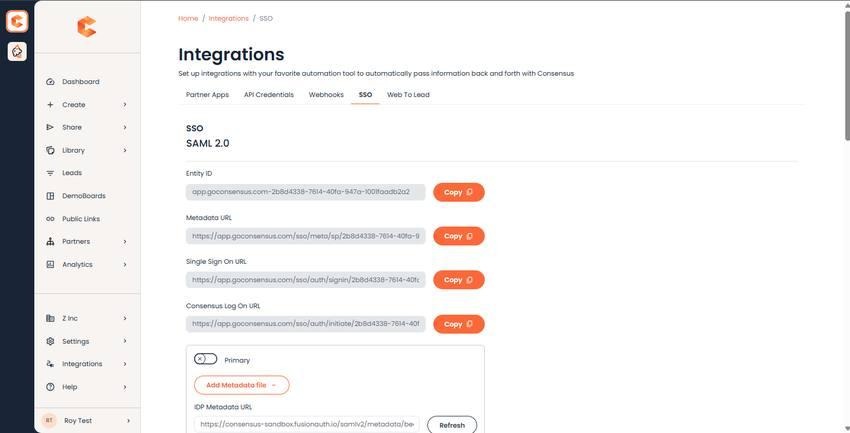
Consensus SSO settings — Okta configuration form.
Final step in Okta
Assign users or groups to the Consensus application in Okta. Without assignment they'll hit "App not assigned" on sign-in.
Optional: pair with Okta SSO Provisioning
For automatic user creation, deactivation, group, and role sync, also set up Okta SSO Provisioning. See "How to Set up SSO Provisioning for Okta" for the companion guide.