Overview:
This document goes through the process of customers who will be upgrading from a current managed package (version 10.9 or older) to the new Consensus version 11 plugin.
Configurations you can re-use with version 11:
- The API Keys
- The Connected App and Site
- The IDP Login URL
- Site URL
Pre-Upgrade:
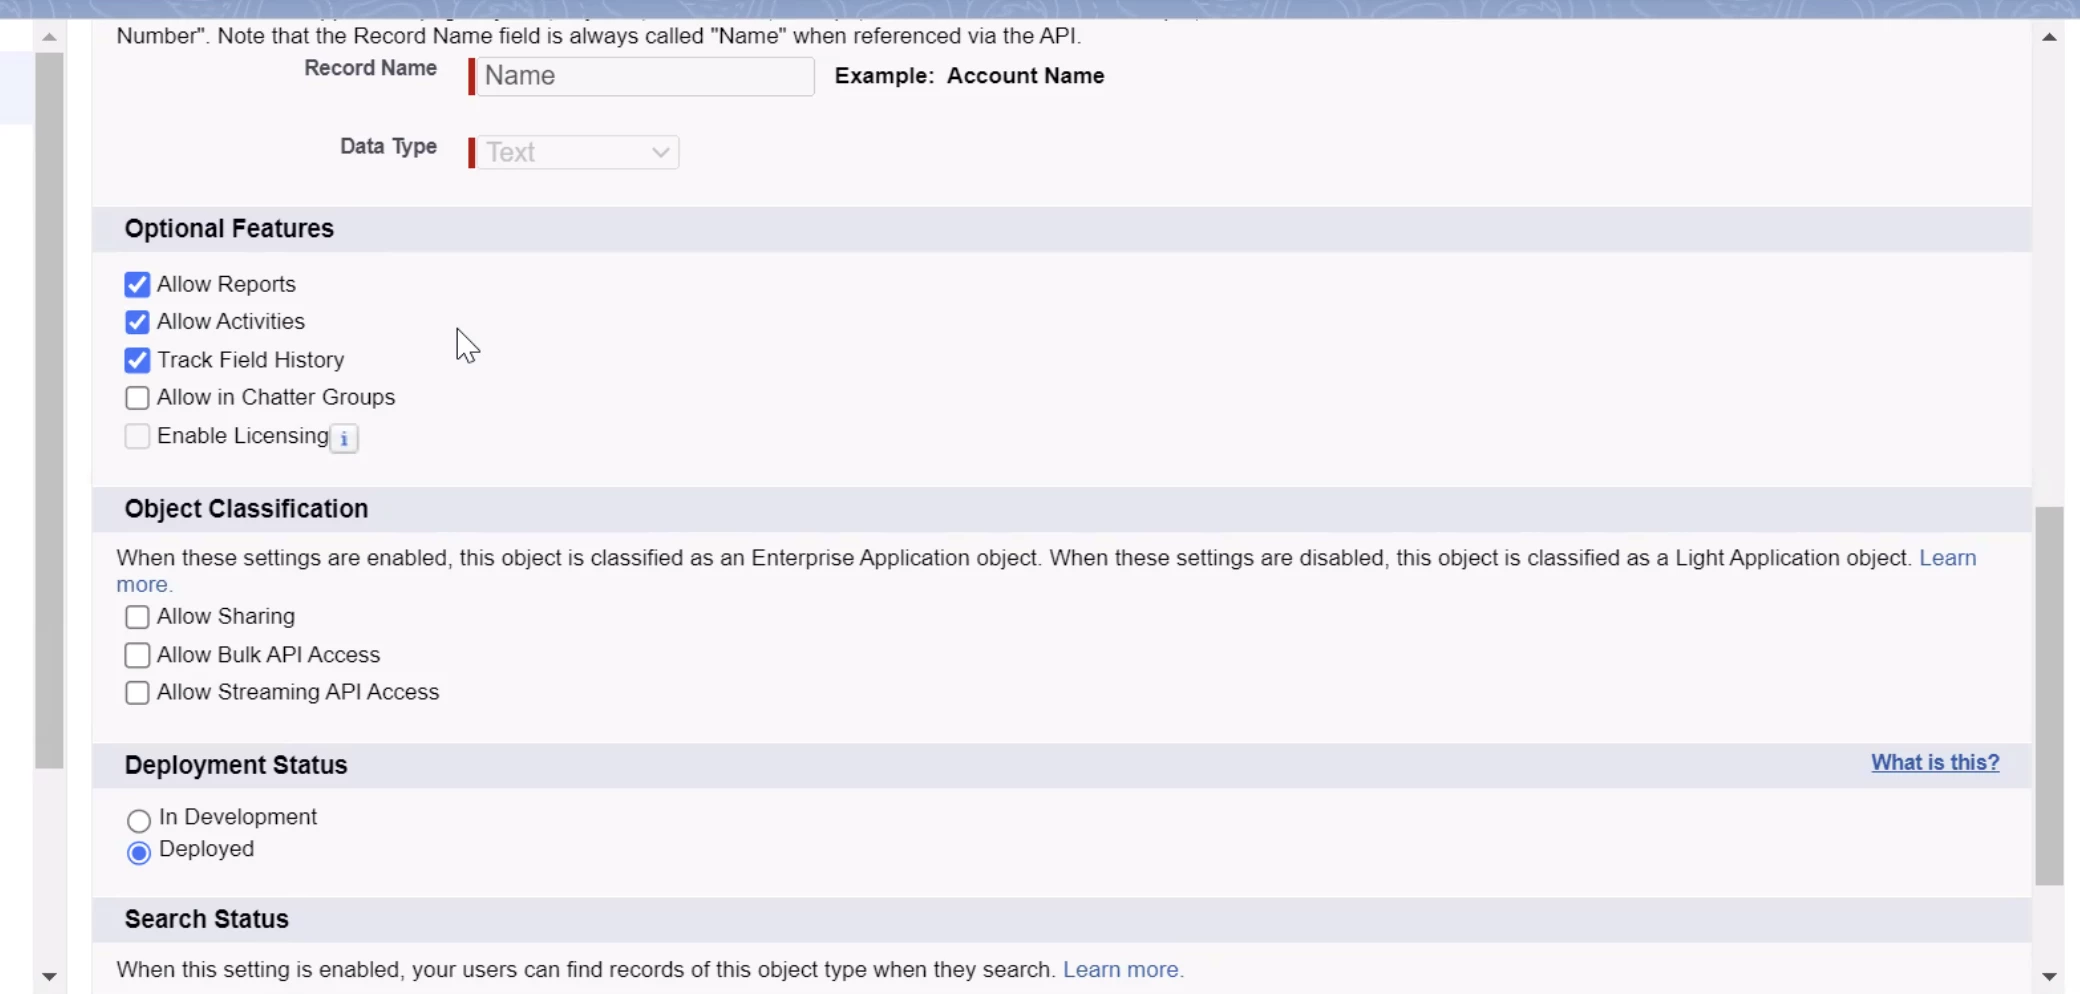
Please make sure that before you upgrade, you access the "cDemo" object in your current package, and make sure that the"Track Field History" option is enabled.
 Pre-Upgrade
Upgrade Process:
Here is a higher level outline of the steps required for completing additional config and Layout updates post-V11 upgrade.
Configuration Page:
- Confirm the Configuration page is still populated (or reconnected to existing or new API Keys). On our testing, this information remained populated.
- Confirm everything still looks good on the User Info table post-upgrade.
- After the below steps, you will need to kick off permission and data updates manually again to bring in data once more to the environment. Manually starting the Data Update again, will also start the new schedule job called “RecentDemoBoards” that we’ve introduced in this managed package, which is meant to be a more frequent, “lighter” request to Consensus for updated data from that day’s activity that needs to be synced to SFDC.
Included in the sections below:
- Permission Sets
- Site Settings
- Apex Classes
- Layouts
- CRM Sync and SSO Auth
Permission Sets
In version 11, Instead of providing a Consensus User Profile, we are now including a 'Consensus Users' Permission Set to assign proper access to our objects and fields.
- Each user can only have one profile in Salesforce. Thus, system administrators previously needed to clone our profile and copy over all of our settings to whichever profiles they wanted to have access to the app.
- Permission sets, however, are special sets of permissions and one user can have as many permission sets added to them as necessary. So now, with the use of a permission set, the system administrator can simply assign that permission set on top of whatever user or profile they want, simplifying the setup process.
To make sure your Consensus Users are assigned access to the correct objects and classes, please follow the steps below.
End User Permission Set
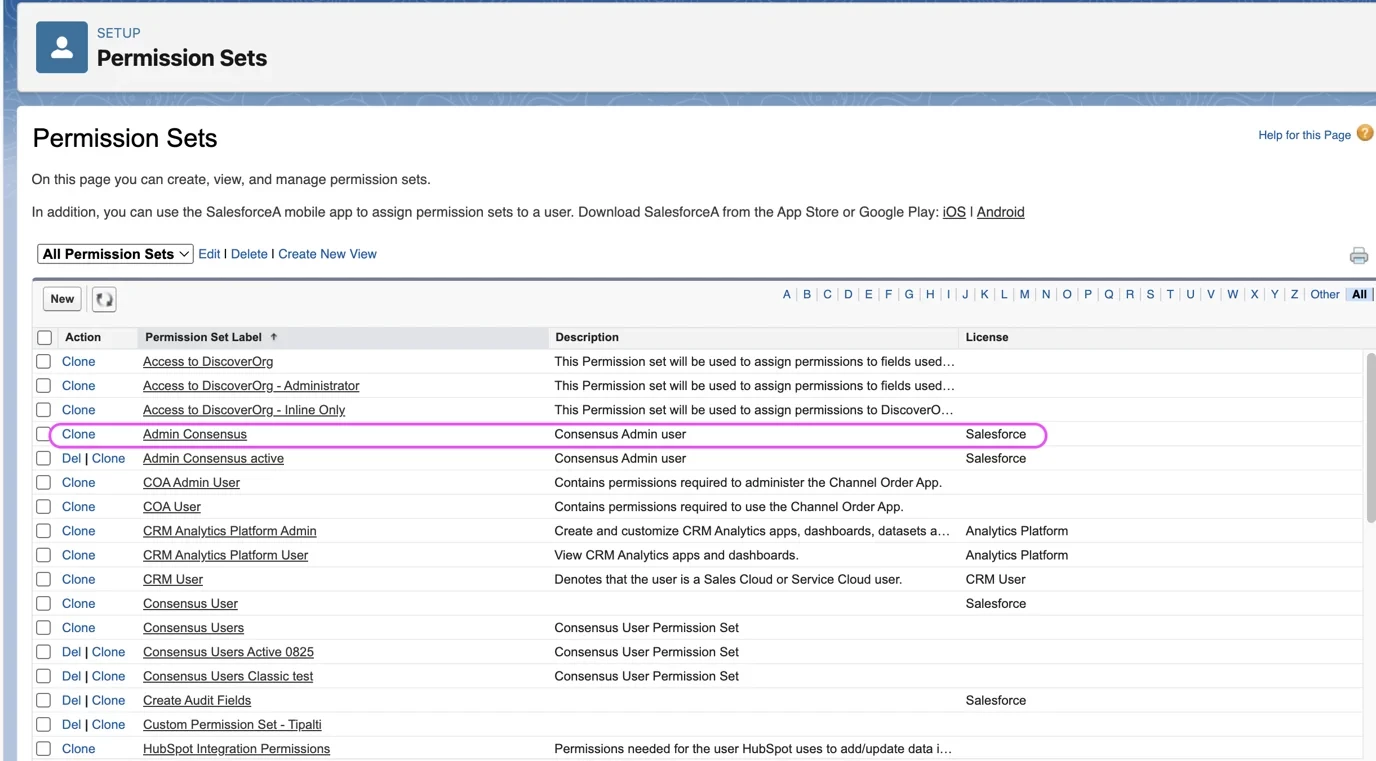
Step 1: Find the "Consensus Users" permission set
*IMPORTANT: Please choose Consensus "Users" (plural). There are 2 options here, which can be confusing. This Permission Set is used for standard end users, not Admins.
 Permission Sets > Consensus Users
Step 2: Assign the "Consensus Users" permission set to the necessary end users.
Admin Permission Set (for Admin access to the Consensus app in SFDC)
Step 1: Find the "Admin Consensus" Permission Set
 Permission Sets > Admin Consensus
Step 2: Assign the "Admin Consensus" permission set to the necessary Admin users
Site Object Settings
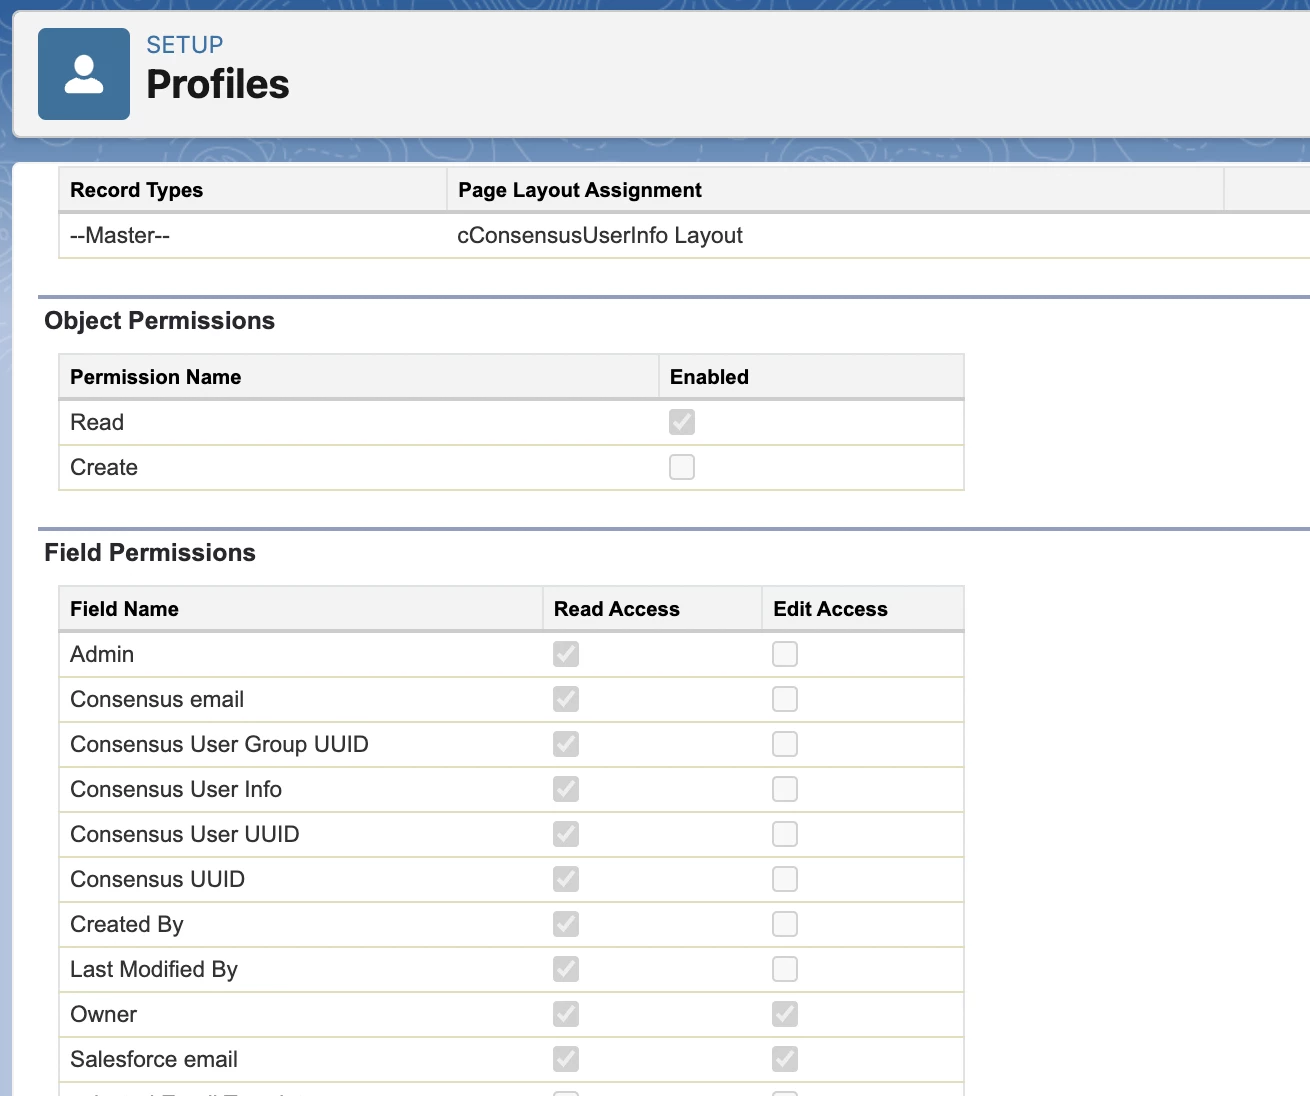
If you haven’t checked on the Site object settings as well, we’d recommend reviewing the Site’s access to the Consensus User Info fields. Please got to Sites > Public Access Settings > Object Settings, and then edit the Consensus User Info object settings to ensure the site has read access for all fields in that custom object.
This is important for CRM Sync, and other features that rely on logically referencing this object and it’s fields for proper routing.
 Assign the "Admin Consensus" permission set to the necessary Admin users
Apex Classes
You may need to re-add the correct Apex Classes to the public site settings.
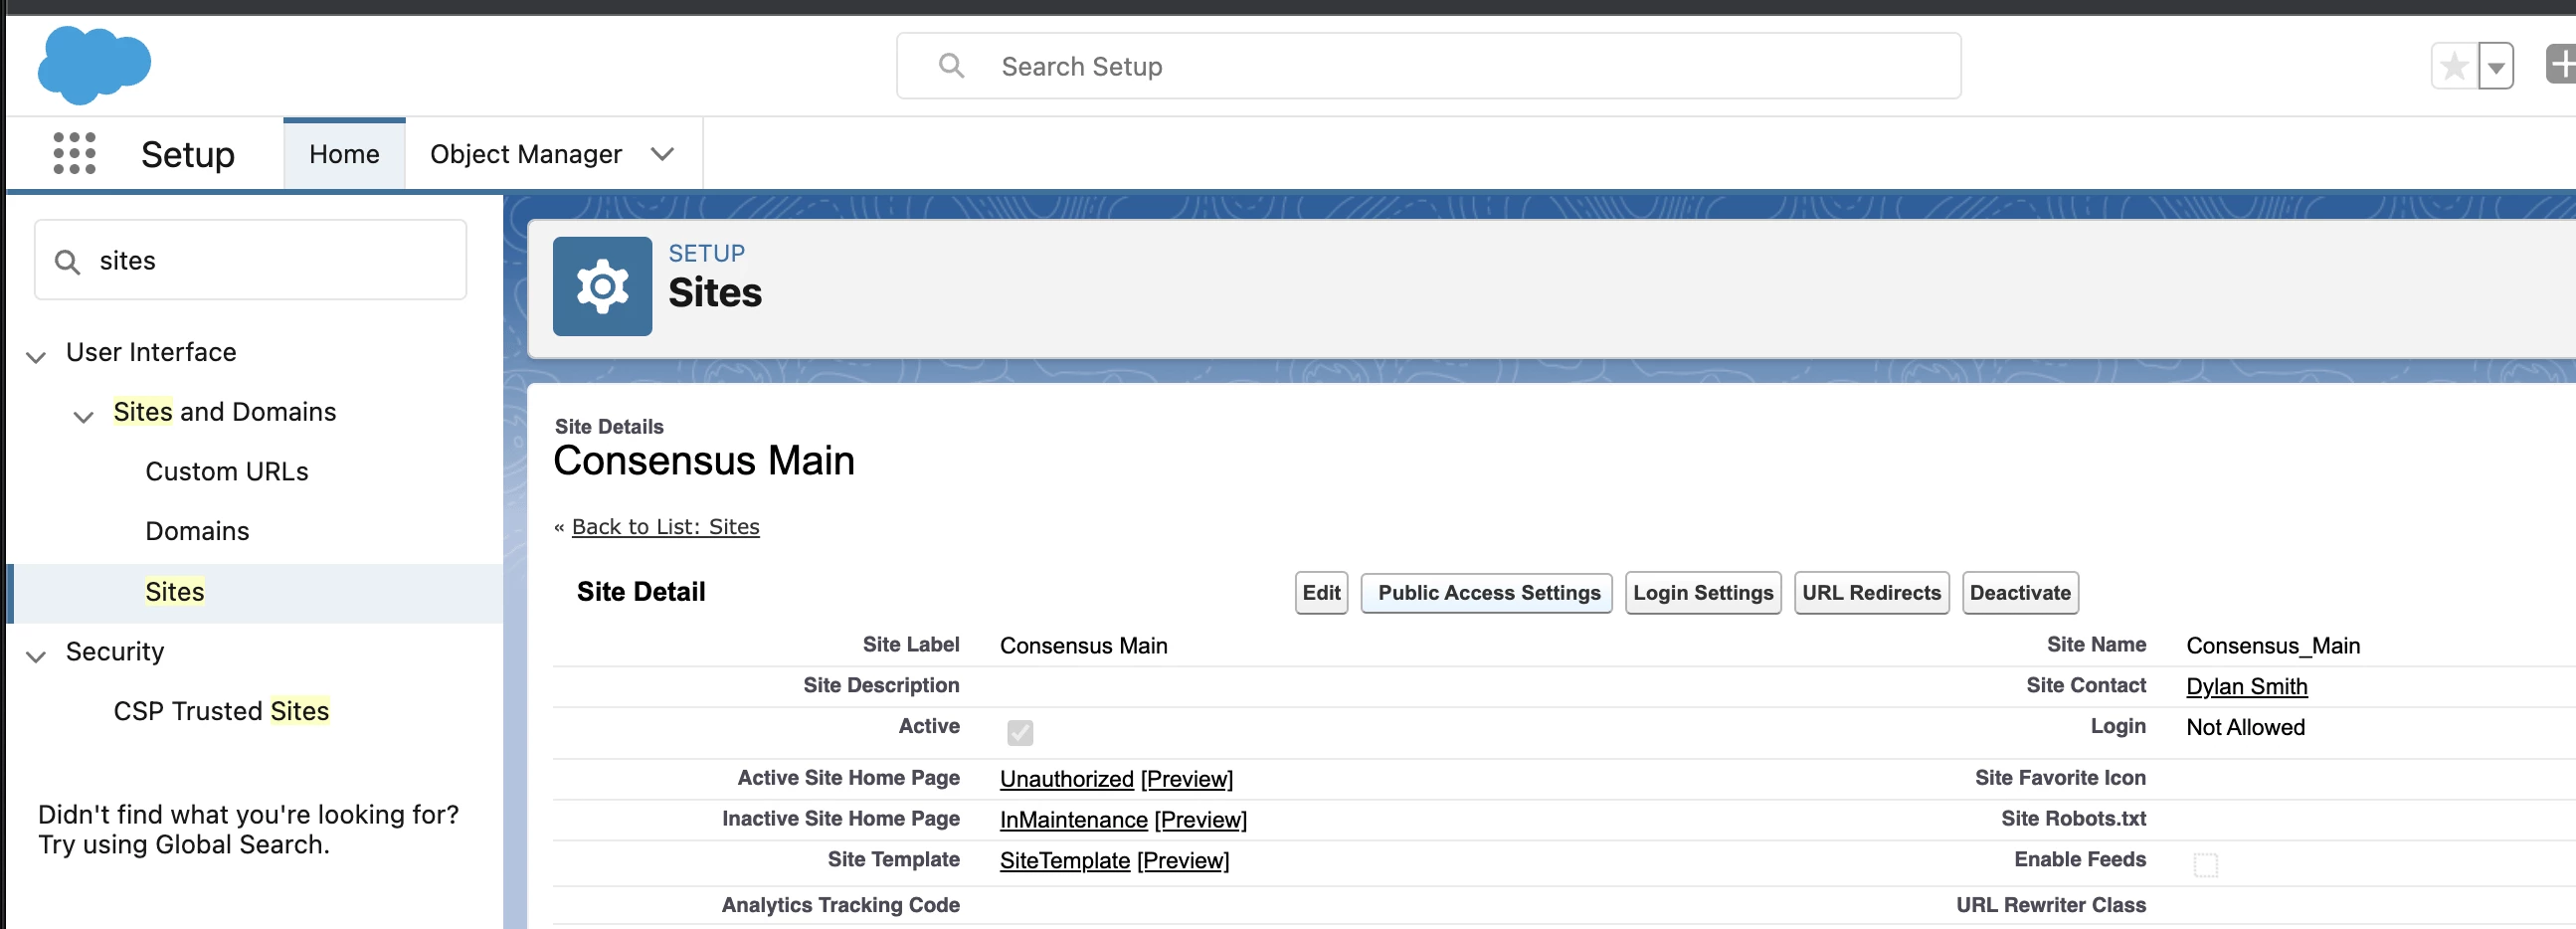
- Step 1: Go to “Setup” > search for “Sites” and select the Consensus site that you created for the previous version of our SFDC application.
 Apex Classes
- Step 2: Select “Public Access Settings” > The choose the option for “Apex Class Access”. Then “Edit” the selected apex classes.
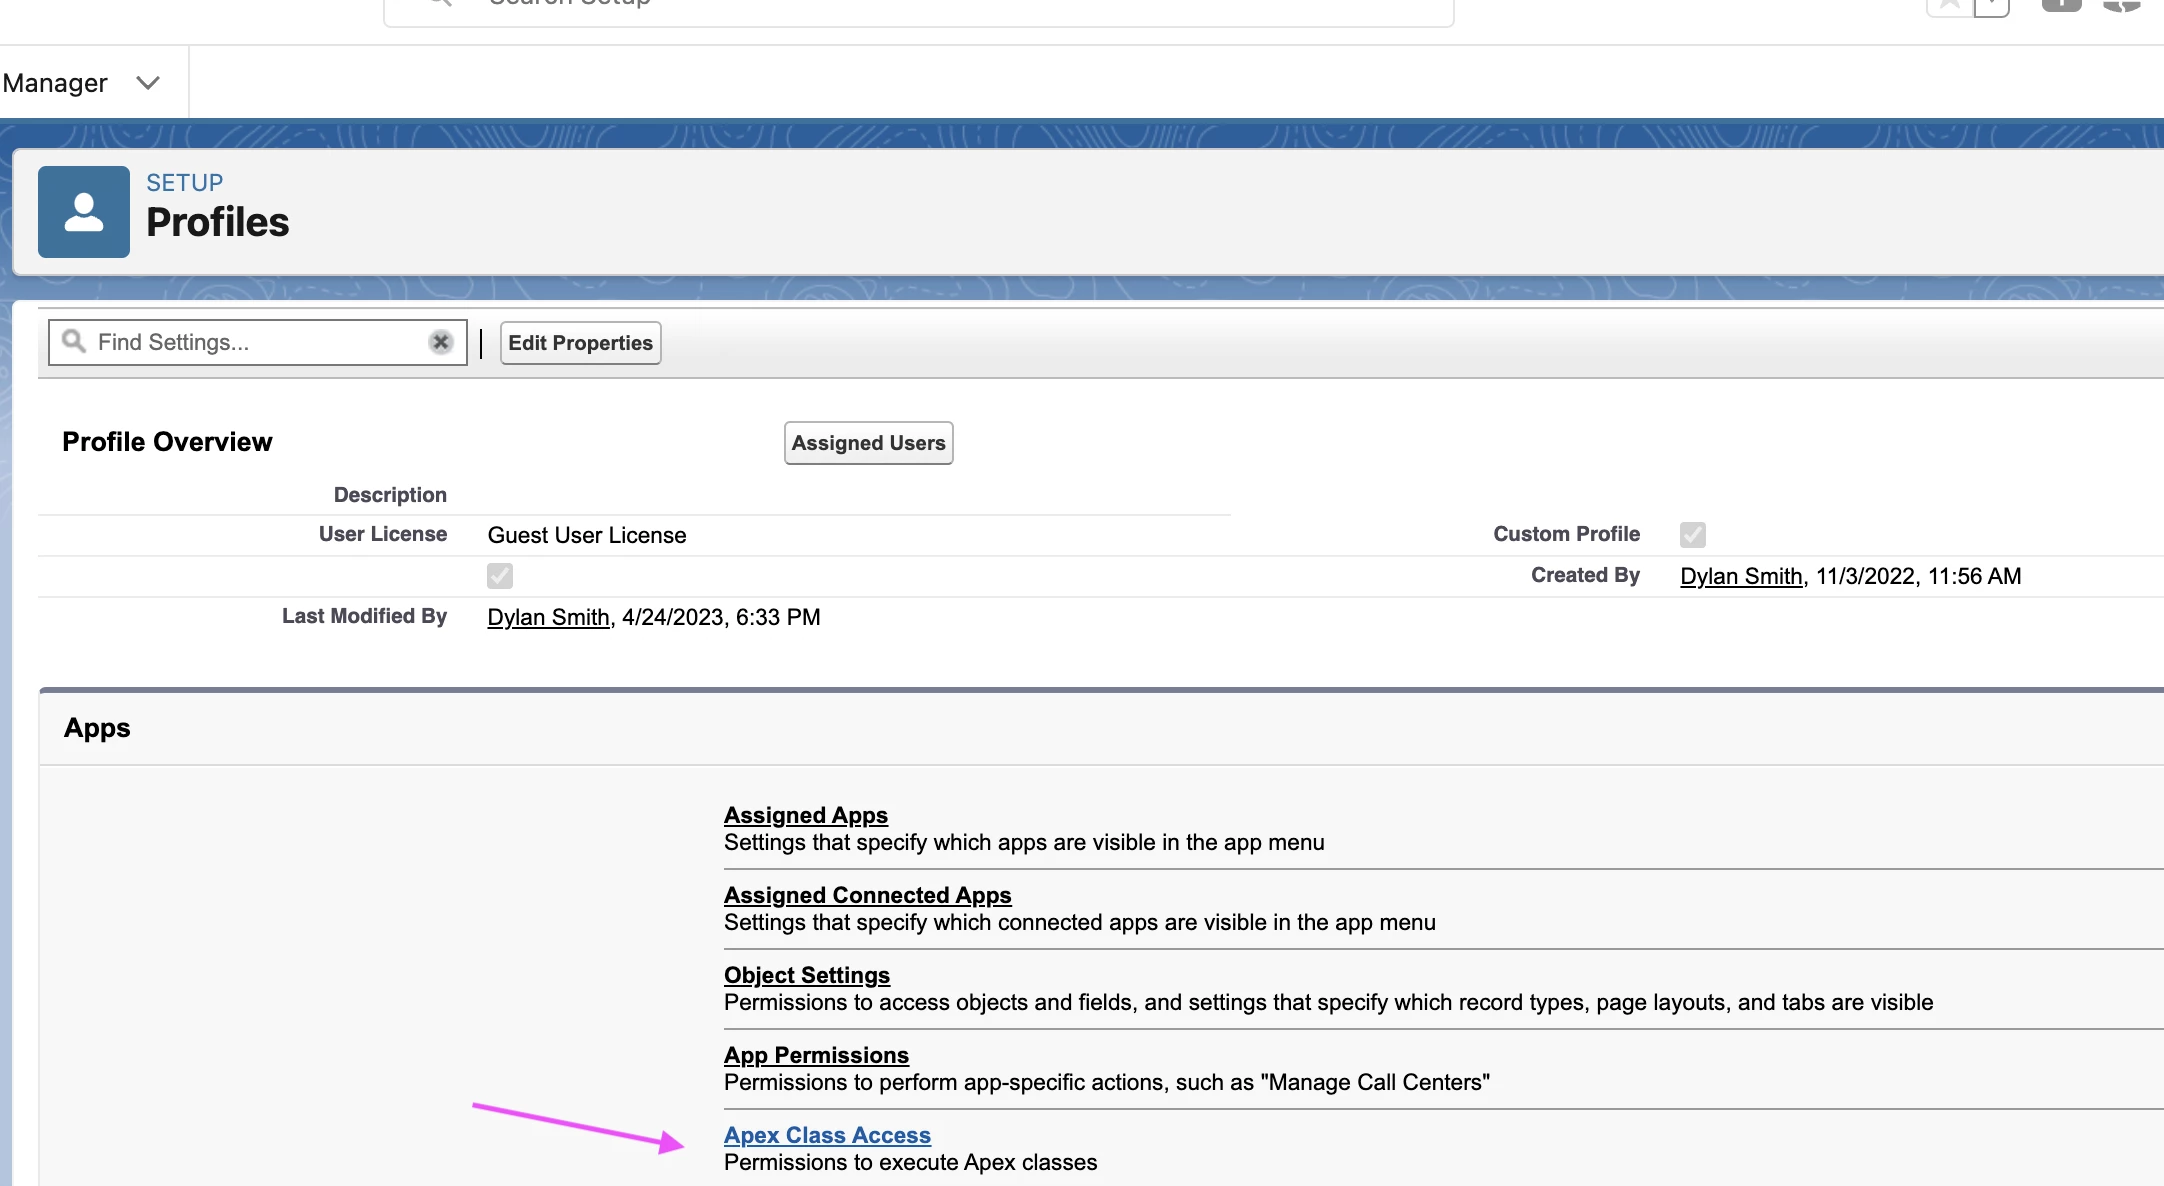 Apex Class Access
- Step 3: Check that the correct Apex Classes are added or re-add them if necessary. Make sure to Save your changes
- DemoManager
- IntegrationManager
- IntegrationManager1
- IntegrationManager2
- SsoManager
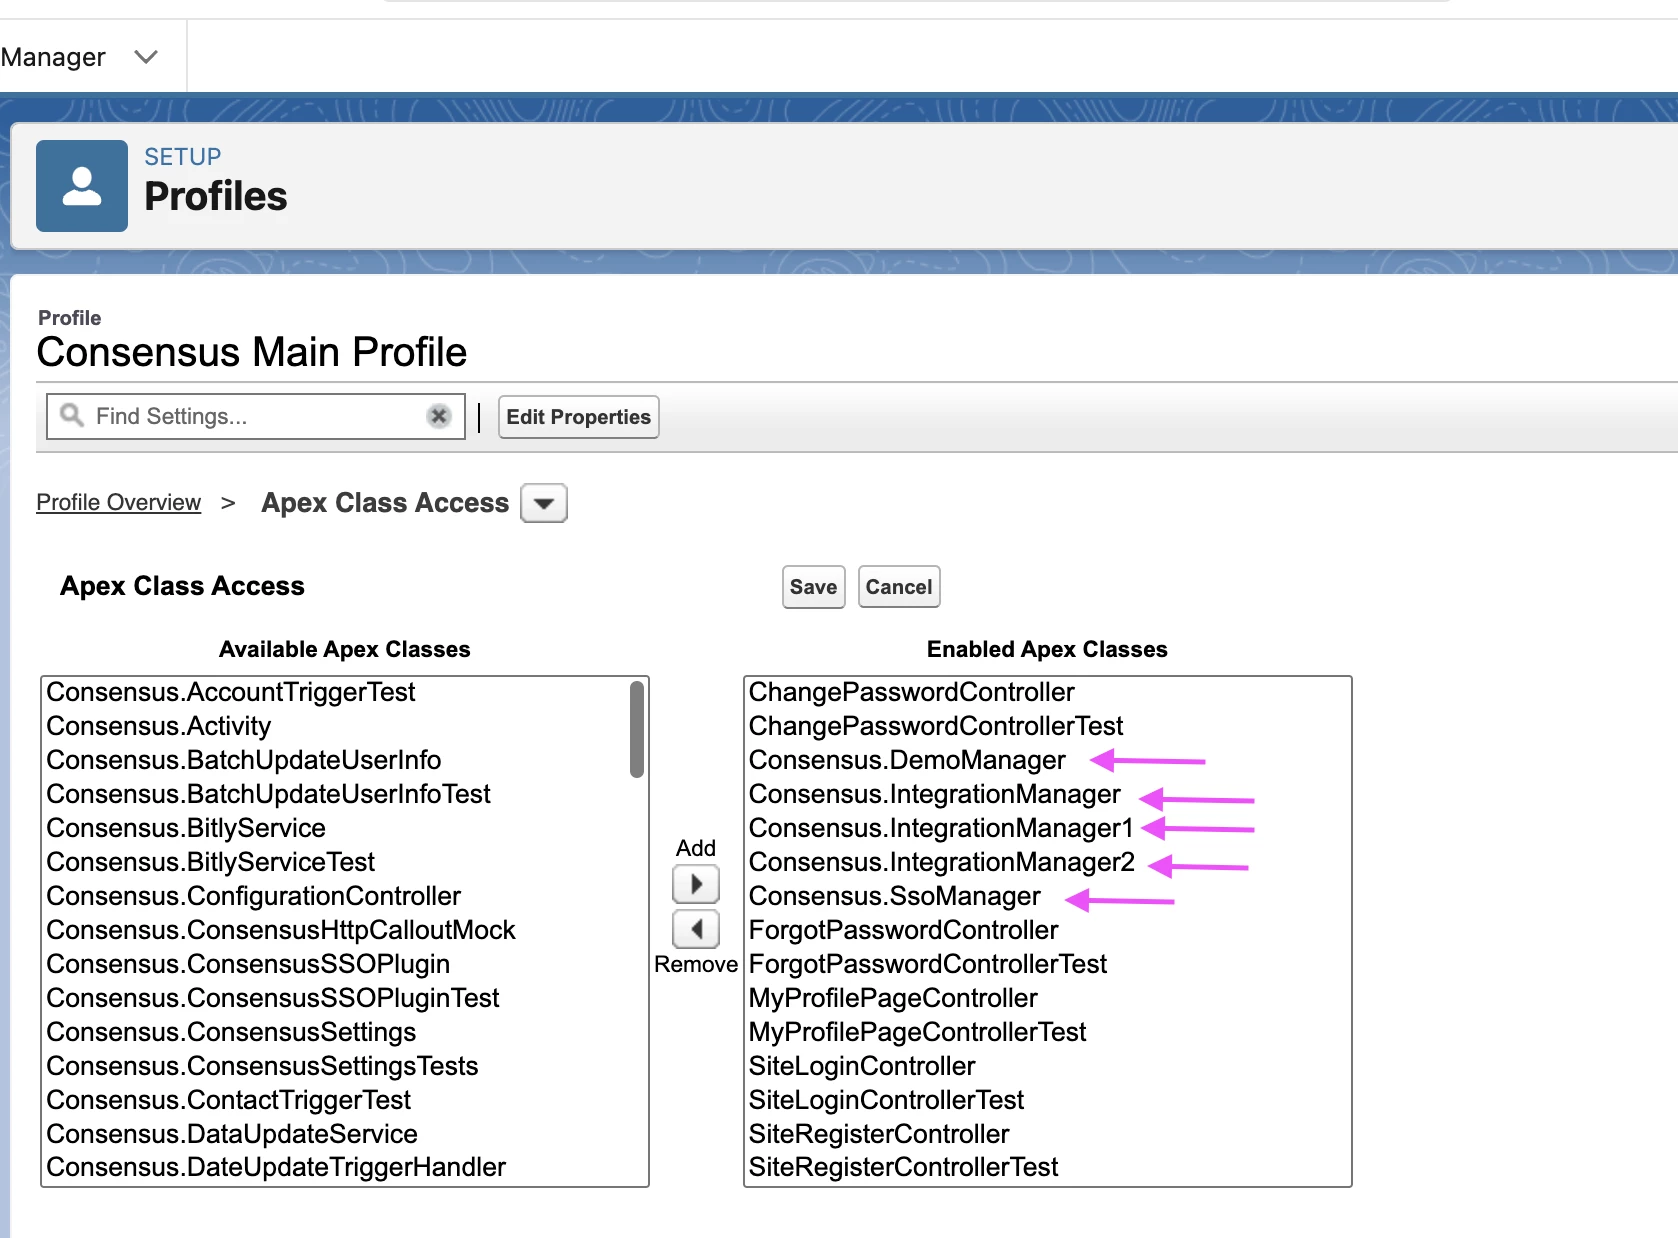 Demo Manager, Integration Manager, Integration Manager1, Integration Manager2,SSO Manager
Layouts:
- It is recommended to update the standard object Page Layouts to make sure our DemoBoard and Invitation objects are added to each as a related list. This will most likely entail you remove the previous VisualForce Page leftover from V10 as well.
- You will be able to add the DemoBoard related list to Accounts and Opportunities, and the Invitations related list to Opportunities, Contacts, and Leads (or wherever you want this data available in layout views).
Here's an example from the Opportunity Object, along with the fields that would be good to add to the related list view as columns.
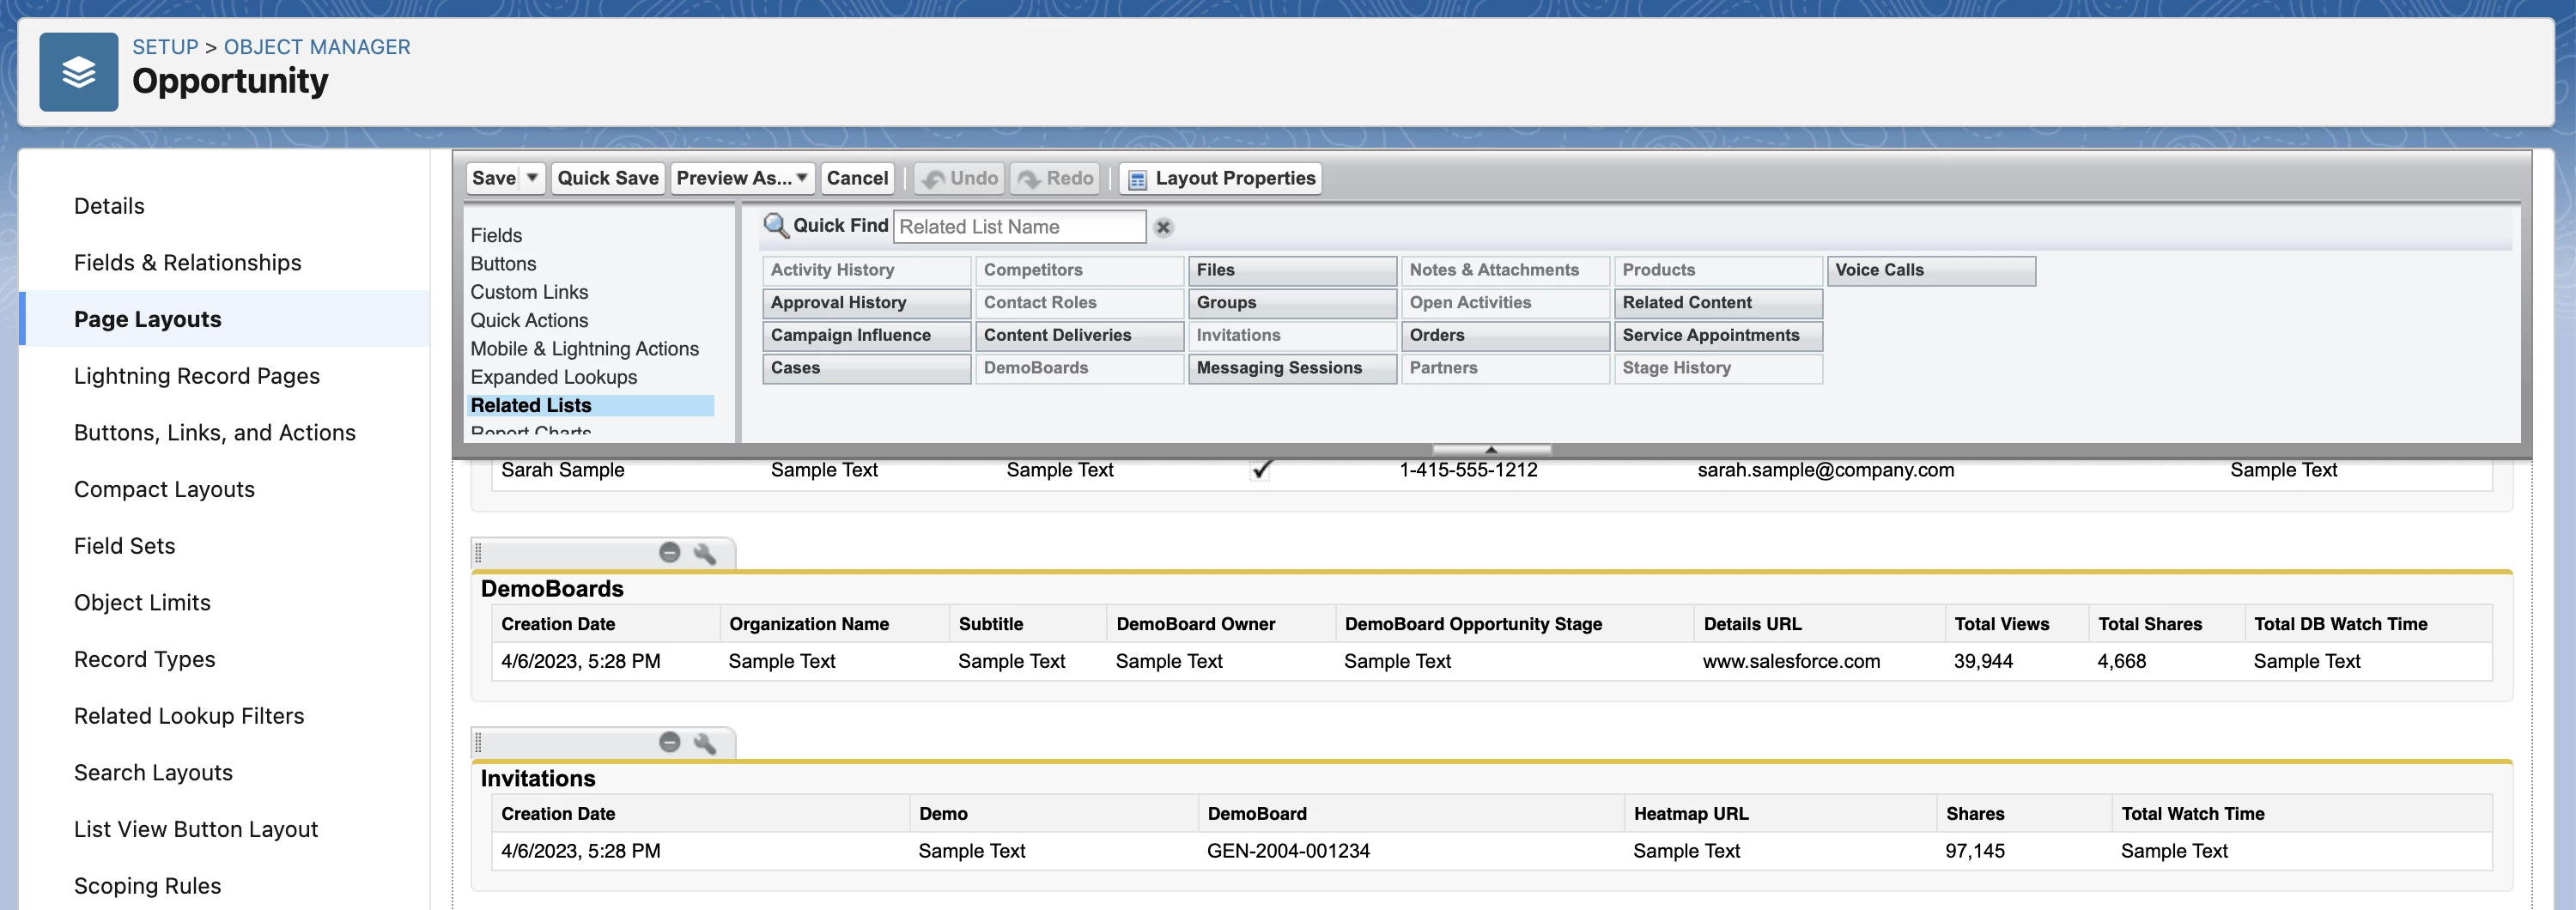 sample from the Opportunity Object
Recommended Columns/Fields for the DemoBoard related list:
- Creation Date (the date stamp Consensus recorded the demoboard being created in our system)
- Organization Name (Org/Account name recorded from Consensus)
- Subtitle
- Demo
- Total Invitations
- Total Views
- Total Shares
- Total DB Watch Time (total watch time of from all recorded activity on the DemoBoard)
- Details URL (The Consensus URL where you can see more details about all stakeholders and their respective analytics)
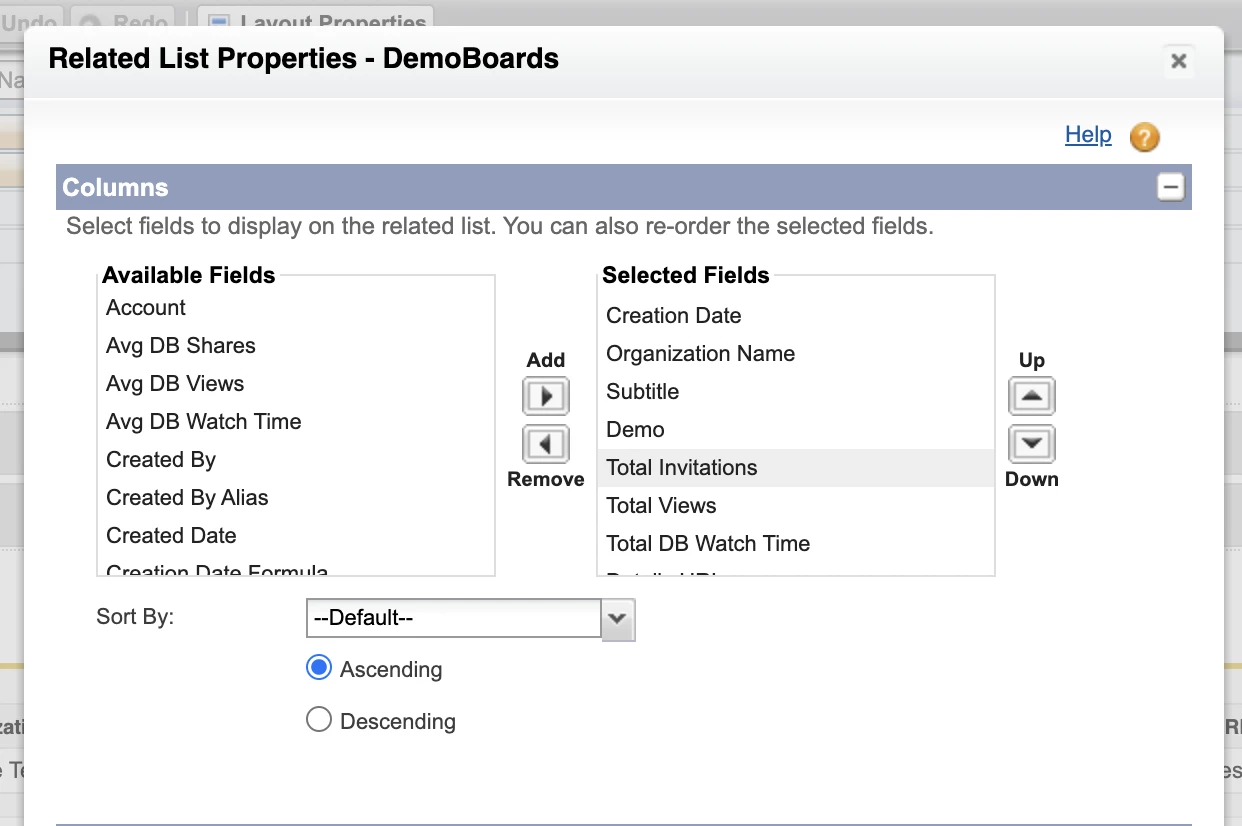 Related List Properties
Recommended Columns/Fields for the Invitation related list:
- Creation Date (the date stamp Consensus recorded the invitation being created in our system)
- Demo
- Heatmap URL (link to view heatmap recorded for the stakeholder’s activity on the DemoBoard)
- Invite Opportunity Stage
- Total Watch Time
- Views
- Shares
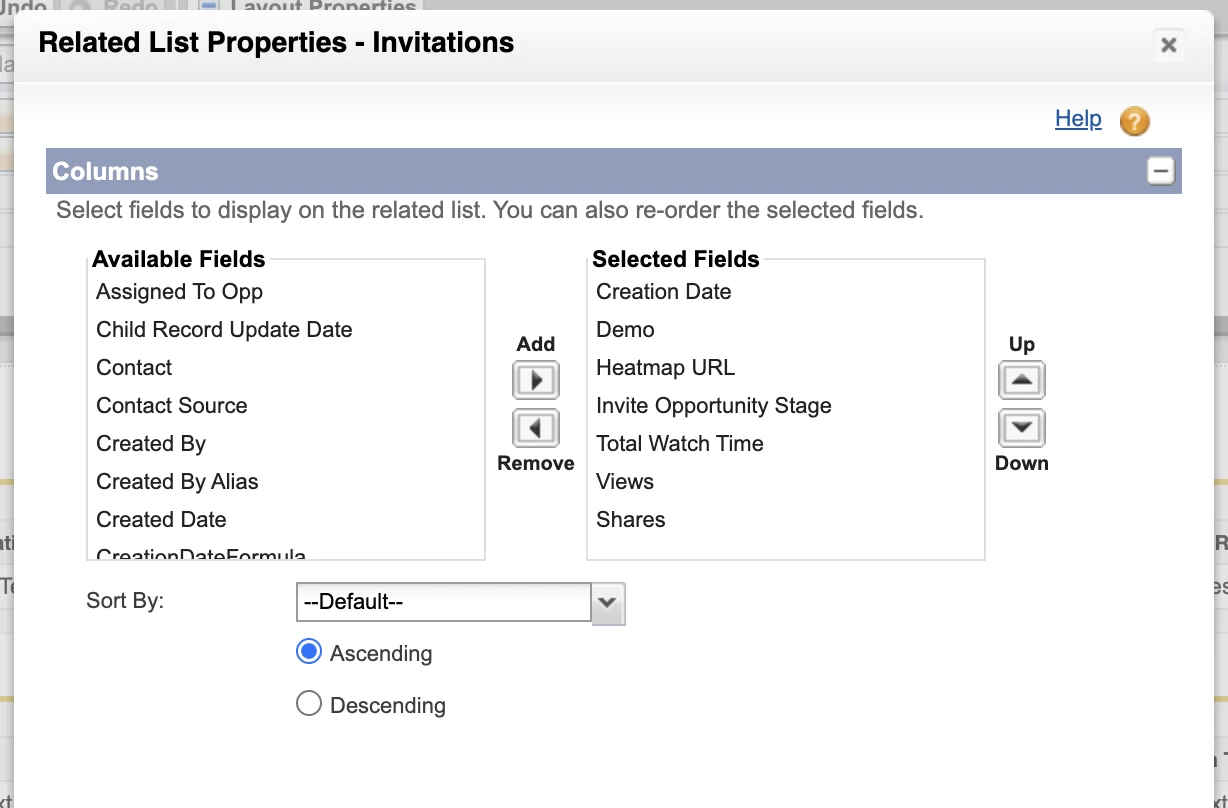 Related List Properties - Invitations
2. Update Layout Page (Pictured below is Lightning page builder):
 Update Layout Page
Tab Recommendations:
- Create a new custom tab called “Consensus”
- Add our new customer managed component called “cCreateDemoBoard” as element within the tab
- Add 2 related lists elements (single) to the tab, for DemoBoards and Invitations.
CRM Sync
If you “Test” the CRM sync connection from Consensus and notice it’s not working, you may need to regenerate new keys to reset the CRM Sync bridge that allows Consensus to have access to a list of Accounts and Opportunities during (external) DemoBoard creation in our web app or other plugins.
- Generate new keys from Configuration page in Consensus SFDC app
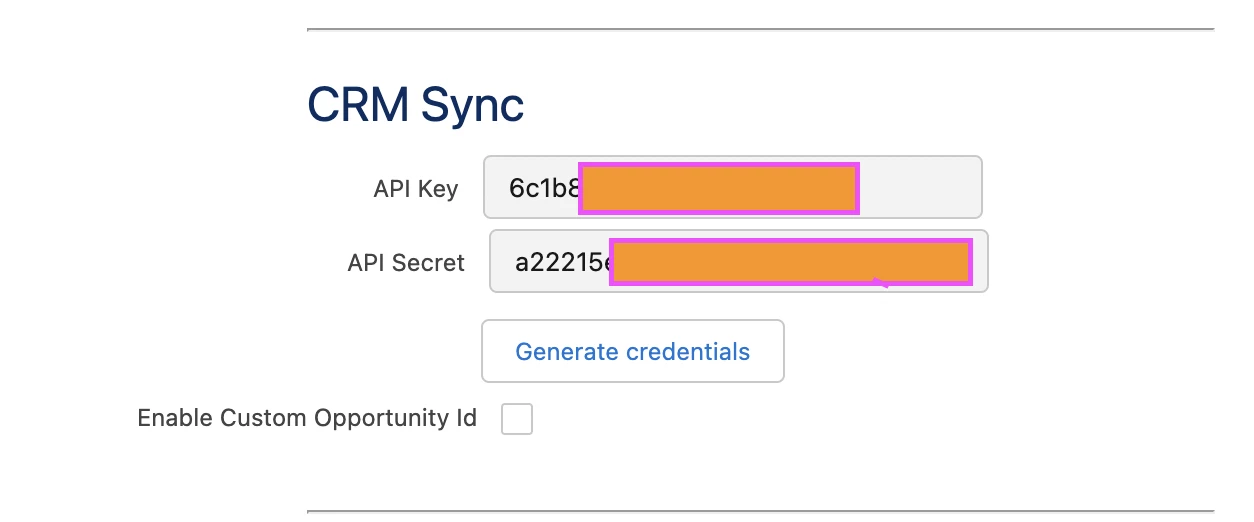 CRM Sync
- Add the new keys to the CRM Sync page in Consensus, and select the “Test” button to make sure you get a green “Success” message.
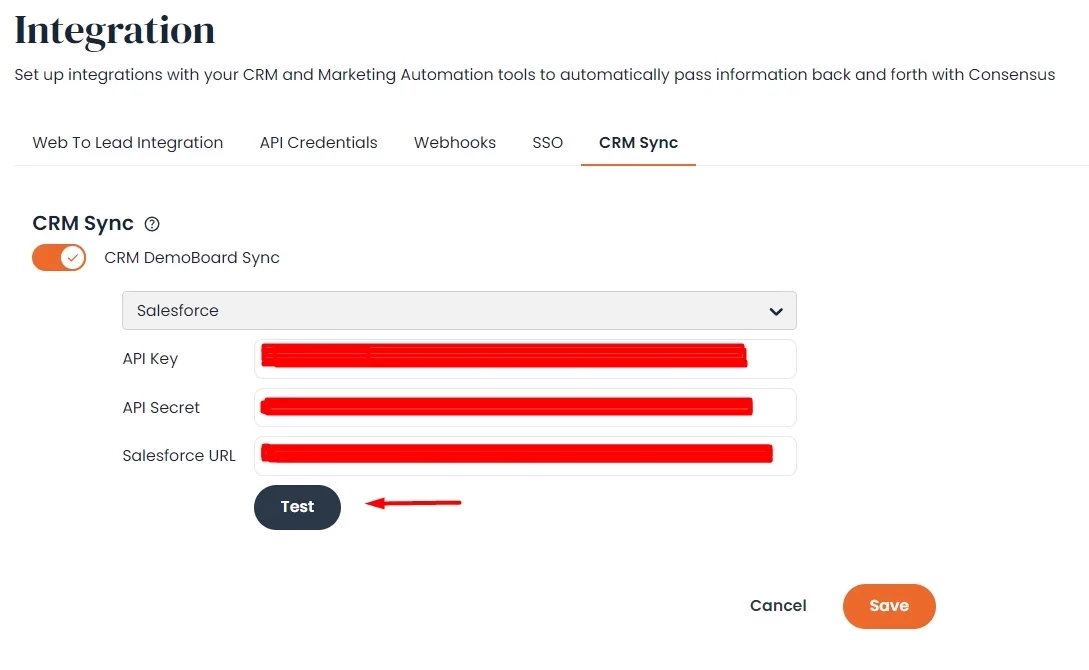 Test > Save
SSO Authentication
You may need to re-download the metafile and reset SSO with Consensus (only if logging into the Demo Invite via SSO is not working).