
Salesforce is a powerful tool that allows you and your teams to manage prospects and opportunities. The Consensus Salesforce Professional integration lets you bring Demo View data collected from Consensus directly into your Salesforce account — so you can see Demo views right within Salesforce and include that data in your reporting.
In this article, we'll cover:
- What the Consensus Salesforce Professional App can do
- Installing the Consensus Salesforce Professional App
- Configuring the Consensus Salesforce Professional App
- Permission Sets and Permission Set Groups
- Managing Consensus User Info
- Adding the Consensus Component to Page Layouts
- Creating a DemoBoard
- Uninstallation
What the Consensus Salesforce Professional App can do
Depending on your configuration options, the app:
- Send Consensus engagement data into Activity Records/Tasks on the Salesforce Lead or Contact record
- Activities are matched based on the email address associated with a Lead or Contact.
- Tracks DemoBoard Invite events and Demo Watched events.
- The aggregate of these activities also rolls up to the parent Account.wg
- If enabled, creates new Lead records for historical leads or demo recipients inside Consensus.
- Loads analytics data into custom objects so you can build custom reports and dashboards based on Consensus engagement activity. Custom objects include:
- Demos — all Consensus Demos
- DemoBoards — all Consensus DemoBoards
- Invitations — all invitations/recipients added to DemoBoards
- Views — all individual views by DemoBoard recipients
- Features — feature rankings selected during a Standard personalized demo view
- Demo Association — a junction object between Demo and DemoBoard, used to support Consensus Playlists
- Allows users to create and send custom DemoBoard links from within Salesforce to Leads or Contacts.
- Shows up-to-date Consensus engagement analytics for Leads, Contacts, and Opportunities.
- Associates DemoBoards with Accounts and Opportunities.
- Generate Consensus data report in Salesforce that can be used for calculating ROI
- And more!
Installation
To install the Consensus Salesforce Professional App:
- Log in to Salesforce as a System Administrator.
- Download the Consensus App from the Salesforce AppExchange here.
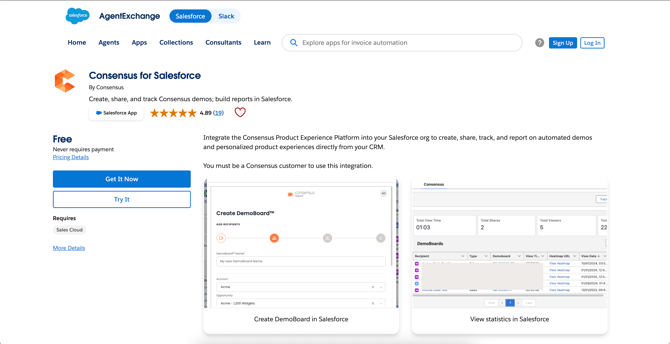
- Choose your install environment, the app displays options to install in Production or Sandbox during this step.
- We recommend installing the app for All Users.
Configuration
Configure a Domain Name
If you already have a domain name configured for your Salesforce instance, you can skip this step.
- Click the Gear icon (Setup).
- Type "domain" into the Quick Find box in the top-left corner of any page.
- Select My Domain.
- Enter a domain name (must be unique across all Salesforce instances), click Check Availability, then click Register Domain once confirmed available.
When installation is complete, switch to the Consensus application.
Accessing the Configuration Page
In Classic mode:
- Click the 9-dots menu icon.
- Find and click the Consensus application tab.
- Open the Configuration tab.
You'll need the Consensus Admin Group permission set group (included in the managed package) assigned to yourself to access the Configuration page and start data import. See Permission Sets below.
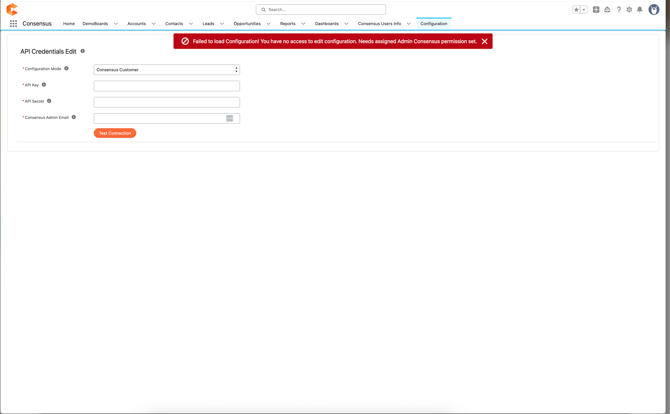
Configuration Page
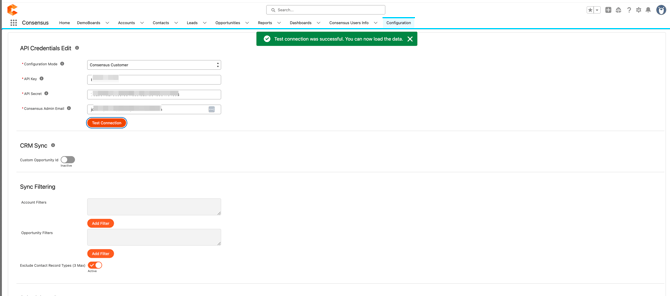
- Select the Configuration Mode. Choose Consensus Customer unless you are an internal Consensus employee.
- Add your Consensus API key and secret. You can find these values in Consensus under Integration > API Credentials.
- Enter your admin email address (this can be you as the SFDC admin, or a dedicated integration user). This email must also belong to a Consensus Admin user.
- Click Test to verify the API connection. Consensus displays a success message once it's communicating with the API properly.
Data Sync Settings (updated in v11.12)
The Configuration page now separates sync timing into two distinct settings, plus two additional controls:
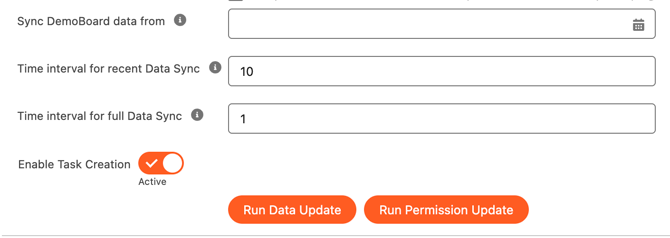
| Setting | Description | Min | Max | Default |
|---|---|---|---|---|
| Time interval for recent Data Sync | How often the near-real-time sync batches (RecentDemosUpdateBatch, RecentDemoBoards) run |
10 min | 240 min | 10 min |
| Time interval for full Data Sync | How often the full daily sync batches run | 1 day | 7 days | 1 day (once/day) |
| Sync DemoBoard data from | Optional date picker. If blank, all data syncs during the daily sync. If a date is set, only DemoBoard data created after that date is synced. Useful for orgs with a large volume of historical Consensus data. | — | — | Blank |
| Enable Task Creation | Toggle. When on, Activity Task records are created in Salesforce for Consensus engagement. When off, no Tasks are created. | — | — | On |
Note: The recent-sync scheduled job (
RecentDemosUpdateBatch) will only begin running on its configured interval after a successful full sync has been completed at least once via the Run Data Update button below.
Schedulers
Select which of the following schedulers to enable, then click Run Data Update. You must run this manually at least once to begin the scheduled Apex jobs — otherwise data will not flow into Salesforce.
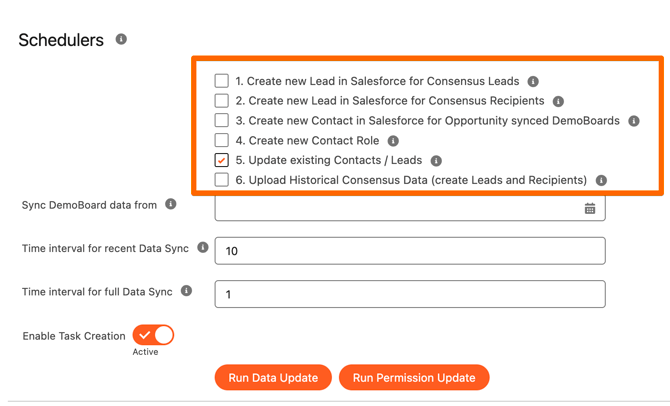
- Scheduler# 1— creates new Leads for any Public Link Qualified Lead from Consensus.
- Scheduler# 2 — creates new Leads for DemoBoard recipients that don't yet exist in Salesforce.
- Scheduler# 3 — Creates new Contacts for Opportunity synced DemoBoards (the Contact will only be created if an Opp was synced to the DemoBoard initially).
- Scheduler# 4 — adds a "Demoboard_Recipient" Contact Role to the Opportunity when a new Contact is created via Scheduler 3.
- Scheduler# 5 — updates existing Contact/Lead DemoBoard analytics by matching on email address only (does not create new records). This is the most commonly used scheduler and the minimum required to get data flowing from Consensus into Salesforce.
- Scheduler# ^ (create Leads and Recipients) — uploads historical Consensus data by creating new Leads for DemoBoard recipients and Consensus Qualified Leads.

Run Data Update runs the schedulers you've selected, in this order:
- Fetch demos in batches of 500 and save/update them in Salesforce.
- Fetch DemoBoard recipients in batches of 100 and save/update them in Salesforce.
- Fetch leads in batches of 150 and save/update them in Salesforce.
Existing records are only updated if there's a change, they are never recreated.
Run Permission Update runs a separate scheduler that keeps user permissions on the Consensus Users Info tab current. It runs automatically once every 24 hours and does not affect data synchronization.
Advanced Options
Salesforce triggers on Account, Contact, Opportunity, Lead, DemoBoard, Invitation, Feature, View, Error Log, and Batch Error can be individually disabled from Configuration > Advanced Options, either org-wide or scoped to a list of up to 5 specific user IDs.
⚠️ Changing these options may impact the Consensus data synchronization process. Don't disable triggers without first consulting Consensus — the Account, Contact, Opportunity, and Lead triggers are currently deprecated and safe to leave disabled with no effect, but disabling other triggers (e.g., DemoBoard, Invitation) can cause data to fall out of sync between Consensus and Salesforce.
Permission Set Groups
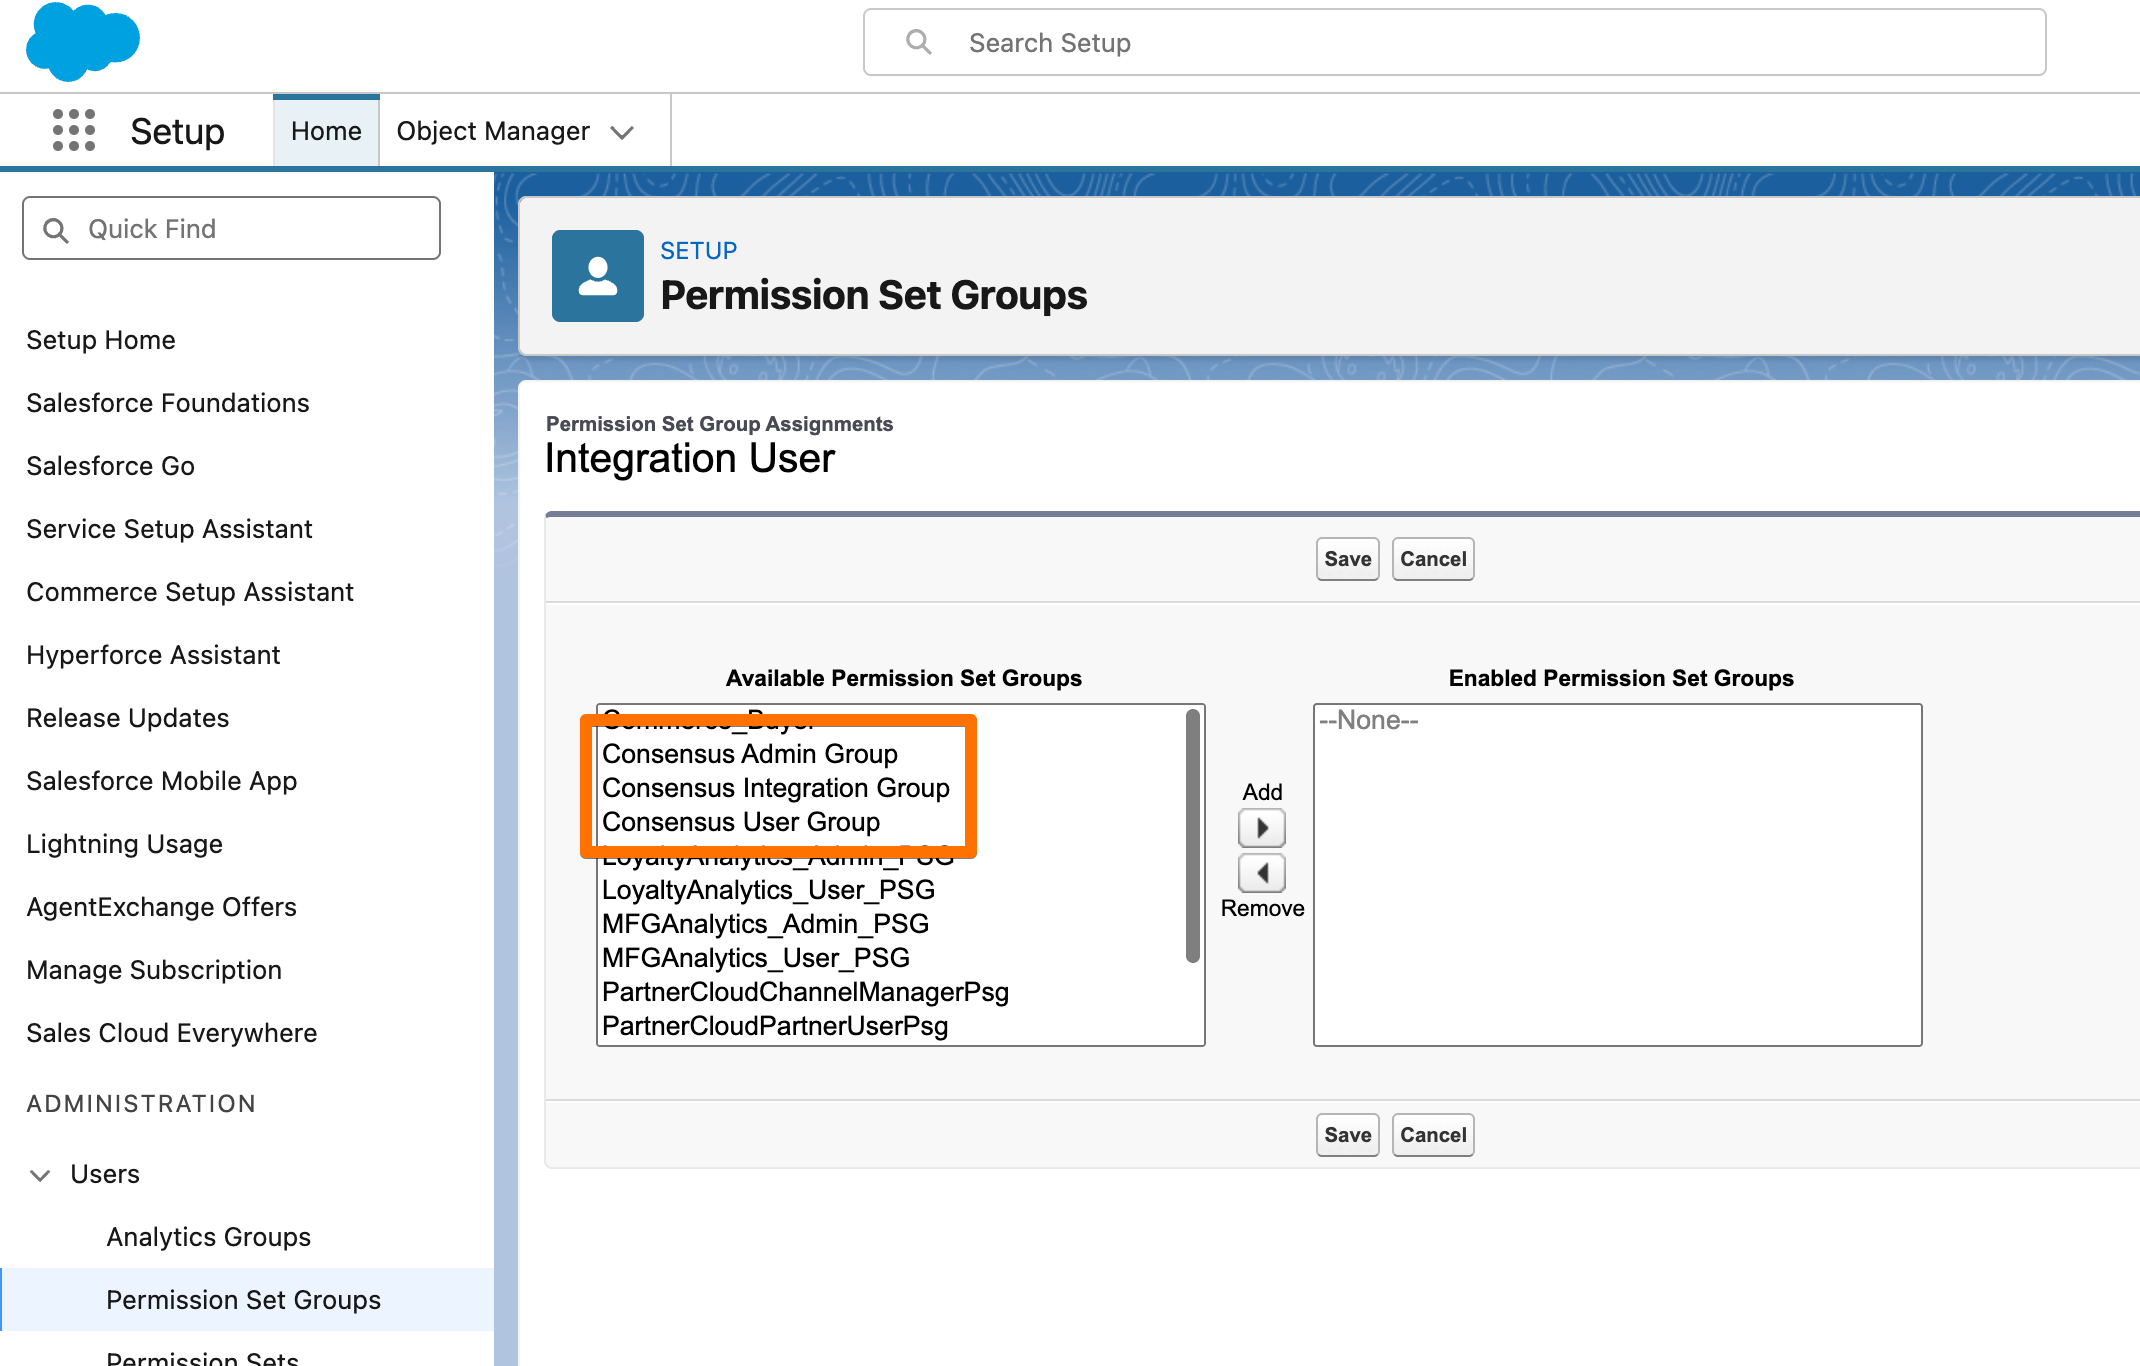
As of v11.12, Consensus recommends assigning Permission Set Groups rather than individual permission sets, since each group bundles the correct custom-object and standard-object permissions together for a given user type.
Permission Set Groups:
| Group | Contains | Use for |
|---|---|---|
| Consensus User Group | Consensus Users + Consensus Users (Standard) | Standard end users |
| Consensus Admin Group | Admin Consensus + Admin Consensus (Standard) | Salesforce/Consensus admins |
| Consensus Integration Group | Integration Consensus + Admin Consensus (Standard) | A dedicated Salesforce integration user/profile |
Step-by-step: Admins
- Find the Consensus Admin Group permission set group.
- Assign it to the necessary admin users, this allows the user to make changes within the Configuration page.
Step-by-step: End users
- Find the Consensus User Group permission set group.
- Assign it to the necessary end users. This allows users to interact with the Consensus component and use CRM Sync.
Step-by-step: Dedicated Integration User
- Swiitch the profile of integration user from Admin to Minimum Access - API Only Integrations profile
- Find the Consensus Integration Group permission set group.
- Assign it to the dedicated Integration User after configuring the integration once all jobs have been processed and scheduled.
Managing Consensus User Info
Only a Salesforce Administrator with the Admin Consensus permission set assigned can access this page. Here you can see and manage the list of users who have signed into the Consensus app in Salesforce. This table is also used when a Salesforce email differs from Consensus email.
- Open the Consensus Users Info tab.
- Add New record
- Input the Consensus email and Salesforce email address
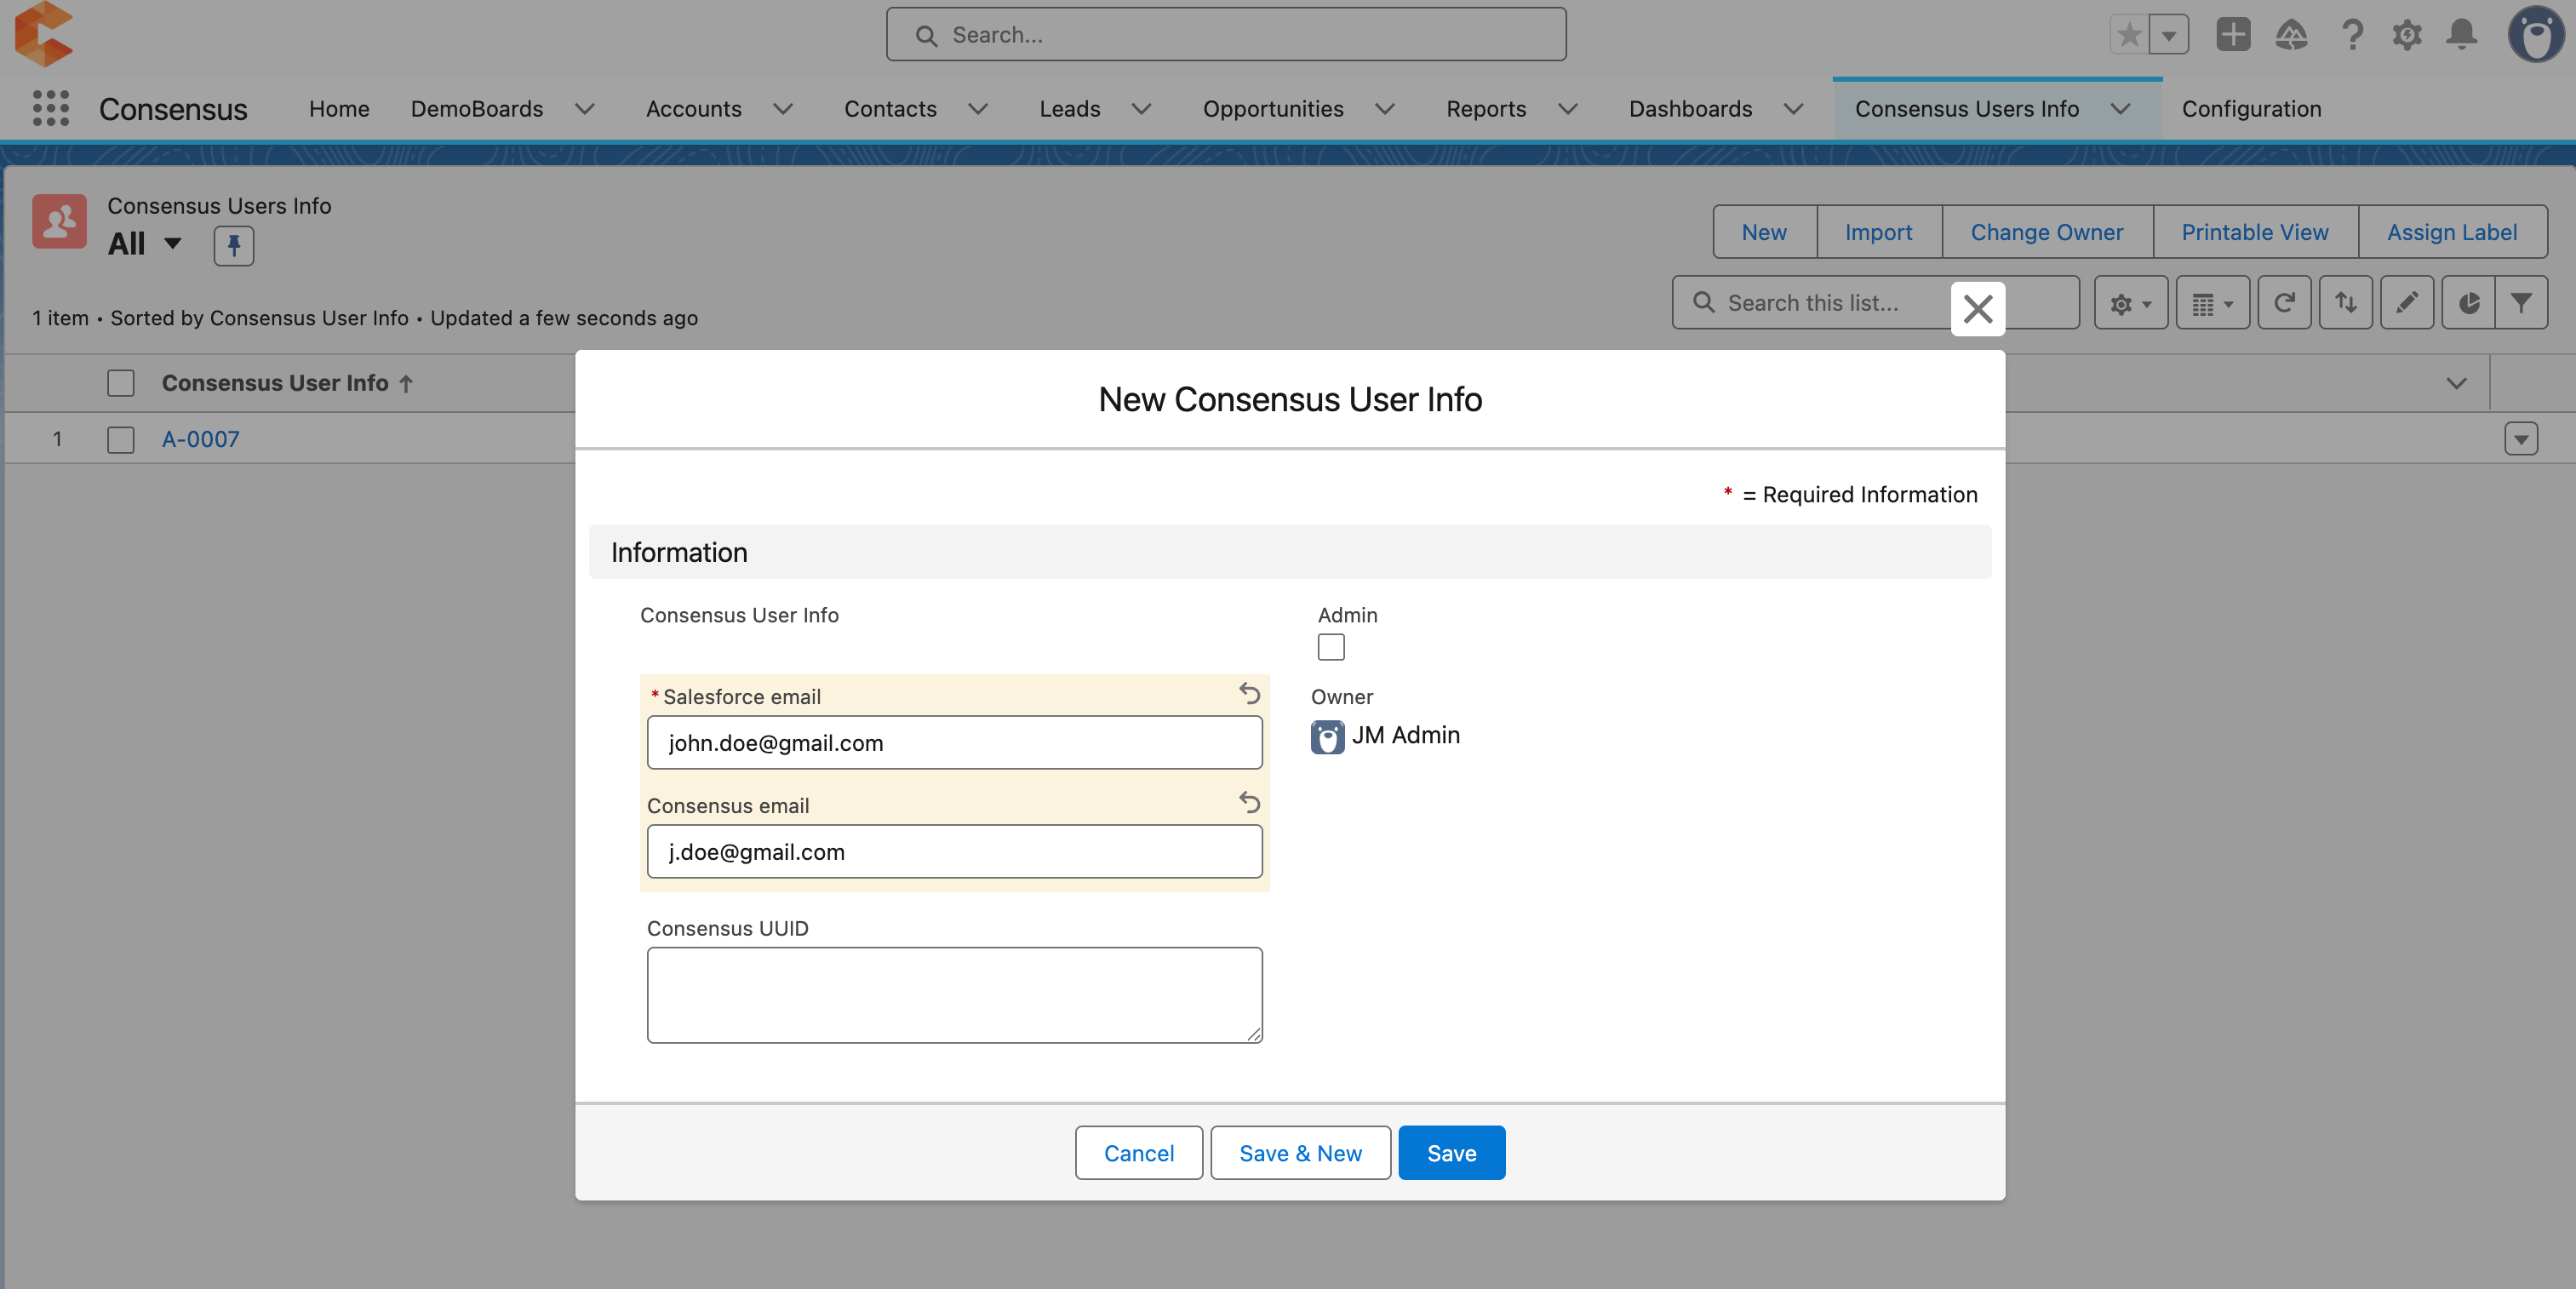
- Save
- Press Run Permission Update within Configuration tab
Adding the Consensus Component to Page Layouts
The Consensus Salesforce App package includes a custom component that lets your Consensus users authenticate with Consensus, view Demolytics for the record they're on, create DemoBoards, and send them via Salesforce email. As of v11.6+, the component includes data tables for DemoBoards and Demo Views, plus high-level stat cards showing Consensus's overall impact on that record.
Recommendation: implement the component wherever it's most beneficial and accessible for your sales team, typically on Opportunity, Account, Contact, and Lead objects.
Steps
- Open the record page layout you want to edit (e.g., Opportunity), click the Gear icon in the top-right, and select Edit Page.
- Add a new tab: go to the Tabs section, click Add Tab, choose Custom from the dropdown, and enter "Consensus" as the Custom Label. Click Done.
- Drag the custom component createDemoBoard from the Custom-Managed area onto the new tab. Choose which table views and stat cards to enable.
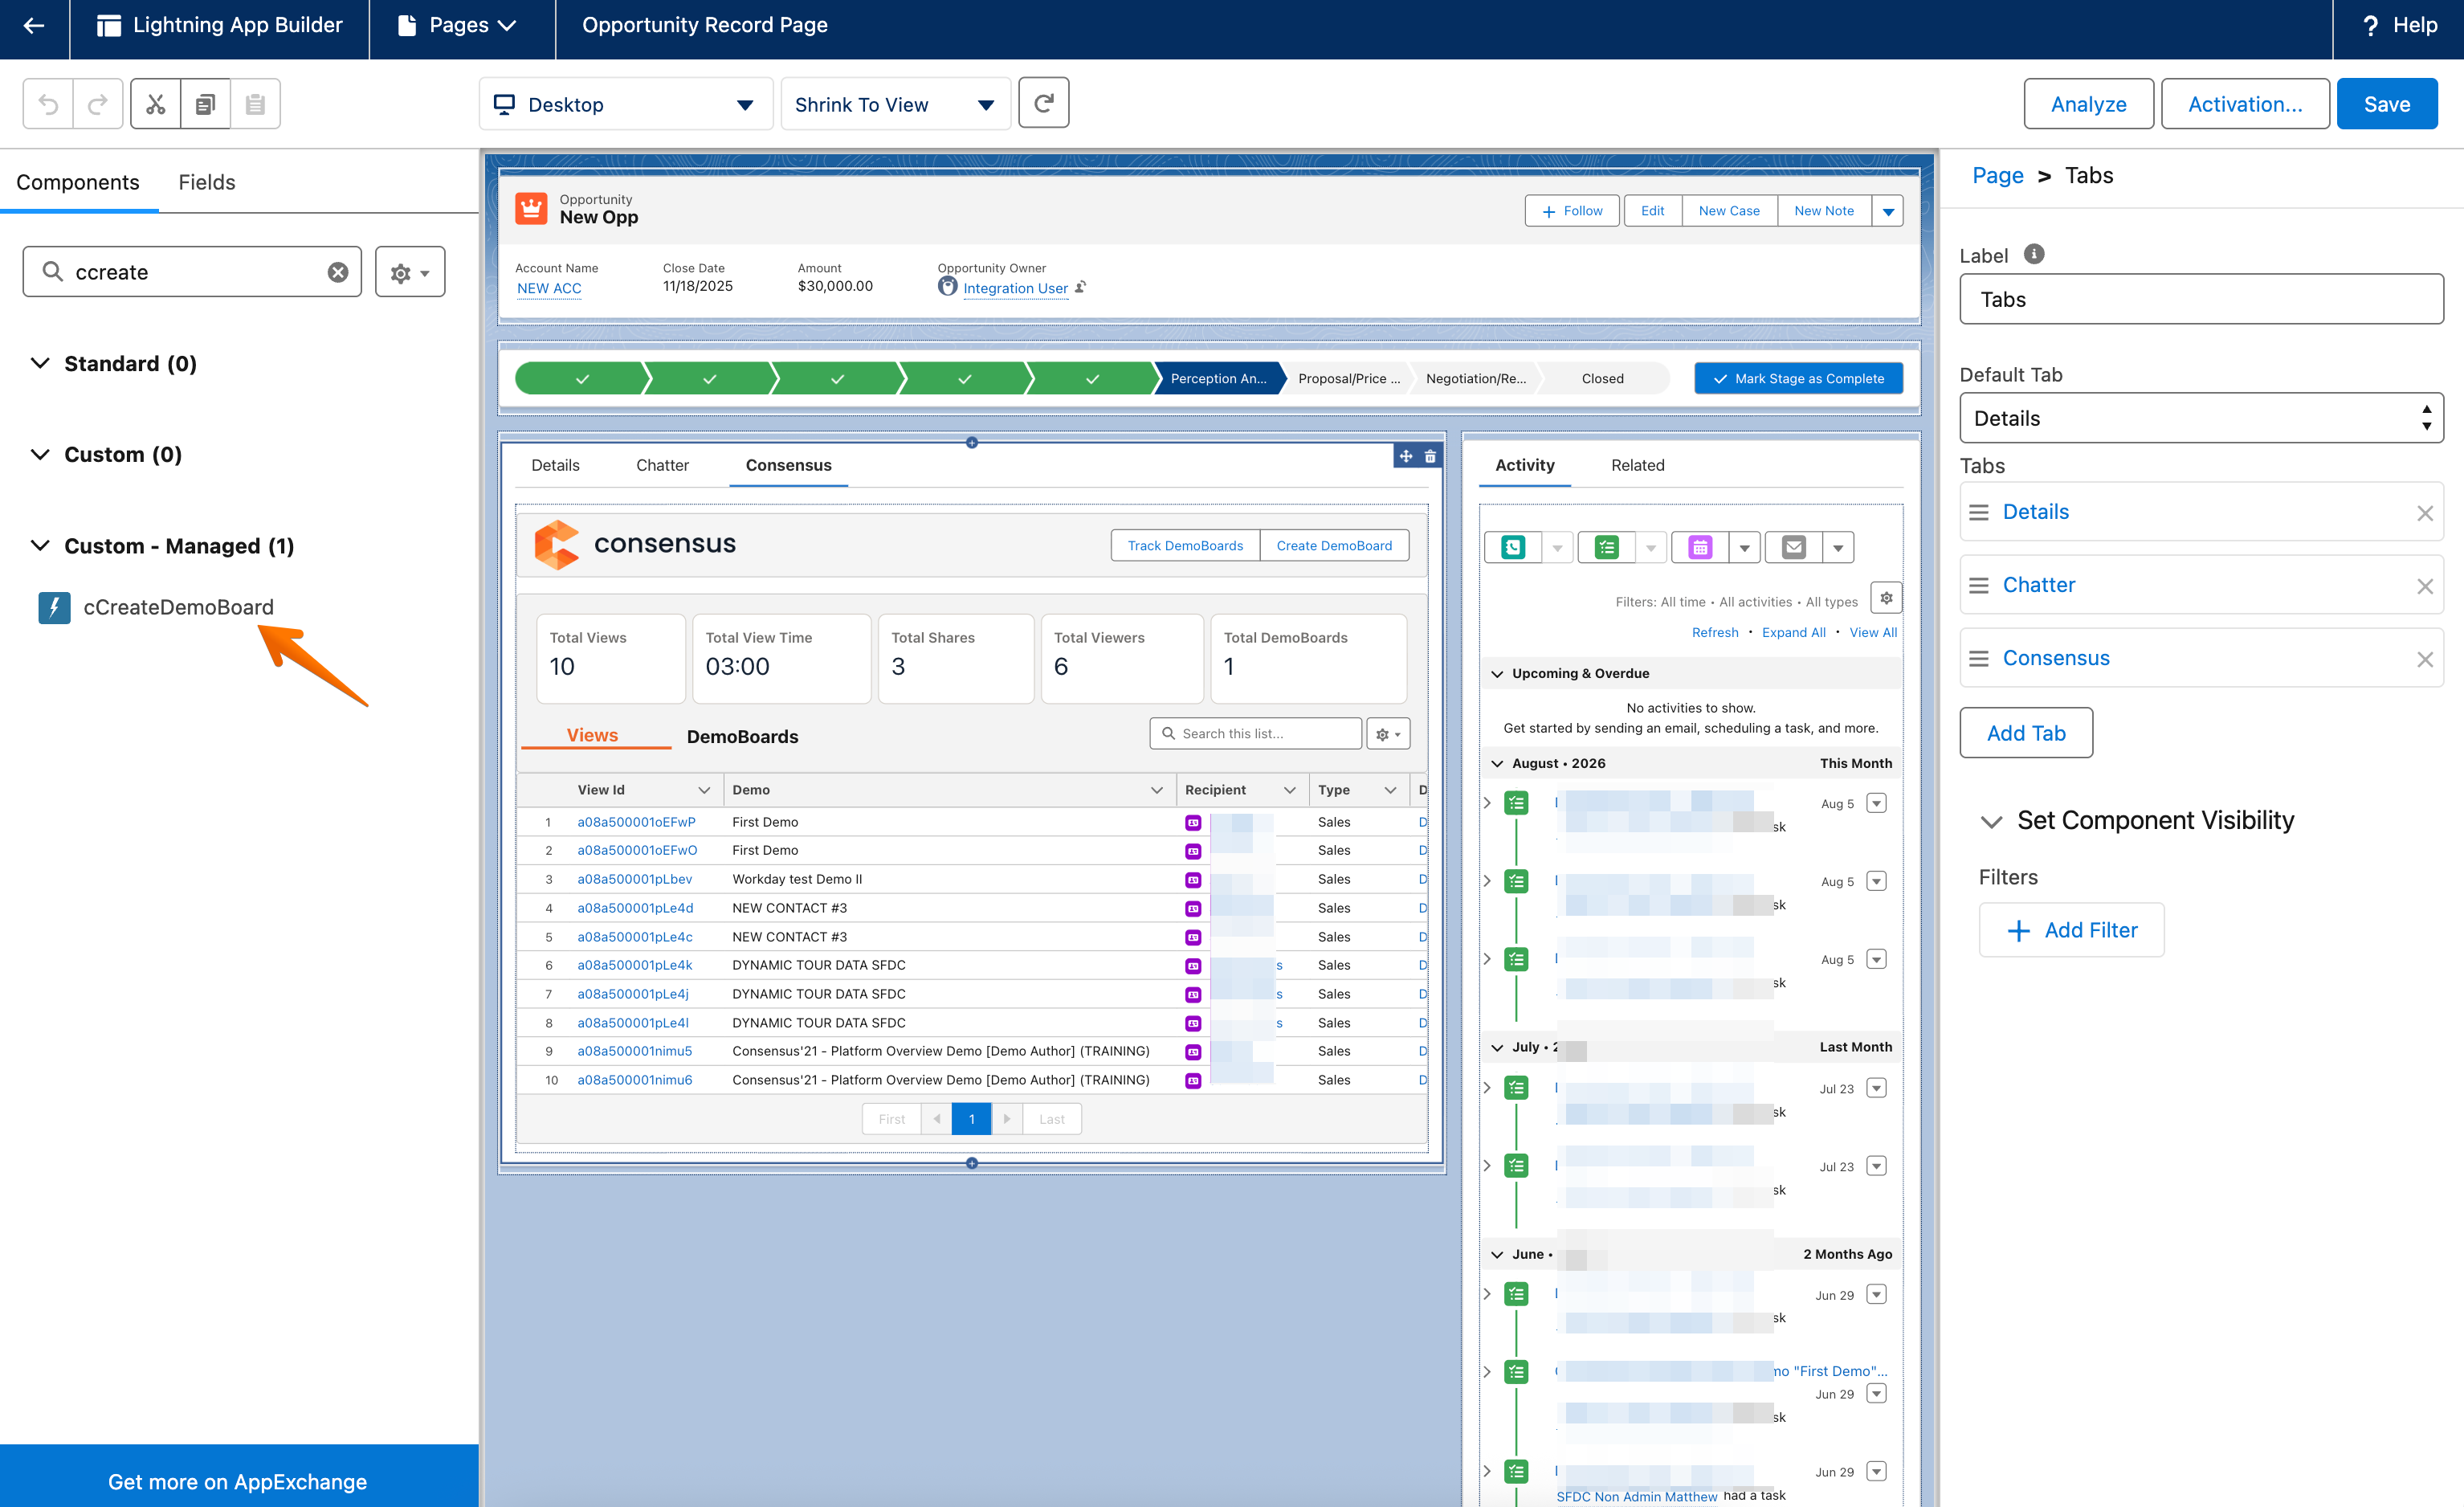
- Click Save.
- Repeat for other Lead, Account, Contact, or Opportunity page layouts where you want the component to appear.
Setting up CRM Sync
Once the component is added, we recommend setting up CRM Sync, which lets users select an Account and/or Opportunity to associate with a DemoBoard live from within Consensus.
Version note: If you're on v11.10 or later, CRM Sync uses the updated OAuth 2.0 authorization flow and does not require a Salesforce Site. See Connecting Consensus to Salesforce – OAuth 2.0 Method (Version 11.10+ Required).
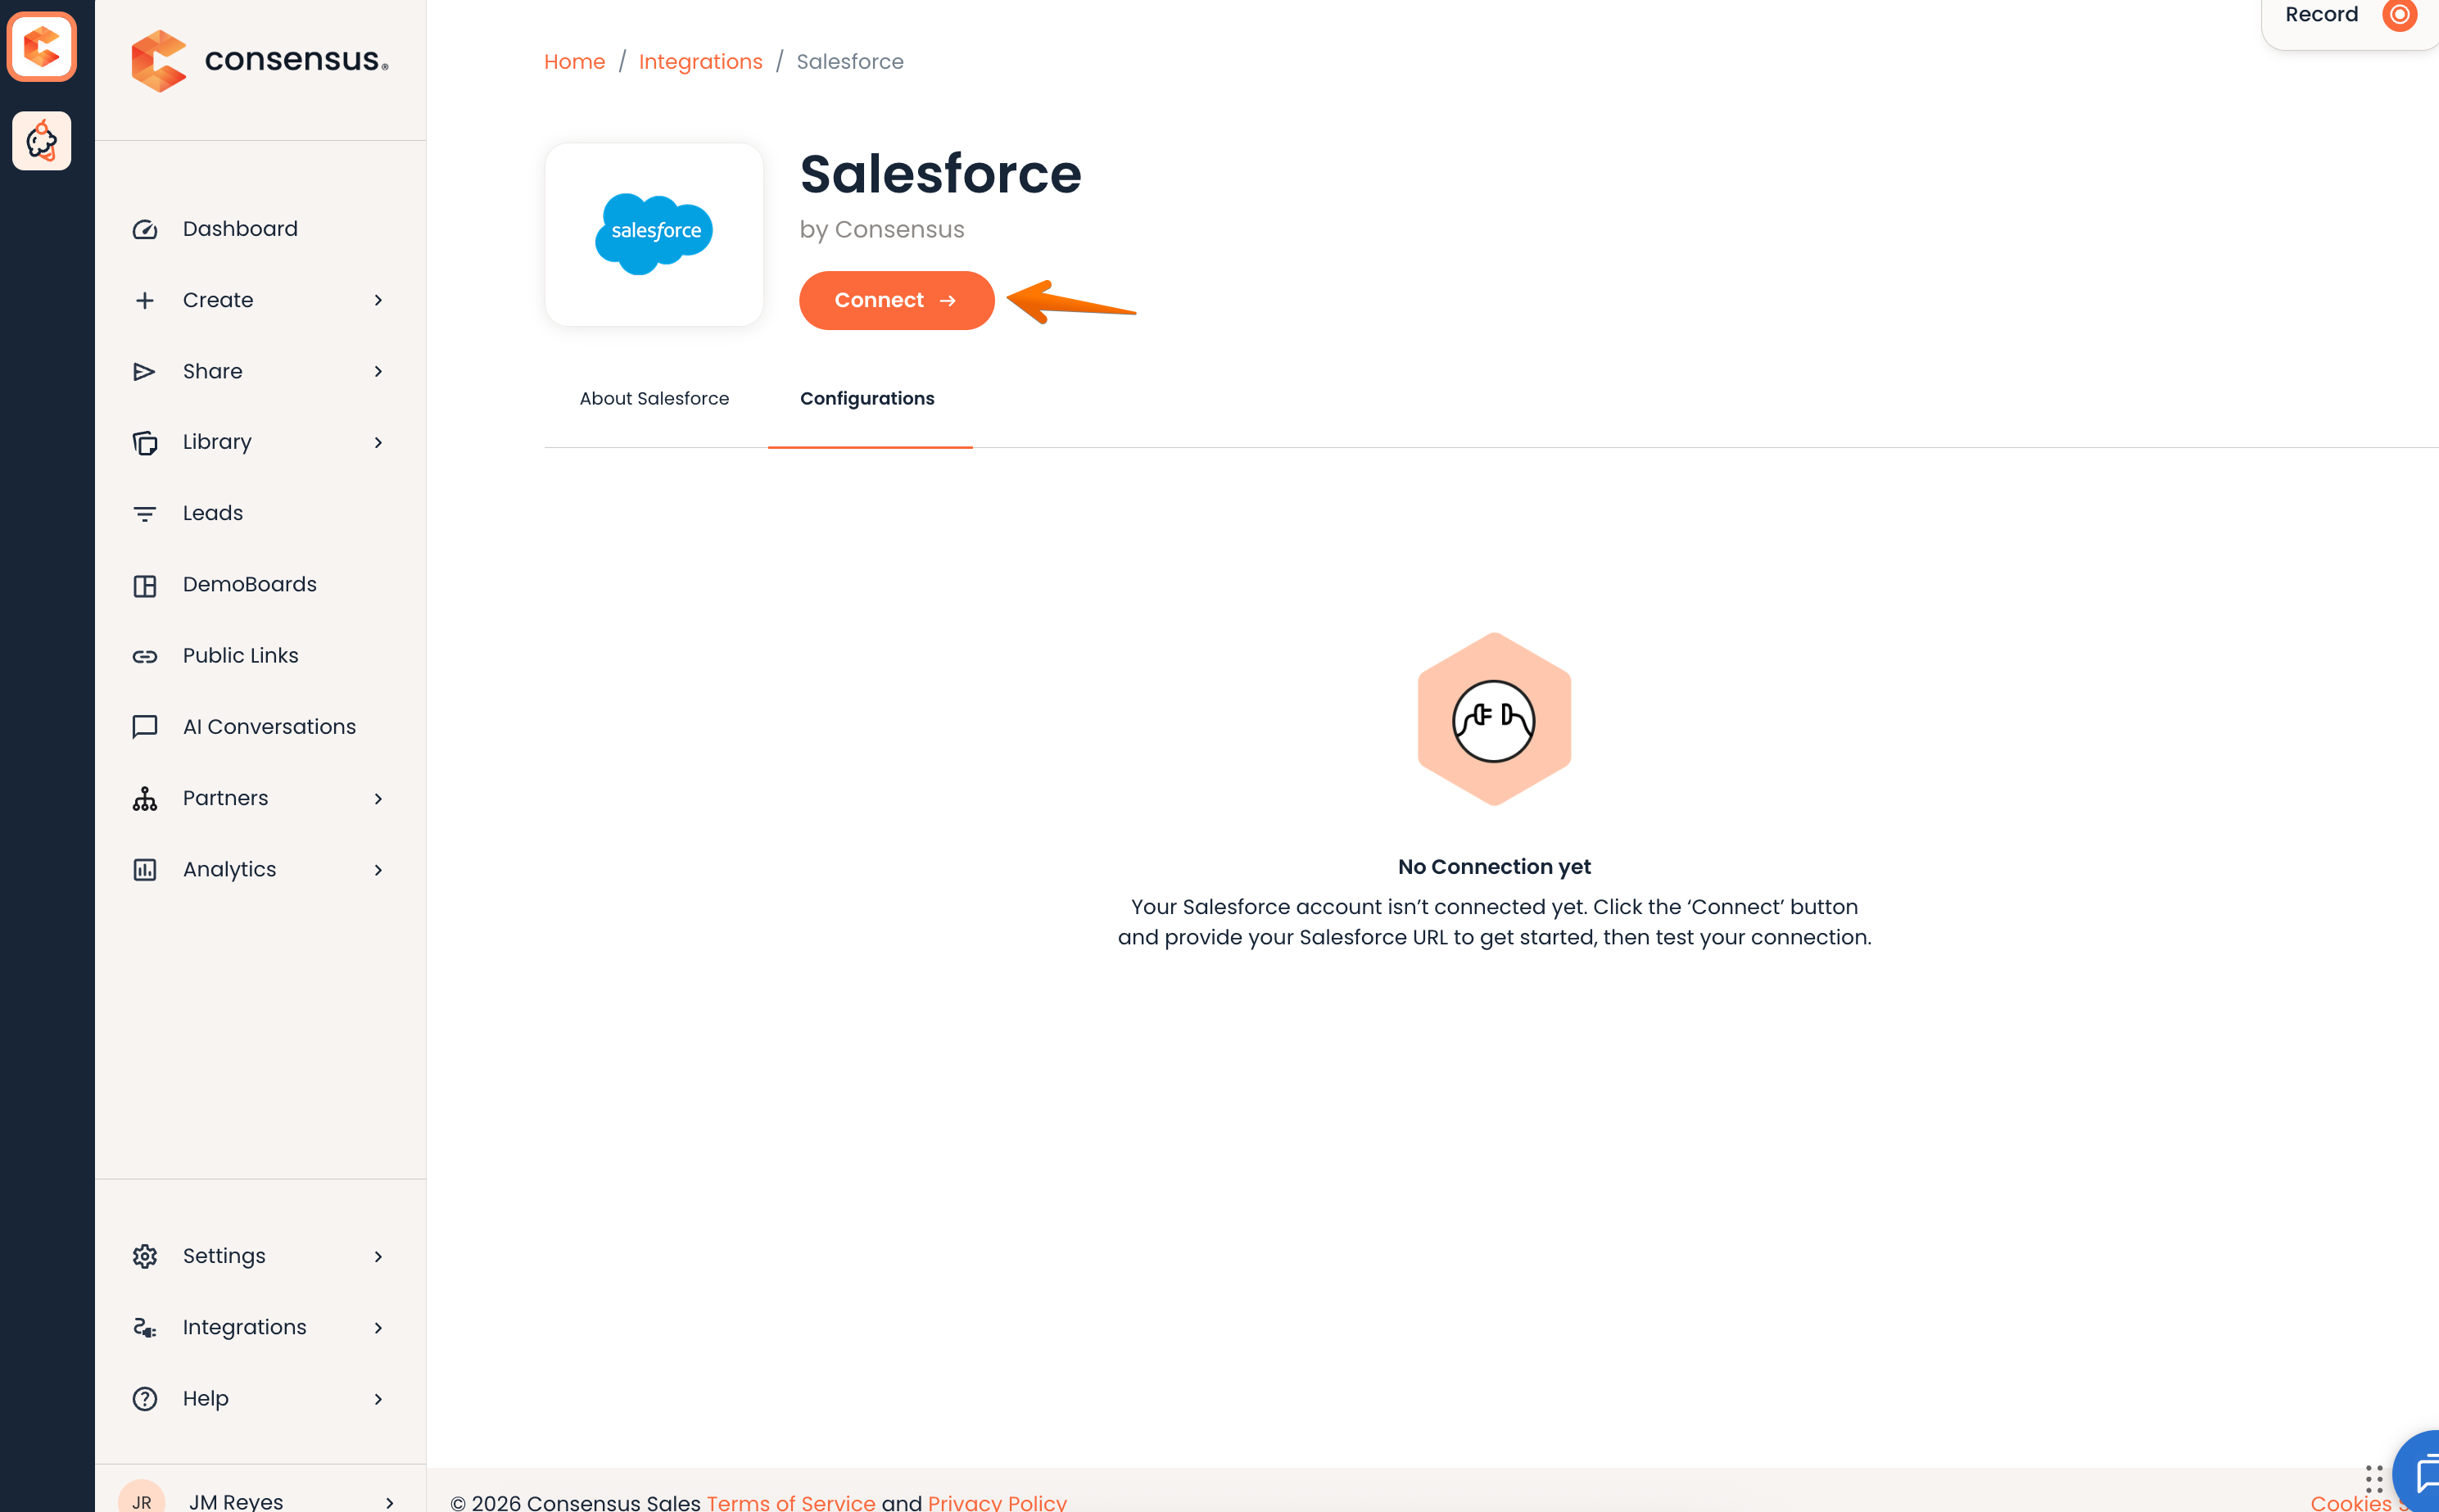
Auto-matching: When Auto-matching CRM is enabled, Consensus automatically suggests the best-fit Opportunity each time a recipient is added to a DemoBoard, based on matching contacts by email, then filtering by account (if selected), primary contact status, opportunity stage/probability, and most recent created date.
Creating a DemoBoard
You can create a DemoBoard for any Lead, Account, Contact, or Opportunity from the Consensus component.
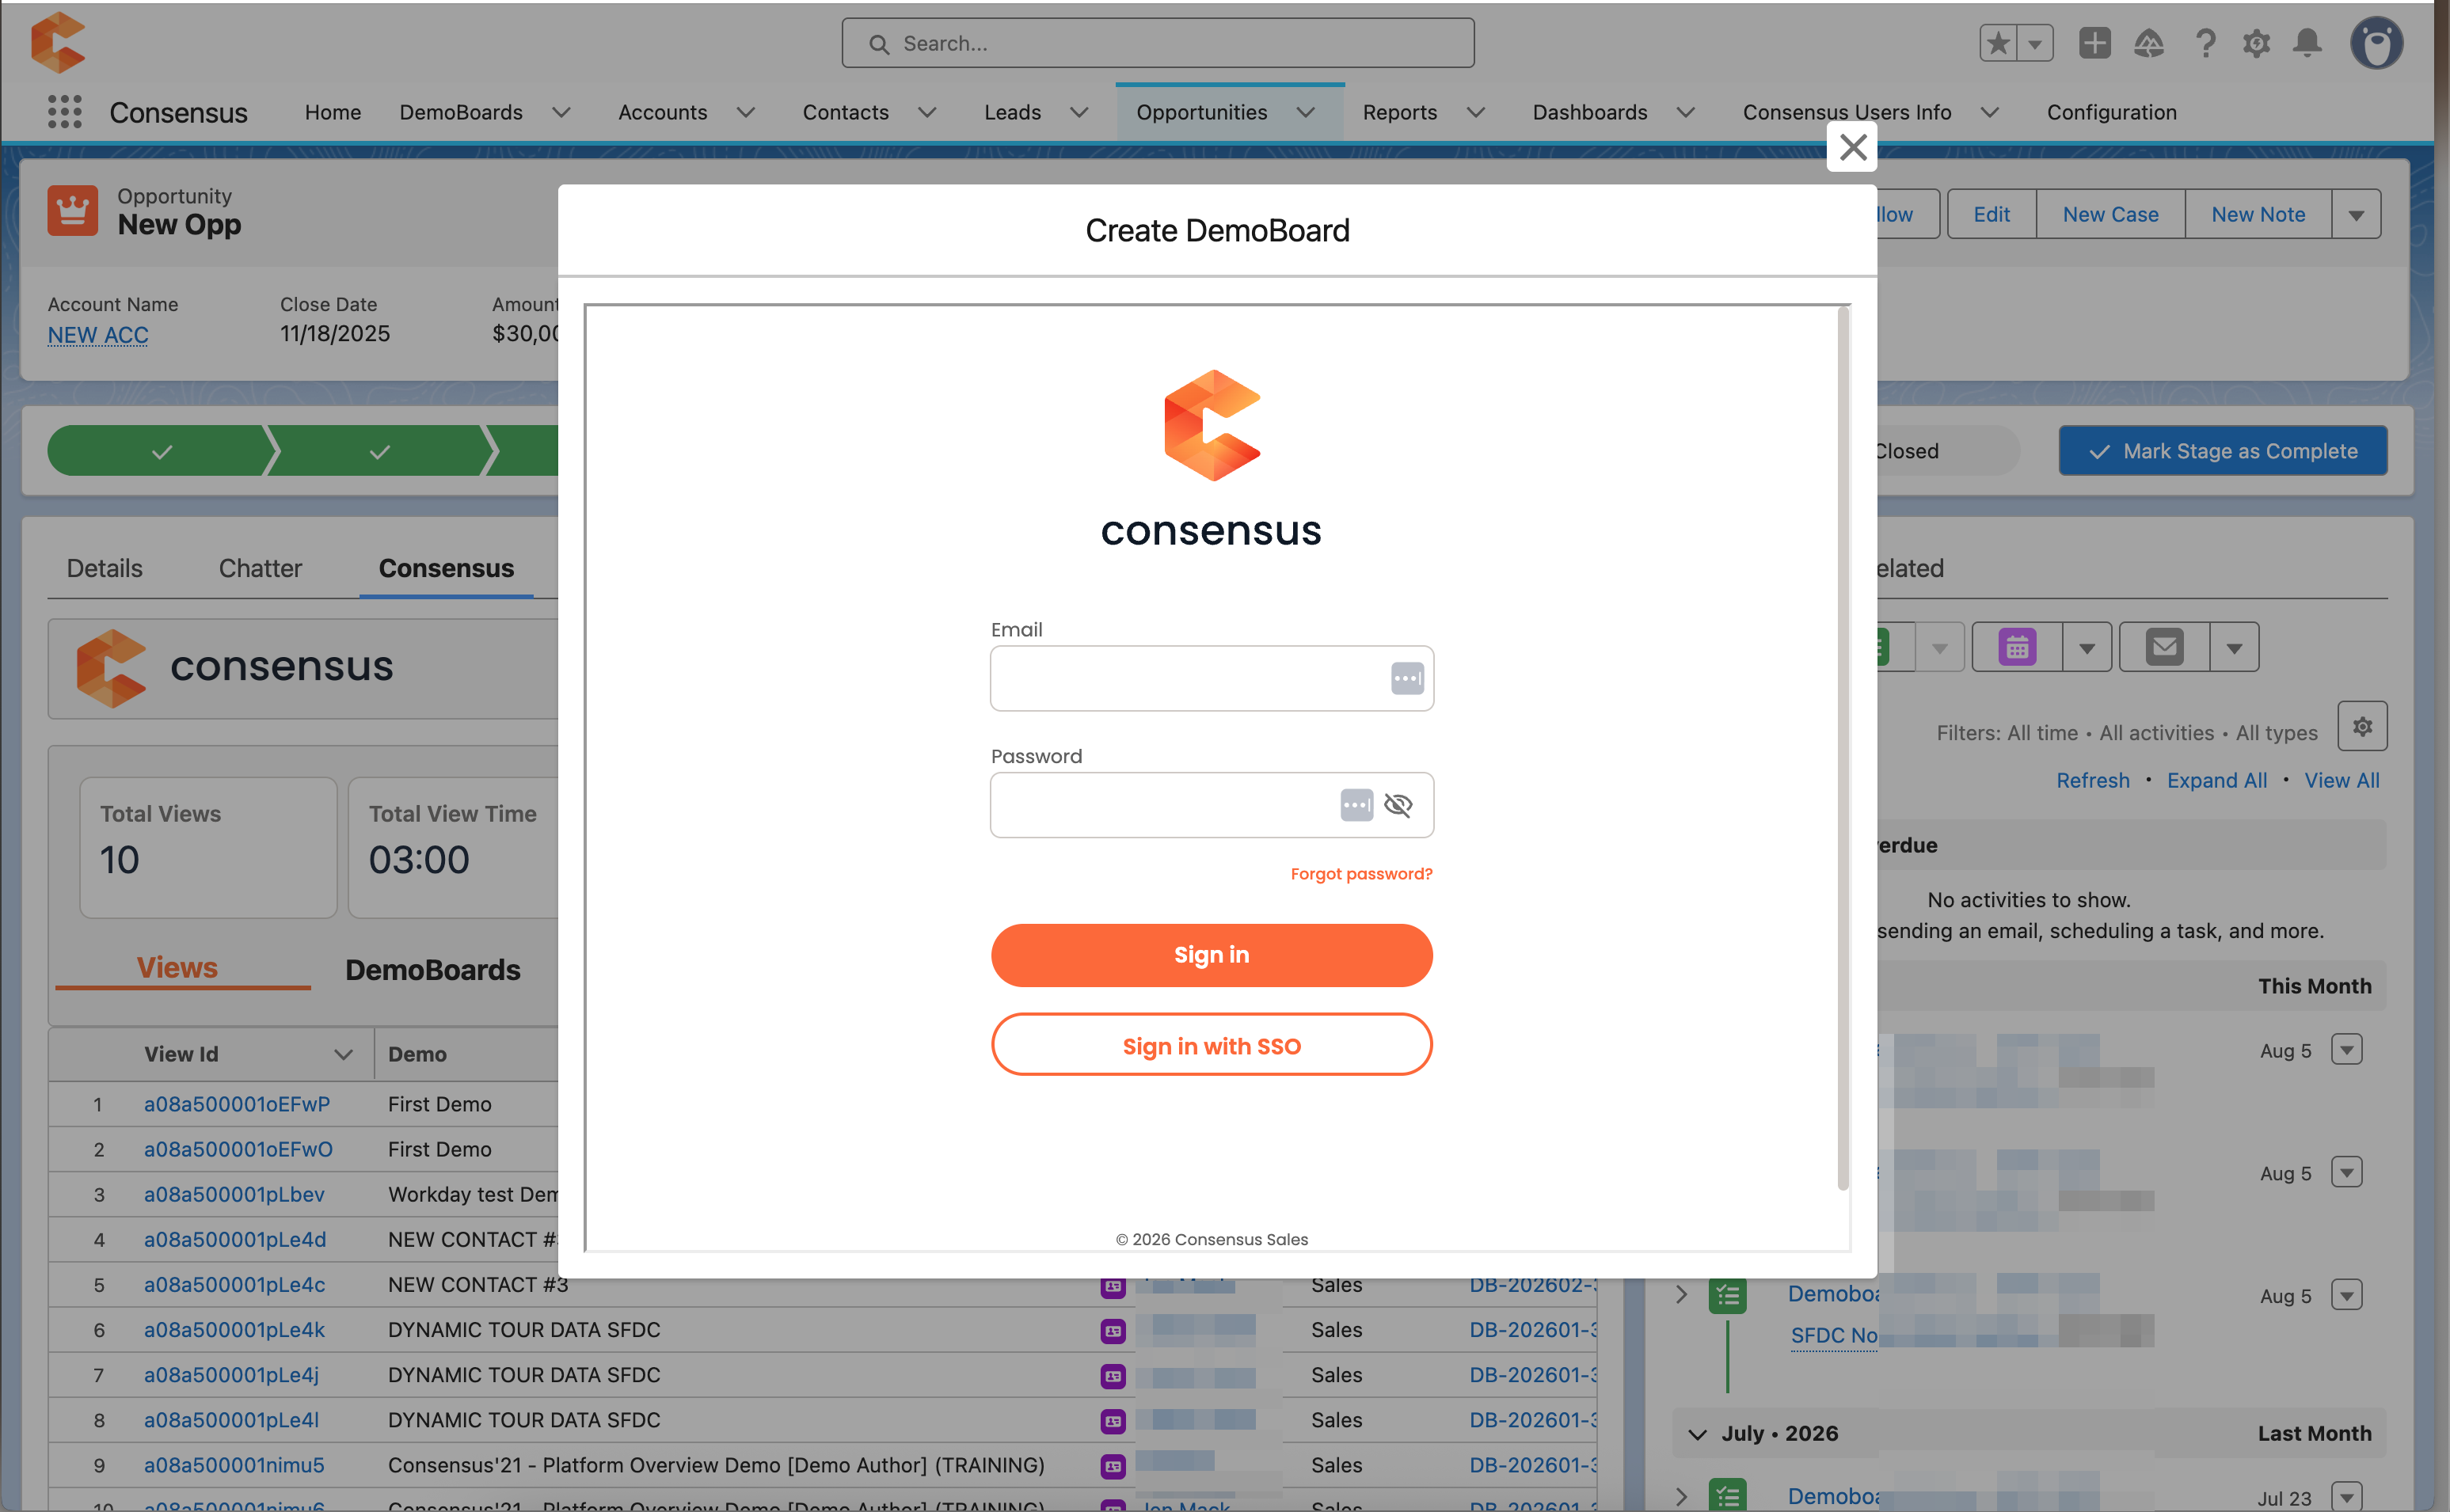
- Open the record and click Create DemoBoard.
- If launching from an Opportunity or Account, you'll be prompted to select related Contacts to import as recipients — select the contacts you want, then click Import.
- The Consensus "Snap" interface opens in an embedded window. If not already logged in, sign in with your Consensus credentials or SSO (using your existing Consensus SSO setup — no separate Salesforce-specific SSO connected app is required).
- Choose Demos — select one or more demos to include, or record/upload new video content.
- Add DemoBoard info and recipients — name the DemoBoard, confirm the associated Account/Opportunity (pre-filled if launched from those records, or selectable if CRM Sync is enabled), and confirm recipients (pre-populated from imported Contacts, or added manually).
- Choose additional options — add other Consensus users for notifications/access, and enable DemoBoard expiration, two-factor authentication, or mark it as a test.
- Choose your link type and create — select Thumbnail or Button link, customize appearance, then insert.
- Send via Salesforce email — a new email opens with the Consensus default template, pre-addressed to your recipients and pre-associated with the correct Account/Opportunity. Customize as needed and click Send.
Uninstallation
Before uninstalling the package, remove the Consensus component from all Lead, Contact, Account, and Opportunity page layouts.
- Remove the Consensus component — delete the "Consensus" tab (or the individual component) from each page layout where it was added.
- Deactivate the Flows (optional cleanup). All Consensus-packaged Flow automations are deprecated as of v11.12 due to a Salesforce managed-package limitation that keeps them installed as active. They have no functional effect and no measurable performance impact while active, so this step is a cleanup step rather than a functional requirement:
- Go to Setup, search "Flows" in the sidebar, and select Flows under Process Automation.
- Filter for the Consensus-packaged flows, open each one, and click Deactivate.
- Uninstall the package — in Setup, type "install" into Quick Find and open Installed Packages. Click Uninstall next to the Consensus package, review the notes, check the confirmation box, and click Uninstall. You'll receive an email once uninstallation completes successfully.
Uninstalled packages appear under Uninstalled Packages, where you can permanently delete them or leave them for historical reference.