Salesforce is a powerful tool that allows you and your teams to manage their prospects and opportunities. The Consensus SFDC Professional integration allows you to include the Demo View data collected from Consensus directly within your SFDC account. This enables you to not only see Demo views right within SFDC, but also allows you to include this data within your reporting. In this article, we will cover:
- What the Consensus Salesforce Professional App can do
- Installing the Consensus Salesforce Professional App
- Configuring the Consensus Salesforce Professional App
- Managing Consensus User Info
- Adding the Consensus Component to Page Layouts
- Permission Sets
- Creating a DemoBoard
- Unistallation
What the Consensus Salesforce Professional App can do
Depending on your configuration options, here are some of the things the Consensus Salesforce Professional App can do. The app:
- Loads historical Consensus engagement data into Activity Records/Tasks in the Salesforce lead or contact record
- We currently track these activities based on the email address that we match with a lead or contact.
- We track DemoBoard Invites and demo watched events
DemoBoard Invite Task

Demo Watch Task

- If enabled, creates new lead records for historical leads or demo recipients inside Consensus
- Loads analytics data into custom objects so you can create custom reports and dashboards inside Salesforce based on Consensus engagement activity
- Custom Objects include:
- Demos (all Consensus Demos)
- Demo Association
-
Demo association object is a junction object between DemoBoard and Demo, and it is used to handle Playlists data for Salesforce.
-
- DemoBoards ( all Consensus DemoBoards
- Invitations (all invitations or recipients that get added to DemoBoards)
- Views (all individual views by recipients (invitees) of DemoBoards
- Features (all feature rankings selected during a Standard personalized demo view).
- Custom Objects include:
- Allows users to create and send custom DemoBoard links from within the app to leads or contacts
- Shows up-to-date Consensus engagement analytics for leads, contacts, and opportunities
- Associates DemoBoards to Accounts and Opportunities
- and more!
Installation
To install the Consensus Salesforce Professional App:
- Login to Salesforce as a System Administrator.
- Download the Consensus App from the Salesforce AppExchange HERE.
- The Consensus Salesforce App displays these installation options. You can choose to install in your Production or Sandbox environment during this step.
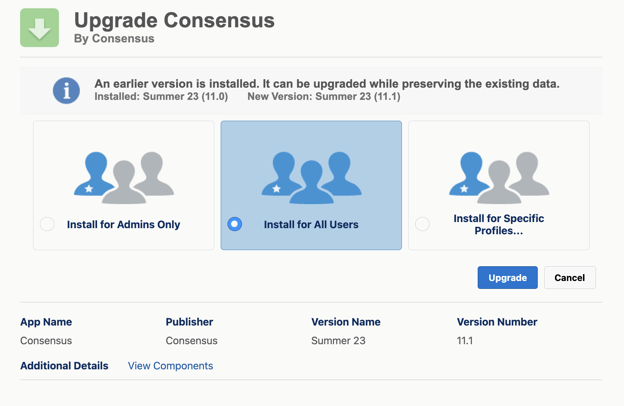
- We recommend installing the App for All Users.
Configuration
Configure a Domain Name
NOTE: If you already have a Domain name for your Salesforce instance you can skip this paragraph.
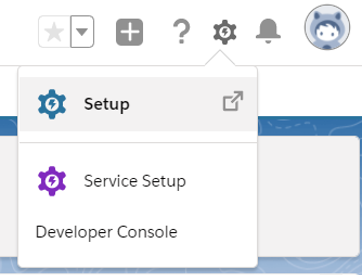
Click the Gear icon (SETUP).
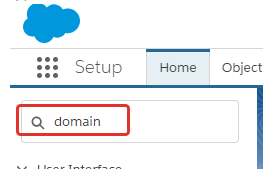
Type the “domain” word into the Quick search box on the top left corner of any page
And choose the “My domain” menu item and click on it to open a My domain page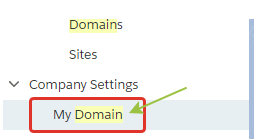
Follow the instructions: enter the name of domain that you prefer (it must be unique for all Salesforce instance), click Check Availability and then Register Domain if it is available.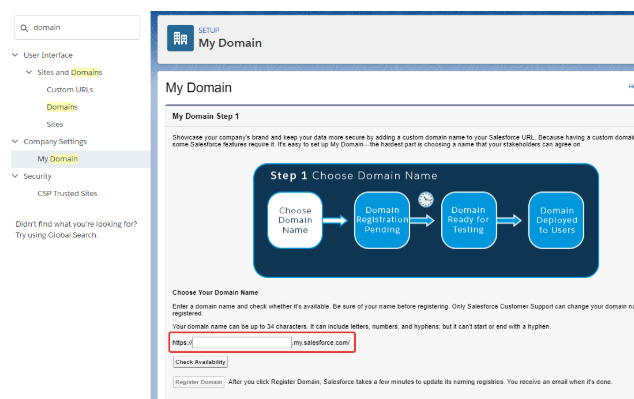
When the installation process is completed, switch to the Consensus application.
Accessing the Configuration Page
Accessing the Configuration Page in Classic mode
Click the 9-dots menu icon.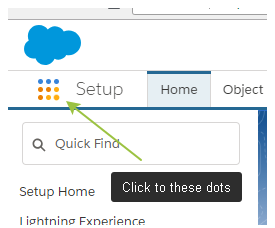
Find to Consensus application tab and click to it.
Then open a Configuration page by clicking on the Configuration tab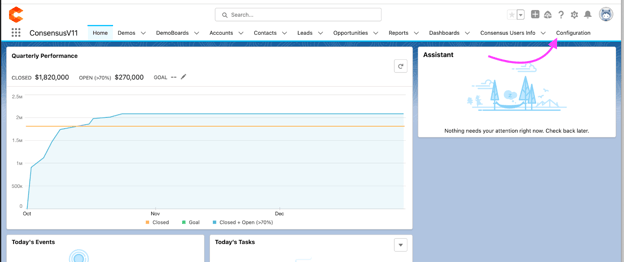
You will need the "Admin Consensus" permission set (included in our managed package) assigned to yourself in order to access the Configuration page and start data import:
Configuration Page
Select the Configuration Mode. Choose Consensus Customer unless you are an internal Consensus employee.
-
NOTE* Access to perform a ‘Test Connection’ is granted for Admin users only. Please include a Consensus Administrator email.

Add the Consensus API key and secret.
Get the values from Consensus in the Integration > API Credentials tab:
Click Test to test the API settings. Consensus displays a success message if it is communicating with the API properly.
Read the instructions on the Configuration tab carefully regarding which Schedulers you'd like to turn on. Change the Scheduler #7 "Time Interval to Sync" to at least 15 minutes to ensure that apex jobs are completing before a new cycle begins.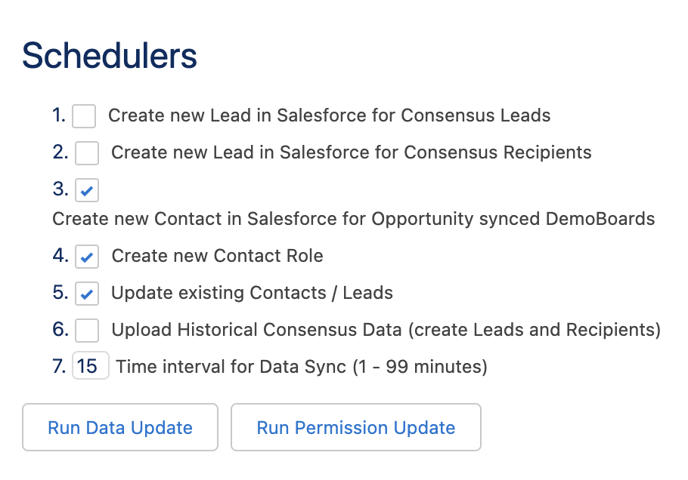
‘Run Data Update’ button will run schedulers with selected options.
‘Run Permission Update’ button will run scheduler for updating permissions on the Consensus User Info tab. It runs once per 24 hours. This is used to keep permissions up to date for Demo and other Permissions within Consensus. NOTE* This scheduler won’t affect the scheduler for data synchronization
Consensus User Info Management
Only a Salesforce Administrator has access to this page, as long as they also have the "Admin Consensus" permission set assigned to them. The Administrator is able to see the list of Users within the account who have signed in to the Consensus plugin in Salesforce. This table is also utilized when companies have a different Salesforce email domain, than the domain used for Consensus users. You will not need to manually add users to this list anymore after the v11.3 update, but you can see and manage who has signed into the Consensus app in SFDC.
Open the ‘Consensus Users Info’ page by clicking on the Consensus Users Info tab

The list of added Users is displayed on the page

‘Consensus User UUID’ and ‘Consensus User Group UUID’ are filled automatically when the user logs into the Consensus app in SFDC.

Adding the Consensus Custom Component to to Page Layouts (Updated for v 11.6)
New recommended Consensus Layout for Standard Object Detail Pages
- This applies to Opportunities, Accounts, Contacts and Leads, or as you determine would be best for the workflow that your sales teams follow.
- You can implement the new CreateDemoBoard component wherever you think is most beneficial and accessible.
Adding the Consensus Components to Lightning Page Layouts
Step 1: Adding the Custom DemoBoard component.
The Consensus Salesforce App package includes a custom component that allows your Consensus users to view relevant demolytics to each record in Salesforce, to properly authenticate with our web application, create DemoBoards, and send those DemoBoards via Salesforce email.
As of version 11.6 of our app, it has been updated with included data tables for Demoboards and Demo Views, along with high level stat cards to show the overall impact that Consensus has had on that particular record.

To make the component appear in other predefined applications (such as Sales), select that layout, edit the layout (click Edit page under Gear icon in the top right corner).
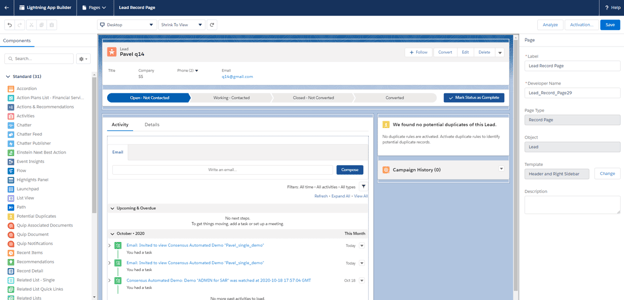
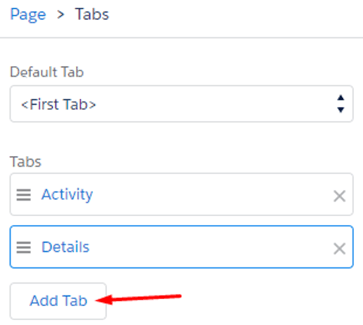
To add the Consensus Salesforce App component, we suggest adding a new custom labeled’ tab called “Consensus” in the section ‘Page >Tabs’. Select the section ‘Page >Tabs’ and click Add Tab in the right section
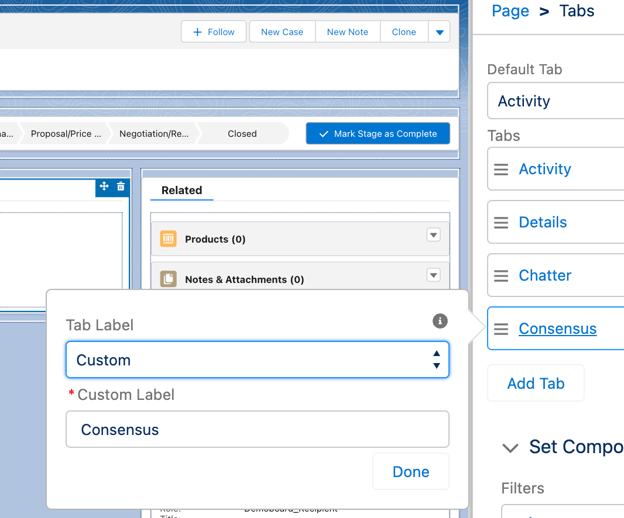
Click on the newly added tab and choose ‘Custom’ from dropdown. Print ‘Consensus’ to the ‘Custom Label’ input field and click Done
Add the custom component titled ‘createDemoBoard” from the Custom-Managed area, choose if you want to enable/disable the different table views or stat cards, and Save the layout.

Repeat the same steps for other Lead, Account, Contact or Opportunity page layouts where you want the component to appear.
*NOTE: Once you have completed the above steps, it is recommended that you proceed to setup the Consensus Site, for use with CRM Sync. CRM Sync allows expanded functionality for sales teams to perform a live-lookup up Account and Opportunity data to associate their DemoBoards with.
https://support.goconsensus.com/setting-up-salesforce-sites-for-consensus-sfdc-9.1-required
Permission Sets
End User Permission Set
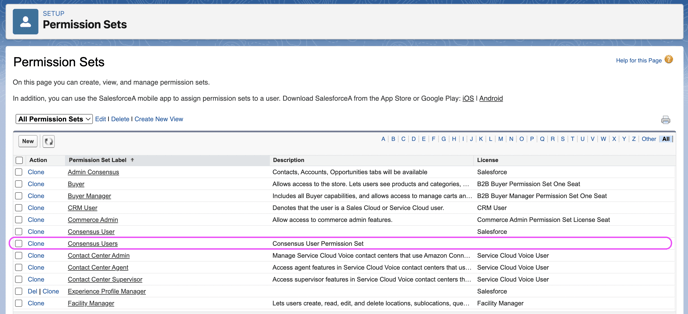
Step 1: Find the "Consensus Users" permission set
*IMPORTANT: Please choose Consensus "Users" (plural). There are 2 options here, which can be confusing. This Permission Set is used for standard end users, not Admins.
Step 2: Assign the "Consensus Users" permission set to the necessary end users.
- This permission set allows users within Salesforce to interact with our component, and to utilize CRM Sync.
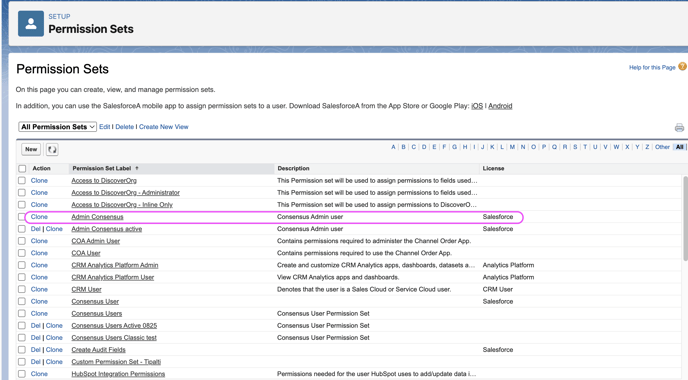
Admin Permission Set (for Admin access to the Consensus app in SFDC)
Step 1: Find the "Admin Consensus" Permission Set
Step 2: Assign the "Admin Consensus" permission set to the necessary Admin users
Creating a DemoBoard
You can create a DemoBoard for any Lead, Account, Contact or Opportunity within the Consensus Salesforce App Component.
Open the detailed information about any Lead, Account, Contact or Opportunity and click ‘Create DemoBoard’ from the Consensus component.

If creating a DemoBoard from the Opportunity or Account Page, the user will be presented with a dialog to select which related Contacts they would like to import as recipients into the DemoBoard. 
Select the the contacts you want to include in your DemoBoard, and choose "Import."
Our new 'Snap" interface will pop up within an embedded window. If the user has not logged in yet, they will be required to enter in their email and password, or utilize Sign in via SSO.

*NOTE: Single Sign On within the new Snap interface will utilize the existing SSO integration you have setup within Consensus such as Okta or Azure. Customers no longer need to setup a separate Salesforce specific SSO authentication using a connected app.
After logging in, the user will be directed to the Snap home page, which showcases previous DemoBoard history and overall statistics. 
Select "Create DemoBoard" to continue making a new DemoBoard.
Step 1: Choose Demos:
The users will be asked to select one, or more demos to add to their DemoBoard. Users can also elect to record or upload new video content now!
Step 2: Add DemoBoard information and Recipients:
On the next step, users will be asked to fill in a "DemoBoard Name" along with information about the associated Account and Opportunity (if CRM Sync fields are enabled), and the DemoBoard recipients.

When launching this experience from an Account page, the Account will be pre-selected if CRM Sync with Salesforce is enabled. The user will need to select an associated Opportunity if applicable.
When launching this experience from an Opportunity page, the Account and Opportunity will be pre-selected.
Organization and Subtitle will be prefilled. Organization is the Account Name, and Subtitle is pre-filled with the Opportunity Name (but you can edit to whatever you want).
Finally, users will need to fill in the recipient information. If the user had previously selected Contacts to import into the DemoBoard, this information will be pre-populated. They can also add more recipients manually by choosing "Add Recipient."
Step 3: Choose Additional DemoBoard Options
On this final step, users will determine if they want to add additional Consensus users for notification and access to the DemoBoard. They can also enable options for DemoBoard expiration, Two-Factor authentication, or to mark the DemoBoard as a "test."

Step 4: Create DemoBoard and choose Insert Link Type
Choose to insert a Thumbnail link, or a button link at the top of the next pop-up screen. The default is to choose a Thumbnail link. 
Scrolling further down, you're able to choose a different thumbnail, and include a custom text overlay.

Select Insert Thumbnail (or insert Link if you just want a text link) to proceed to sending your DemoBoard via email.
Button link.

You can manage the Button link name, button corner radius, color of the button and color of the text. When you finished all button customization press ‘Insert Button’ and the button will be added to the email body.
Step 5: Send Your DemoBoard via Salesforce Email
This final step will open up a new email with the Consensus default email template, pre-addressed to the recipients you added to the DemoBoard, pre-associated to the correct Account and Opportunity as well. You can make some customization to this email as you'd like, and then select "Send."

Uninstallation
Before uninstalling the plugin you need to remove the plugin component from all Lead, Contact and Opportunity page layouts.
Removing the Consensus Component:
You can do this quickly by simply deleting the tab on the page layout you are editing. Or, you will need to delete the individual component.

Uninstalling the package
When the all plugin components are removed open the Installed Packages Salesforce page by typing the word “install” in the Quick Search box on the Setup page.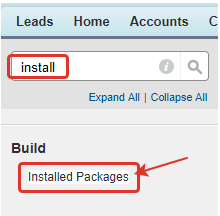
Now click the Uninstall link.
Read the instructions and notes about uninstalling and scroll down to bottom of the page. Click Yes then click Uninstall and wait for the email notification that tells you that your uninstallation was successful.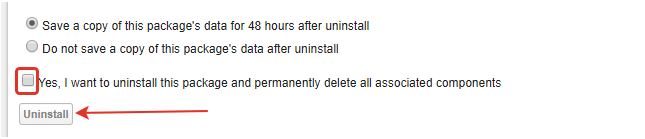
All successfully uninstalled packages placed to the Uninstalled Packages section and you can delete it permanently or stay there for history.