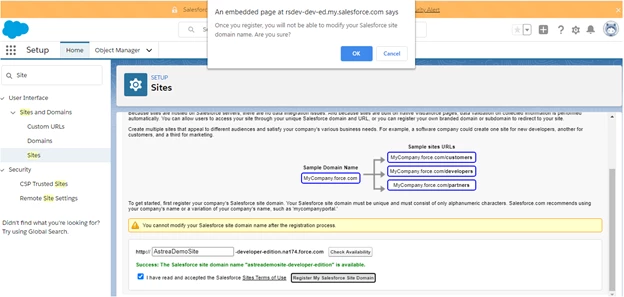
Step: 1 Register Salesforce Site Domain
Setup >> Quick Find Box >> ‘Sites’ >> Register My Salesforce Site Domain as shown:
- If enhanced domains are enabled in your org, your Sites domain includes your org’s
My Domain in the format MyDomainName.my.salesforce-sites.com.
- If enhanced domains aren’t enabled in your org, select your Salesforce Sites
subdomain.
- Enter a unique name for your Salesforce Sites domain.
- Click Check Availability to confirm that the domain name you entered is unique. If it
isn't unique, you are prompted to change it.
- Read and accept the Sites Terms of Use by selecting the checkbox.
- Click Register My Salesforce Site Domain.
 Read and accept the Sites Terms of Use > Register My Salesforce Site Domain.
Step: 2 Create and Edit Salesforce Sites
- In the site section click New.
2) Enter information about your site.
3) In the field: “Default Web Address” enter ’consensus’ as shown below. Create and Edit Salesforce Sites
4) In the field: Active Site Home Page choose ‘Sso_Flow_Page’ as shown below. Active Site Home Page
5) Checkbox "Active". Leave all other fields as is, then click save.
 “Active” > Save
6) Click on the site label that you just created (the title of the Site you just created).
 Site Label
7) Click on Public Access Settings.
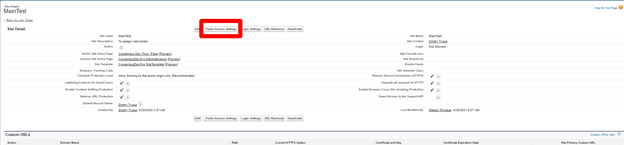 Public Access Settings
8) In the Apex Class Access section, click edit.
 Apex Access section
9) Add Classes as shown below and click save.
● DemoManager (For webhooks)
● SsoManager ( For Secure API)
● IntegrationManager (For Opp sync)
● IntegrationManager1 (For Opp sync)
● IntegrationManager2 (For Opp sync)
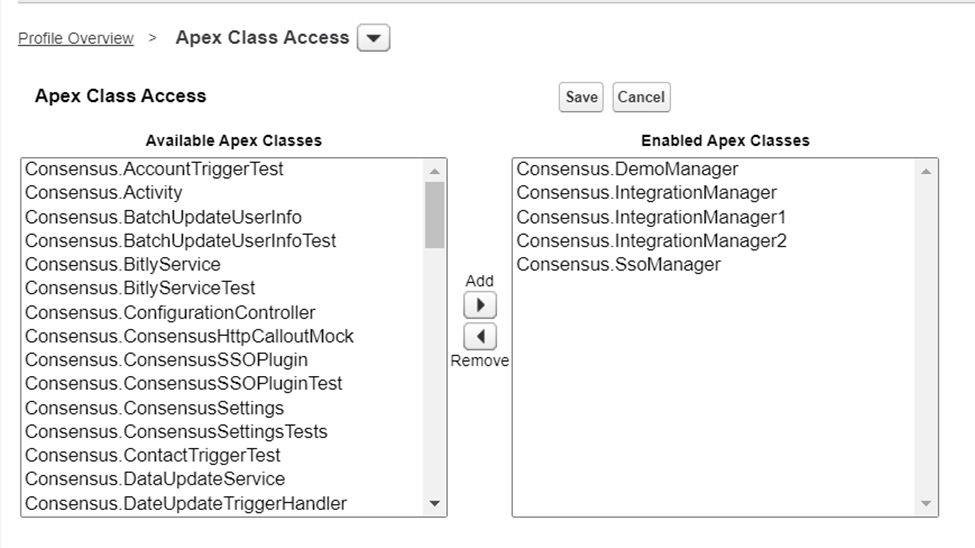 Apex Class Access
10) Go to System Permissions (in the same Public Access Settings as before) and enable View All Custom Settings.
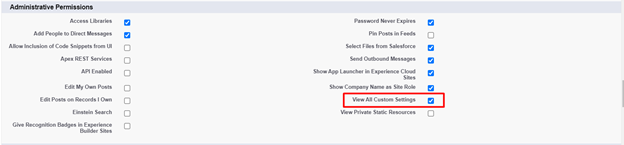 View All Custom Settings.
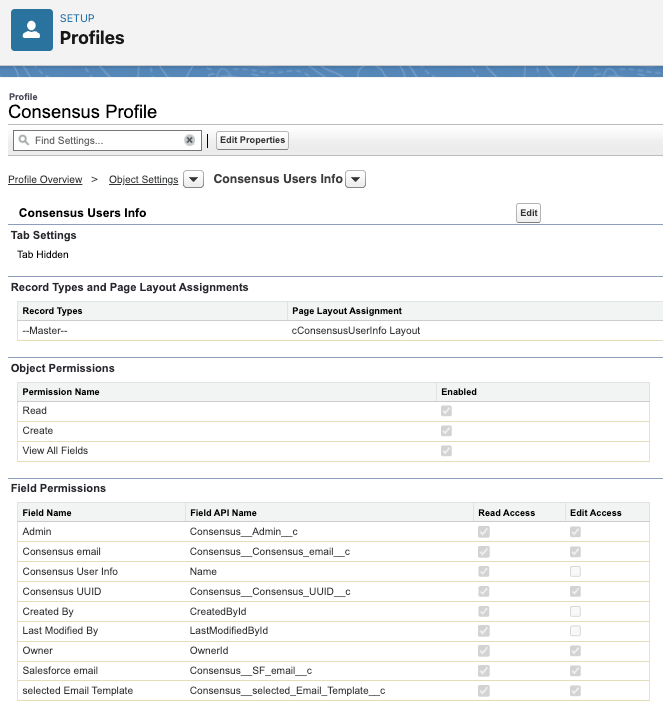
11) Go to Object Settings (in the same Public Access Settings as before), find Consensus Users Info, and give Read, Create and View All Fields for Object Permissions. Give Read Access for the Field permissions:
● Salesforce email
● Consensus email
“Public site URL” link should be copied from:
- Salesforce Setup
- Enter “Sites” into Quick find field
- Open “Sites”
- Copy Site URL from the Site you just created
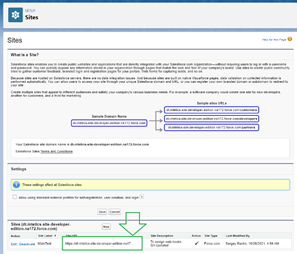 Public site URL
You will need this Site URL later when setting up CRM Sync.