This integration enables leads captured by our lead capture form to be sent to Pardot automatically. We will be using our web-to-lead feature in conjunction with a Pardot form handler to enable this functionality.
REQUIREMENTS
You will need to have the following privileges in Pardot to proceed:
- Create Prospect Custom Fields
- Create Form Handlers
INSTALLATION
1. Log into Pardot and go to Admin > Configure Fields > Prospect Fields
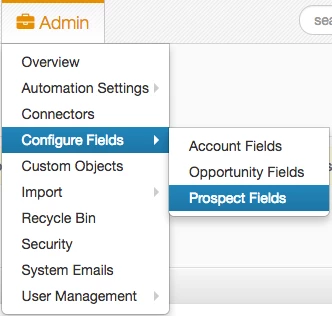 Admin > Configure Fields > Prospect Fields
2. Click on the Add Custom Field button
 Custom Field
3. Now create a custom field with the Type being Text and enter a Name and Custom Field ID. You can use the naming convention below (Demo Title) or create your own.
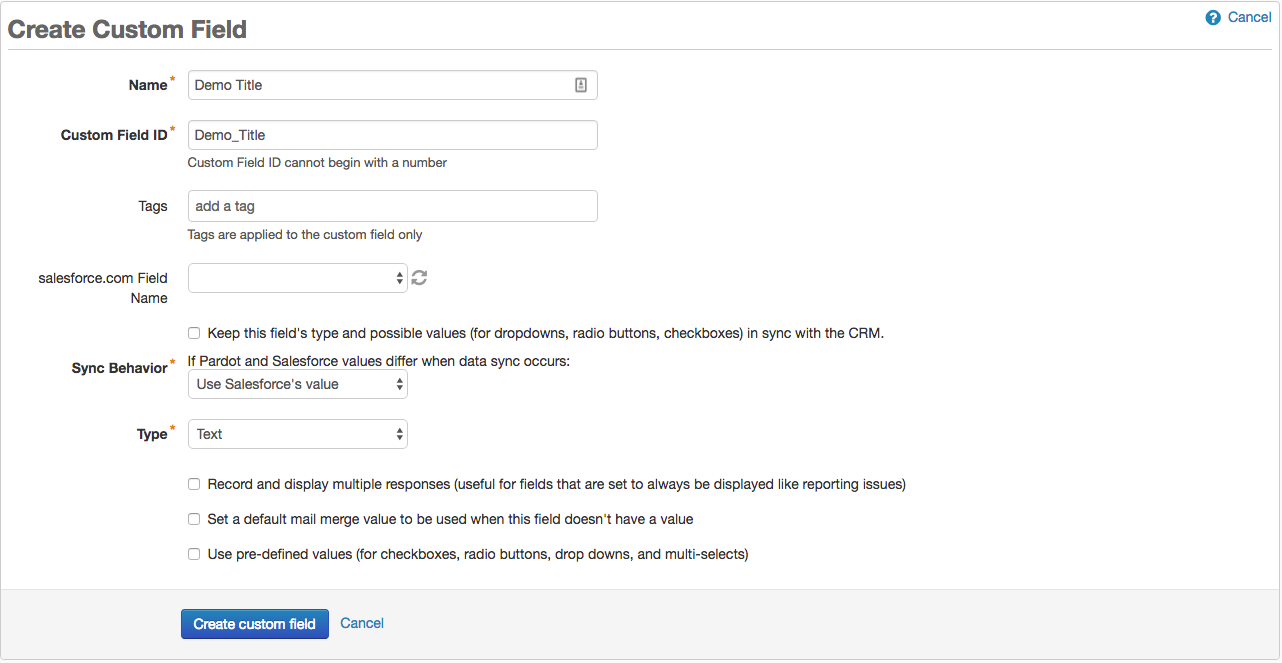 Create Custom Field
4. Repeat this process and create custom fields for the following data
- Name: Demo Very Important Features
- Custom Field ID: Demo_Very_Important_Features
- Type: Text
- Name: Demo Somewhat Important Features
- Custom Field ID: Demo_Somewhat_Important_Features
- Type: Text
- Name: Demo Not Important Features
- Custom Field ID: Demo_Not_Important_Features
- Type: Text
Note: If you have created custom fields or are capturing comments in your demo's lead capture form, you'll also want to create those as custom fields in Pardot. In this example we will create two additional custom fields in Pardot to collect the comments and Company Size fields.
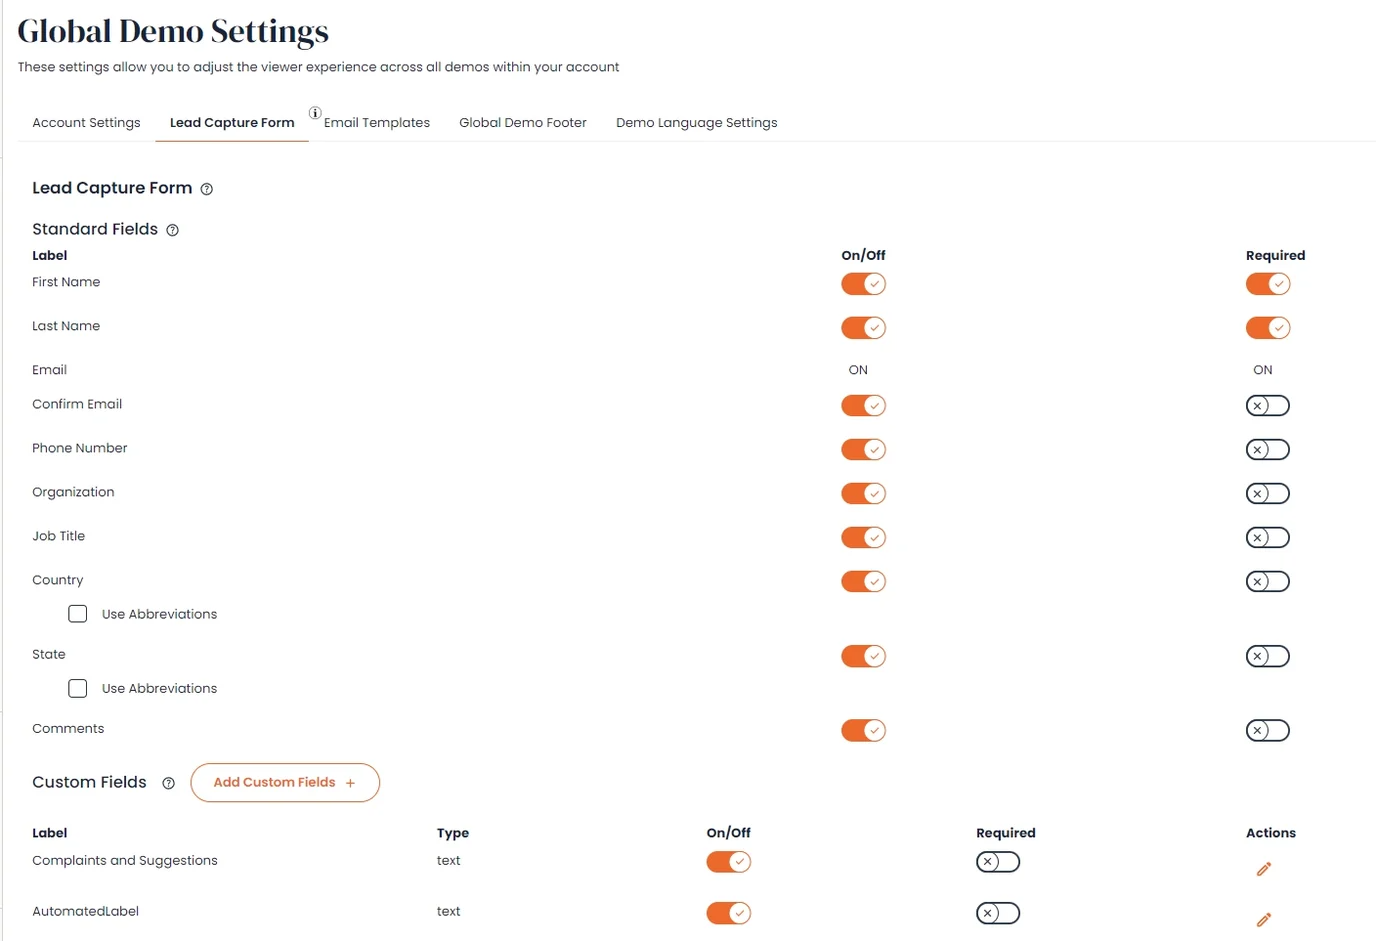 Global Demo Settings
5. Now we will create the form handler. Go to Marketing > Forms > Form Handlers
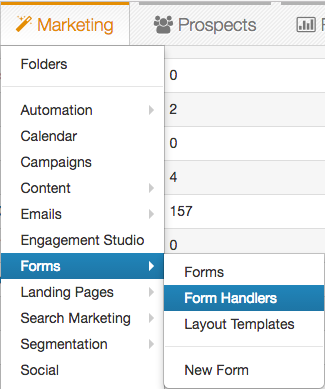 Marketing >Forms > Form Handlers
6. Click on the Add Form Handler button
 Add Form Handler
7. Fill out the required fields and select the Kiosk/Data Entry Mode checkbox
 Kiosk/Data Entry Mode
8. Now scroll down to the Form Fields section and click the Add New Field button
 Add New Field
9. We will add the new field to the form handler for the first name. Make sure the External Field Name matches the Label you are sending from Consensus.
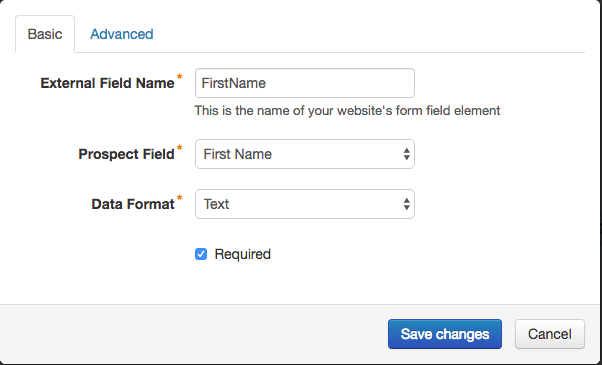 External Field Name
10. Repeat this process until all of the fields in your demo's lead capture form match your Pardot form handler
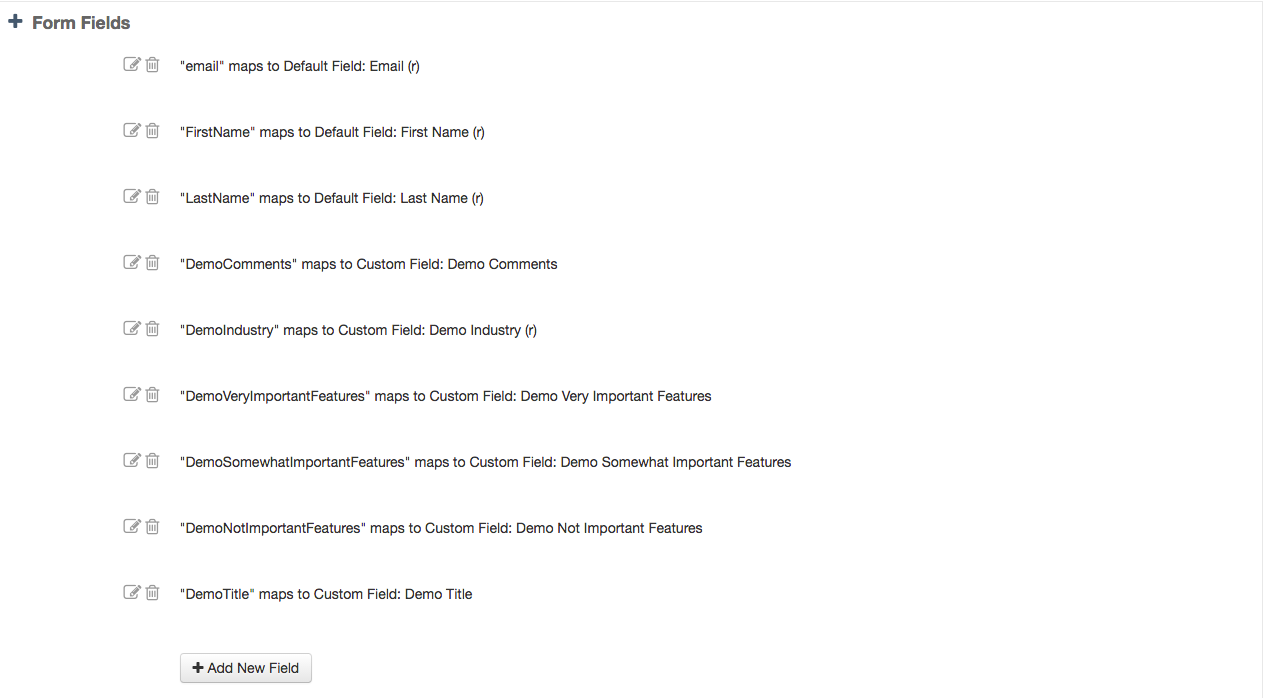 Repeat the process
Note: The only fields required in the Pardot form are also required on your demo's lead capture form. This is important to note because if you require a field in Pardot that is not required on your demo's lead capture form the lead may not be created in Pardot.
 Form fields
11. Click the Save form handler button
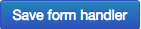 Save form handler
12. Go to the Endpoint URL section of the summary and click the https button
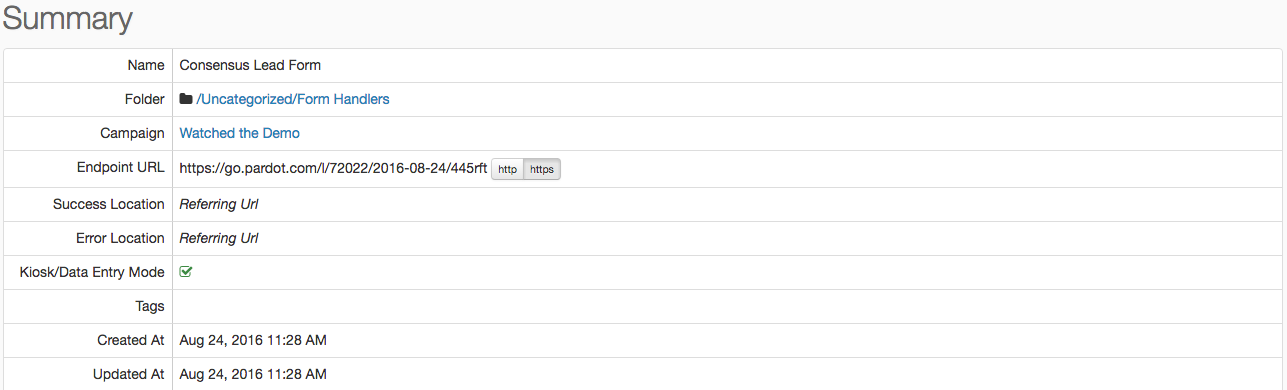 Summary
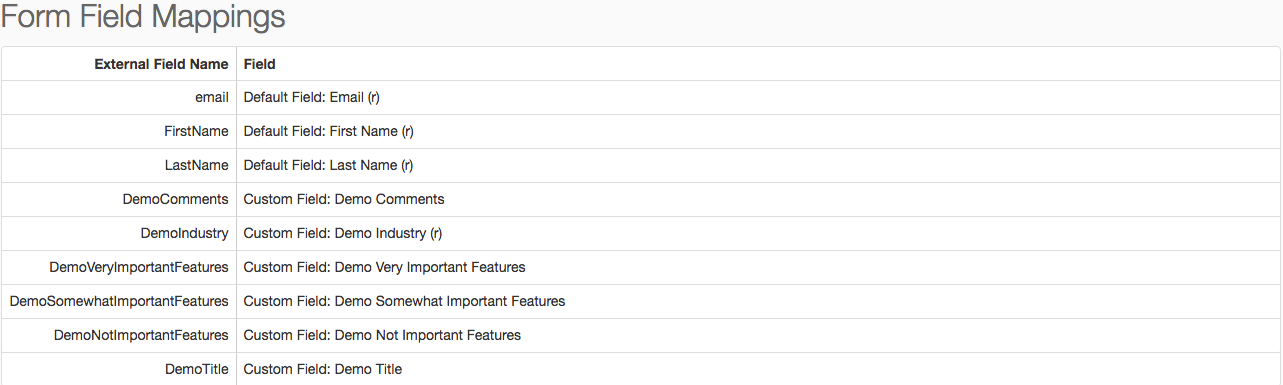
Note: Here is the summary view for the Form Field Mappings. Your mappings might look different depending on the naming convention you followed and if you added additional custom fields.
Important! the External Field Name is what will need to match on the web-to-lead field mappings inside of Consensus.
 Form Fiels Mapping
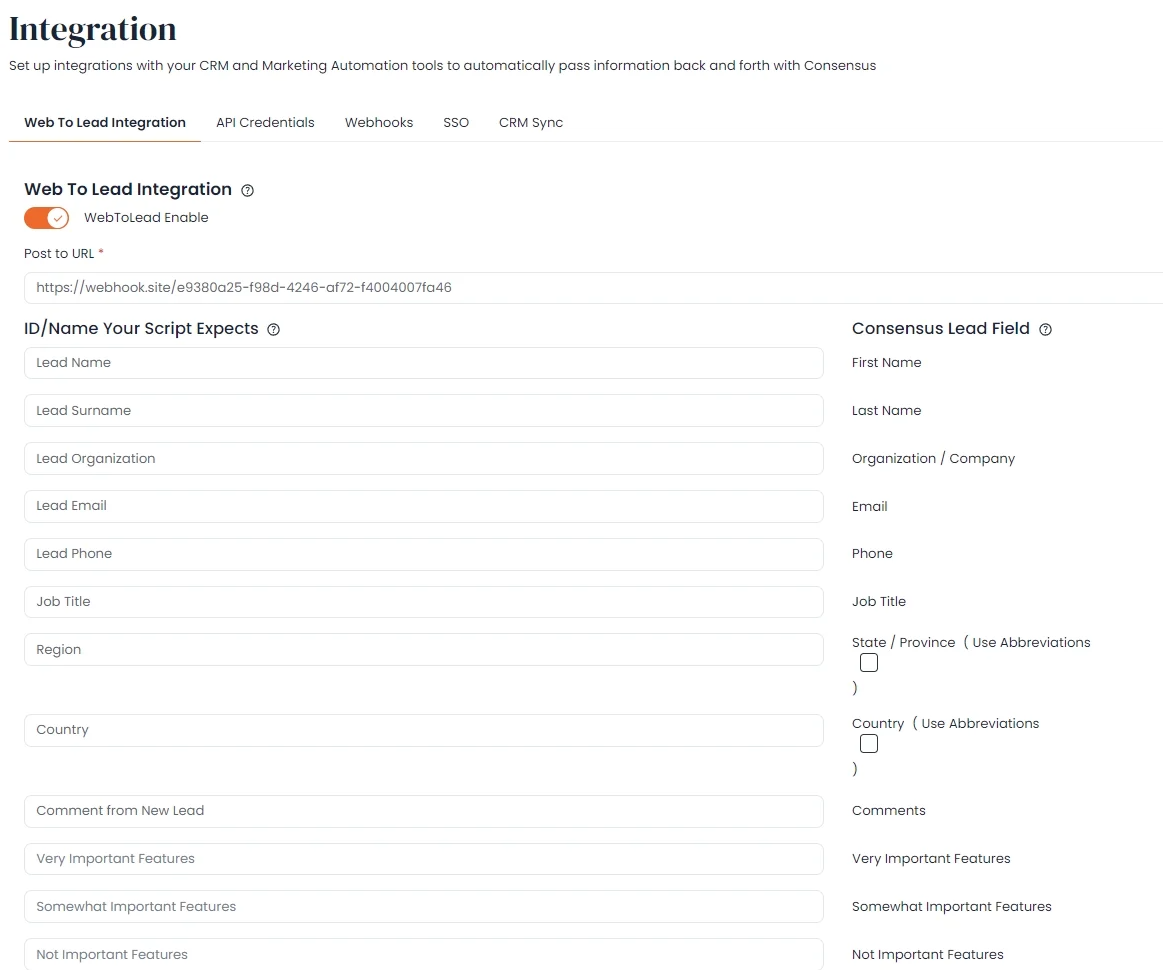
13. Go to web-to-lead tab on Consensus and enter the Endpoint URL from the summary in the Post to URL input field
 Post to URL
14. Now populate the ID/Name inputs in the web-to-lead tab on Consensus and match them to the External Field Name in the Form Field Mappings summary from Pardot. Note that the email field is lowercase "email" because it's a predefined field in Pardot.
 Populate the ID name
Important! the External Field Name is what will need to match on the web-to-lead field mappings inside of Consensus. Below is an example of how they need to match.
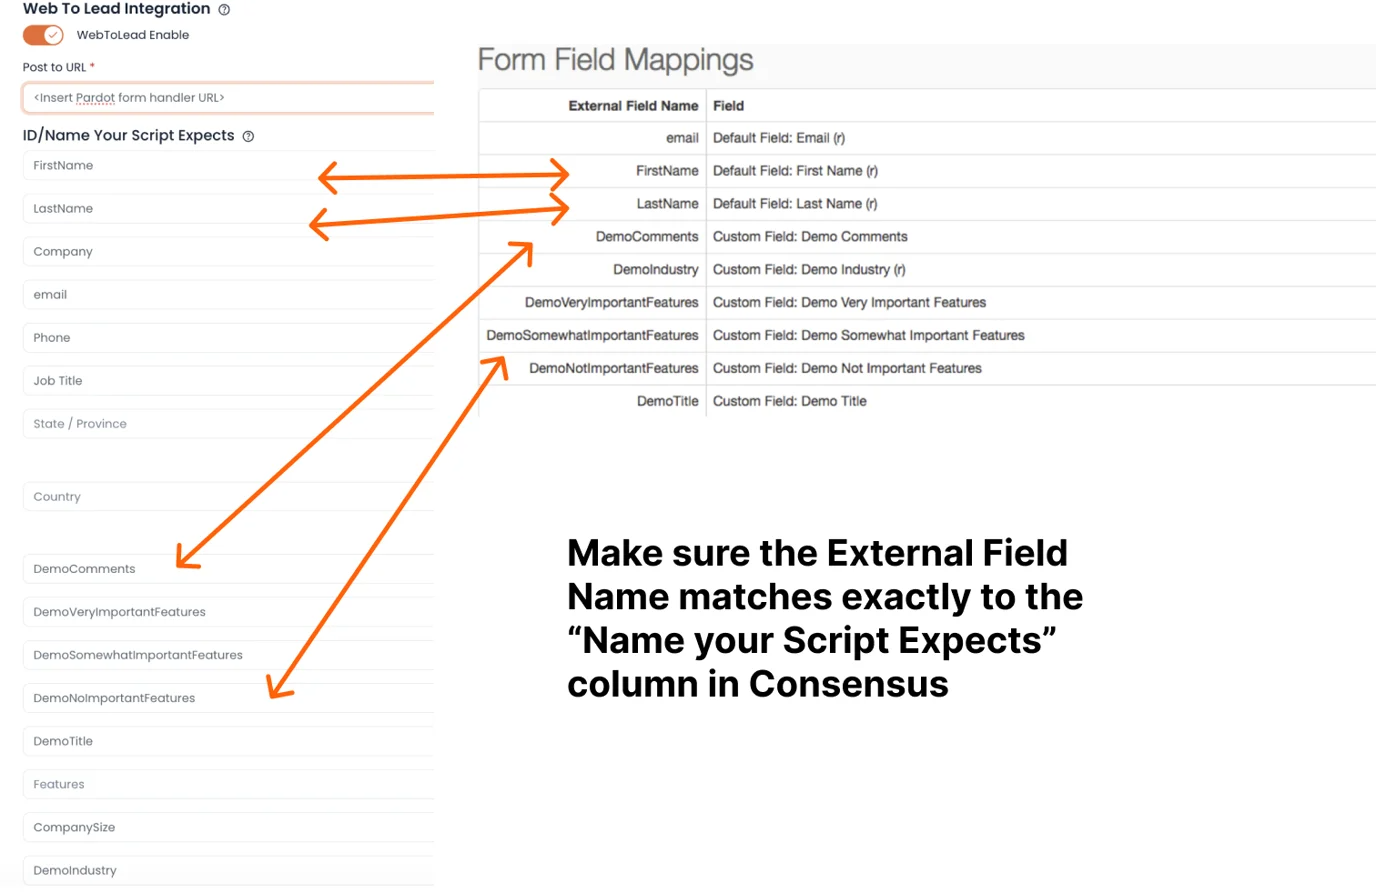 Make sure the External Field Name matches exactly to the “Name your Scripts Expects” column in Consensus
15. Click the Save button and follow the directions for creating a test lead
All done! You should now have all new leads created on the Consensus platform being pushed into your instance of Pardot.