
Table:
Overview
To send a demo through Snap you'll need to log in to Snap using the same credentials you use in the main Consensus Platform. If you can't remember your password, you can reset it here
For this walkthrough, we'll cover sending existing demos that you already uploaded to your Consensus Platform. If you'd like to know how to record your own personal video using Snap, please see Recording a Personal Video with Snap
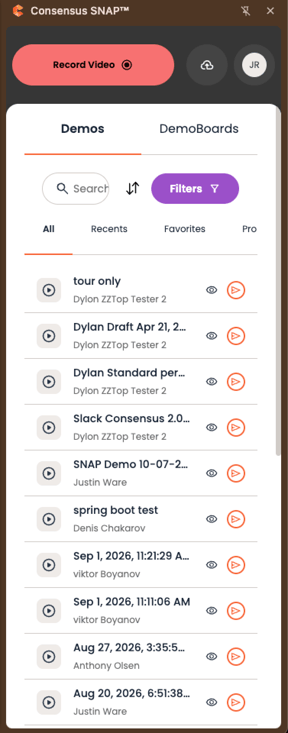
Snap home page, select demos and click Share to start a DemoBoard
The Snap home page gives you a quick overview of all Demos you have access to
Update your extension
The new sharing flow is available in the latest version of the Snap extension. Make sure your extension is up to date before you get started
Optionally, you can connect your Gmail account from Integrations → Gmail. Once connected, you can search your Gmail contacts when adding recipients
Sharing a demo now takes three steps: pick demos, add recipients, then create and share
Step 1: Choose demo(s) to send
There is no Create DemoBoard button. You start from the home page by selecting the demos you want to share
- Open the Snap home page
- Select one or more demos. A green checkmark shows which demos are selected
- Click the Share button
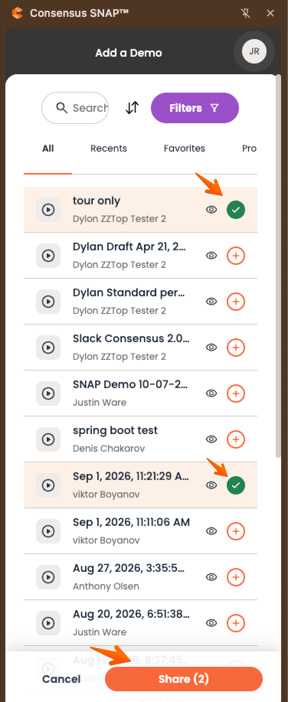
Select your demos, then click Share
To find the right demo faster, use the Recents tab to filter and sort your recently used demos
You can also add content from here:
- Record a new video. See Recording a Personal Video with Snap
- Upload an existing video from your local storage
- Add a Demo from your Demo Library
Step 2: Add recipients
Next, add the people you want to send the DemoBoard to
- If your Gmail integration is connected, search and choose recipients from your Gmail contacts
- If Gmail is not connected, choose from a list of recipients you have added before
To update a recipient, click their name. A window opens where you can edit their email, name and job title
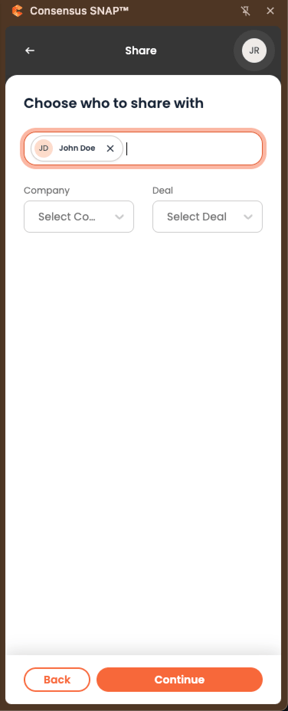
Snap recipients page
The Organization, Subtitle and DemoBoard Name fields are no longer on this page. You can set the name and subtitle in the next step. The Organization field has been removed
Step 3: Review and create your DemoBoard
The final step shows a preview of your DemoBoard. Everything in the preview is editable, so you can check it over and make changes before anything is sent
- DemoBoard Name
- Thumbnail
- Demos
- Recipients
- Personal Intro Video (PIV)
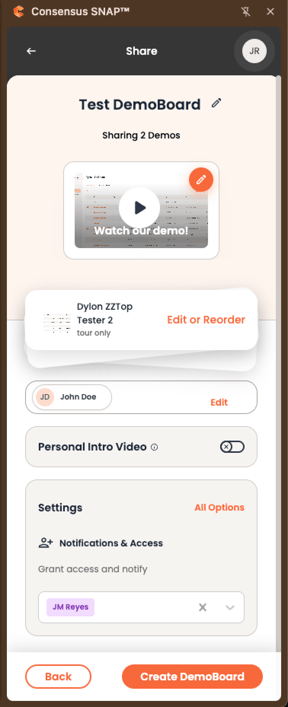
Snap DemoBoard preview
For the PIV, you can:
- Record a new default intro video or use one you have recorded in the past
- Create a custom intro video to personalize the demo for your prospect
- Have no intro video
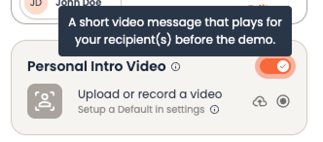
PIV
Click All Options to load additional settings:
- Add other users to get notifications when the recipient has viewed or shared your Demo
- Change the contact info to show if you are sending on behalf of someone else (they need to be in the Notifications & Access section to show their contact info)
- Enable two factor authentication, which sends the recipient a passcode by email that they need to enter before watching the content
- Enable no view notifications to get notified if the recipient hasn't watched it after X days, up to 10 times
- Set an expiration in days, in case the demo contains sensitive or time sensitive information that shouldn't be shared after X days
- Set viewer access
- Mark the DemoBoard as a Test so that no analytics are captured for it
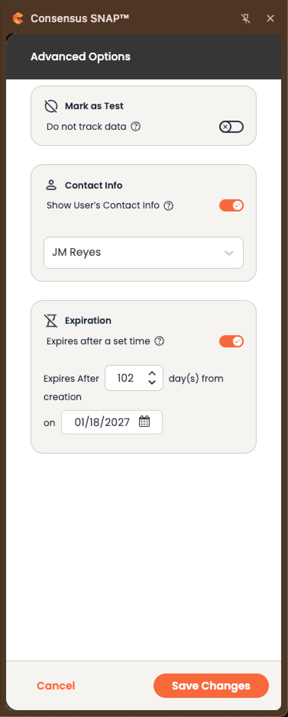
Advanced Options
When you are happy with your setup, click Create DemoBoard
Share your DemoBoard
After the DemoBoard is created, choose how you want to share it:
- Copy link to paste into your email or other tool
- Insert thumbnail or button to add a thumbnail or button link into your email (if you use Seismic, this option is Save to workspace)
- Send to open an email prefilled with your DemoBoard in your mail client. Gmail is currently the only supported mail client
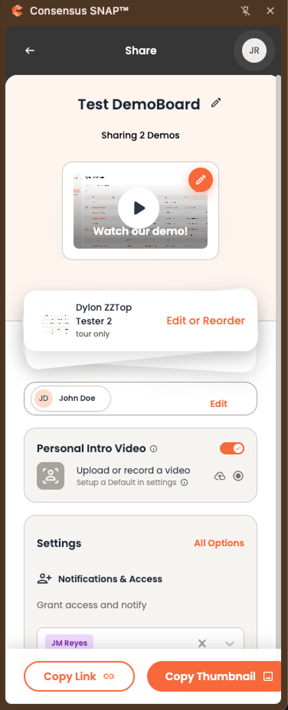
Snap DemoBoard share options
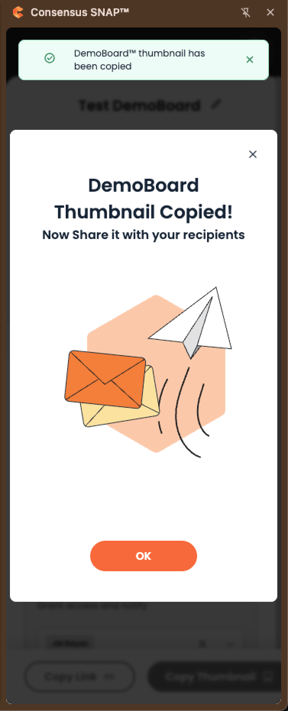
Success message
We recommend using the thumbnail link, but try them all and see which one gives you the best response
Sending from Gmail
If your company uses Gmail, Snap appears in your Gmail account when you compose an email. If you use the Snap Chrome extension to send, you don't need to open Gmail at all
DemoBoards Section
Another way to share a DemoBoard is from the DemoBoards section. There you will find a list of all active DemoBoards ordered by date (descending)
To share a DemoBoard, click the three dots on the side → Share As and choose how you want to share it. The options are the same as above
Demo Section
The Demo section organizes your content in the following tabs:
- All Demos displays a list of all Demos you have access to
- Favorites displays a list of your Favorite Demos
- Recents shows the most recently used Demos. You can filter and sort this list
- Promoted gives you quick access to the Promoted Demos from your Organization
To make it easier to find the right Demo you can:
- Search for a Demo
- Apply filters. For more information, see the Demo Filters in Snap article
- Load the Demo in Preview Mode by clicking the preview button (eye icon)
To send a Demo from here, select it and click Share. You will land on the recipients step with that Demo already added
Frequently Asked Questions
Can I still use all the options from the old flow?
Yes. Everything is still available, but most options now live in the DemoBoard preview at the final step. The only thing removed is the Organization field, which is separate from the CRM Account and Opportunity
Why can't I see my Gmail contacts?
Contact search needs the Gmail integration. Connect your account from Integrations → Gmail. Without it, you can still choose from recipients you have added before
Can I send from Outlook?
Not yet. The Send option currently supports Gmail only. You can still use Copy link or Insert thumbnail/button with any email tool
Where did the Create DemoBoard button go?
Select your demos on the home page and click Share