Set up SAML 2.0 SSO for Consensus
Consensus supports SAML 2.0 SSO with any compliant identity provider — Okta, Azure AD / Entra ID, OneLogin, Ping, Google Workspace, ADFS, JumpCloud, etc. This article covers the generic SAML 2.0 setup flow. For provider-specific walkthroughs (Okta, Azure, Entra ID), see those dedicated articles.
What you need from your IdP
- A way to create a new SAML application.
- Admin rights to assign users to applications.
- An IdP-side metadata URL or X.509 certificate / signing key to export.
What you need from Consensus
Settings → Integrations → SSO (contact your CSM if you don't see this tab). From the SSO Settings page, copy:
- Entity ID — paste into your IdP's Audience URI / SP Identifier.
- Single Sign On URL — paste into your IdP's ACS URL / Reply URL / Single Sign-on URL.

Consensus SSO Settings — Entity ID and Single Sign On URL fields.
On the IdP side
- Create a new SAML 2.0 application.
- Name it Consensus.
- Paste Consensus's Entity ID into the Audience URI field.
- Paste Consensus's Single Sign On URL into the ACS URL / Reply URL field.
- Configure NameID format — typically Email Address.
- Save and copy the IdP-side metadata URL or download the SAML metadata XML.
Back in Consensus
- Paste the IdP-side metadata URL into IDP Metadata URL.
- Leave Authentication service URL blank unless your IdP specifically requires it.
- Save.
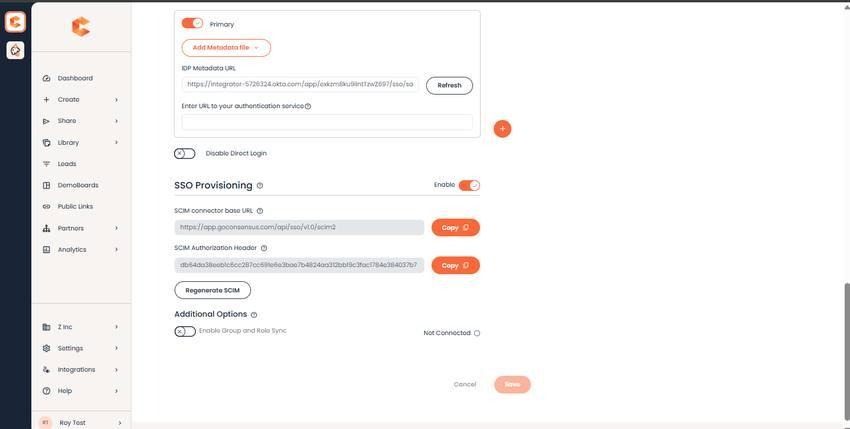
SSO Settings bottom — IDP Metadata URL field.
Final step: user assignment
In your IdP, assign users (or groups of users) to the Consensus application. Without assignment, the SSO sign-in flow will reject them.
Test sign-in
After saving, ask a non-admin test user to sign in via SSO. The flow: they hit your Consensus login page, click Sign in with SSO, are bounced to your IdP for authentication, then redirected back to Consensus with a session.