Consensus is a powerful platform to house all of your video content whether it is a demo we create or a single video you’ve created in-house. Consensus allows you to take advantage of insightful analytics and full demo player functionality with all of your content.
You can upload a video to the Consensus platform by going to Create > Single Experience:

- STEP 1: Demo Info
- STEP 2: Demo Style Settings
- STEP 3: Demo Content
- STEP 4: Stakeholder Actions
- STEP 5: Additional Interactions
- STEP 6: Finalize
- Publishing Your Demo
STEP 1: Demo Info
In the first step, you'll be able to add the Internal and External (client-facing) Titles for the demo. The Description is optional and can be used to add elements that are searchable within the Demo Library and other Demo dropdowns

STEP 2: Demo Style Settings
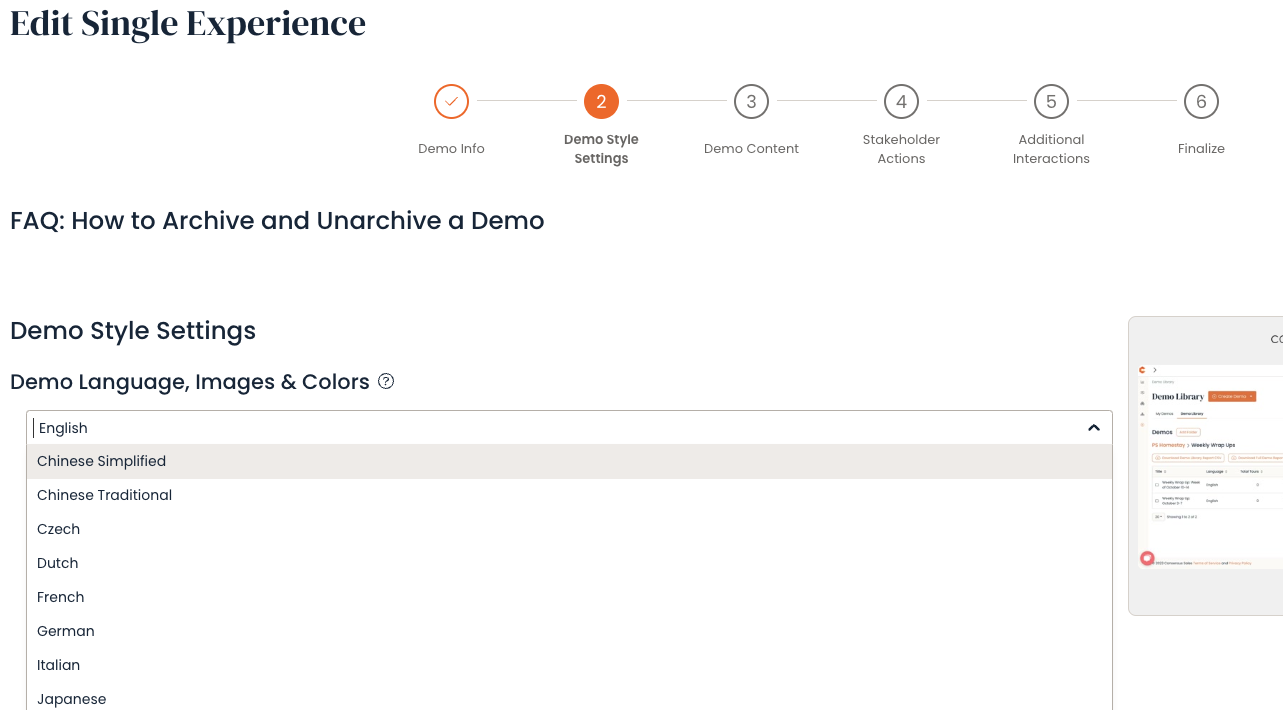
In Step 2, you'll choose the language of the demoplayer, for which we currently support the following:
- English
- Chinese Simplified
- Chinese Traditional
- Czech
- Danish
- Dutch
- Finnish
- French
- German
- Italian
- Japanese
- Korean
- Norwegian
- Polish
- Portuguese
- Russian
- Spanish
- Swedish
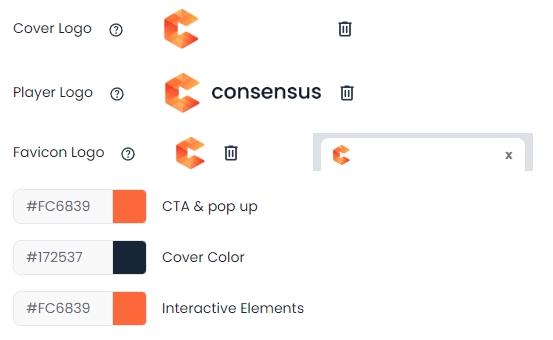
Next, add your logo, favicon, and set what colors you want to use for the demoplayer. Learn more about Demo Style Settings here.
Finally, within the Contact Info section, you'll add a general company phone number, email, and links to your company's social media channels (optional).

STEP 3: Demo Content

In Step 3 you'll upload the video and related documents for your Demo. Note that you can also add Tours to help enhance your Single Video Experience.
NOTE* You can add multiple Related Docs to your Demo
STEP 4: Stakeholder Actions
In Step 4, you'll be able to choose where the Share Prompt will populate within a Sales DemoBoard. You'll also be able to choose whether to enable BuyerBoard for this demo. If you're interested in learning more about the BuyerBoard, see our article here.

STEP 5: Additional Interactions

Step 5 allows you to choose where the Lead Collection Form will appear for the public versions of your demo (on your website or on your social media channels). For Single Experiences, we recommend placing the Lead Collection Form at the end of the demo.

You'll also be able to choose whether to have Call to Action buttons appear on the demplayer. You can have up to four different CTA's on the demoplayer (along with the "Invite Others" CTA if you're sending Sales demos).

NOTE* The "Invite Others" Call to Action is automatically added to DemoBoard (Sales) links you create with your Demos
NOTE** Call to Actions linked to the Consensus Lead Capture Form will NOT show within the DemoBoard (Sales) links you create with your Demos
Examples of what these CTA's look like on a DemoBoard:

STEP 6: Finalize

In the final step, you'll be able to add your details for Demo IDs, Demo Tags, as well as set the Demo Access for your Single Experience Demo.
- Demo Access
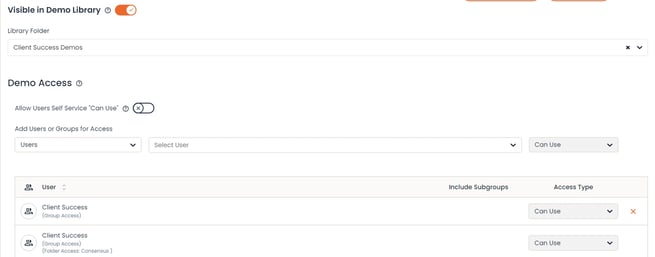
- Visible in Demo Library - Allow Users to preview and request access to this Demo by placing it within your Demo Library
- Demo Access
- Self Service "Can Use" - allow your Users to automatically gain "Can Use" access to demos when they request it within the Demo Library. This limits them to only create DemoBoards or get the Public Link to your Demo based on their User Role and permissions
- User/Group Access - Grant access to Users and set what level of access you want those Users/Groups to have
Learn more about Consensus Roles and Permissions here
Publishing Your Demo

Once you have everything set for your Demo, publishing it allows it to be used. This allows you to get everything set up for your Demo and then set it live by Publishing it. Users won't be able to create DemoBoards or get Public/Marketing links to your Demo if it is not published.
This can also serve as a "kill switch" if you decide you no longer want Viewers to watch your Demo. Unpublishing the demo will send Viewers who navigate to the Demo to the "Demo has expired" page.
That's it! You now have a finished demo. Take advantage of Consensus' powerful demolytics by uploading all of your video content to your Consensus account.