Overview:
SSO provisioning for Okta allows your IDP to become the source of truth for all user information and application licensing.
Configuring the Integration
Step 1: Log in to Consensus and Enable SSO Provisioning
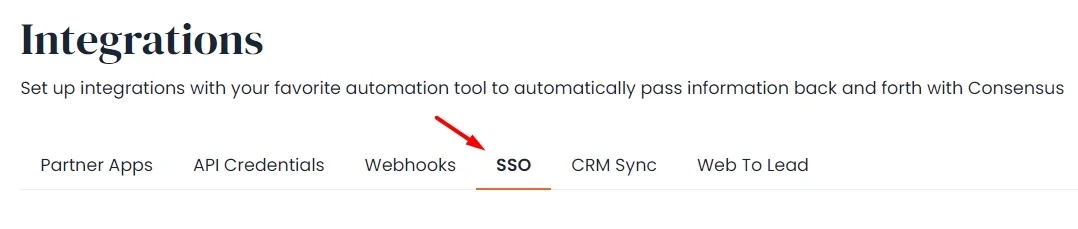
Login to Consensus and then visit the SSO configuration page by clicking the Integrations in the lower left-hand corner, and then navigate to the SSO tab.

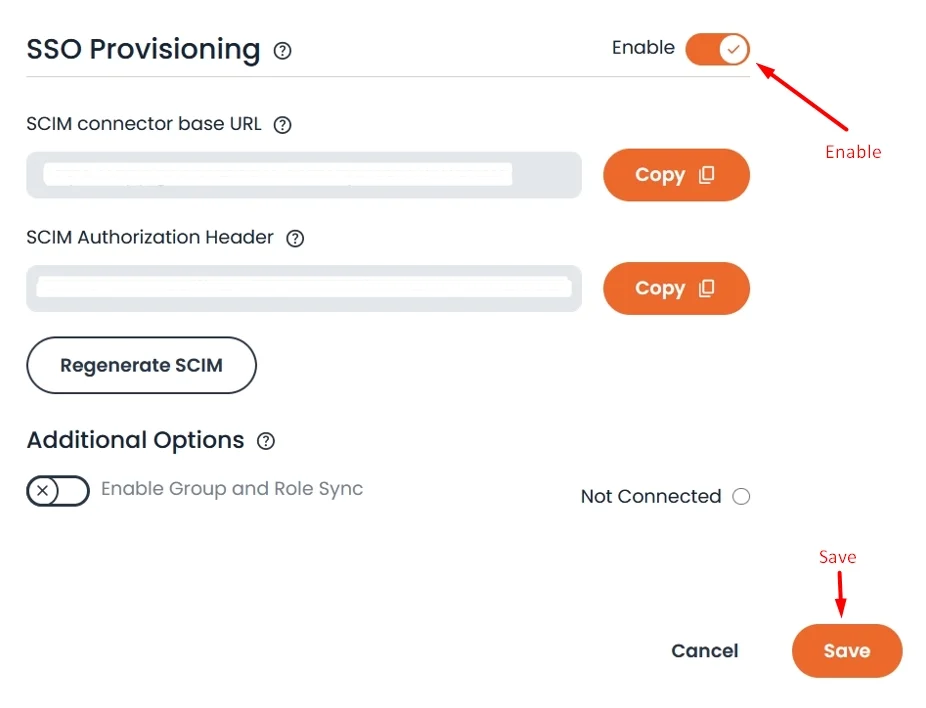
Scroll down the bottom of the page, and you should see a new section available called “SSO Provisioning.” Please "Enable" this toggle to turn on the feature and select "Save" at the bottom of the page.
*Note: If you don't see the SSO Provisioning section on your SSO page, please contact your AE or CSM/Support Team to help enable the feature.
Now, please open up a new tab, and launch Okta before moving to step 2.
Step 2. Log in to Okta and Enable SCIM Provisioning for Consensus Application
If you don’t currently have a Consensus Application installed for use with OKta authentication (SAML 2.0), then you should first follow the steps outline in the article link below:
https://support.goconsensus.com/how-to-set-up-saml-2.0-sso-okta
If you do, then proceed to enable SCIM provisioning in your existing Consensus application.
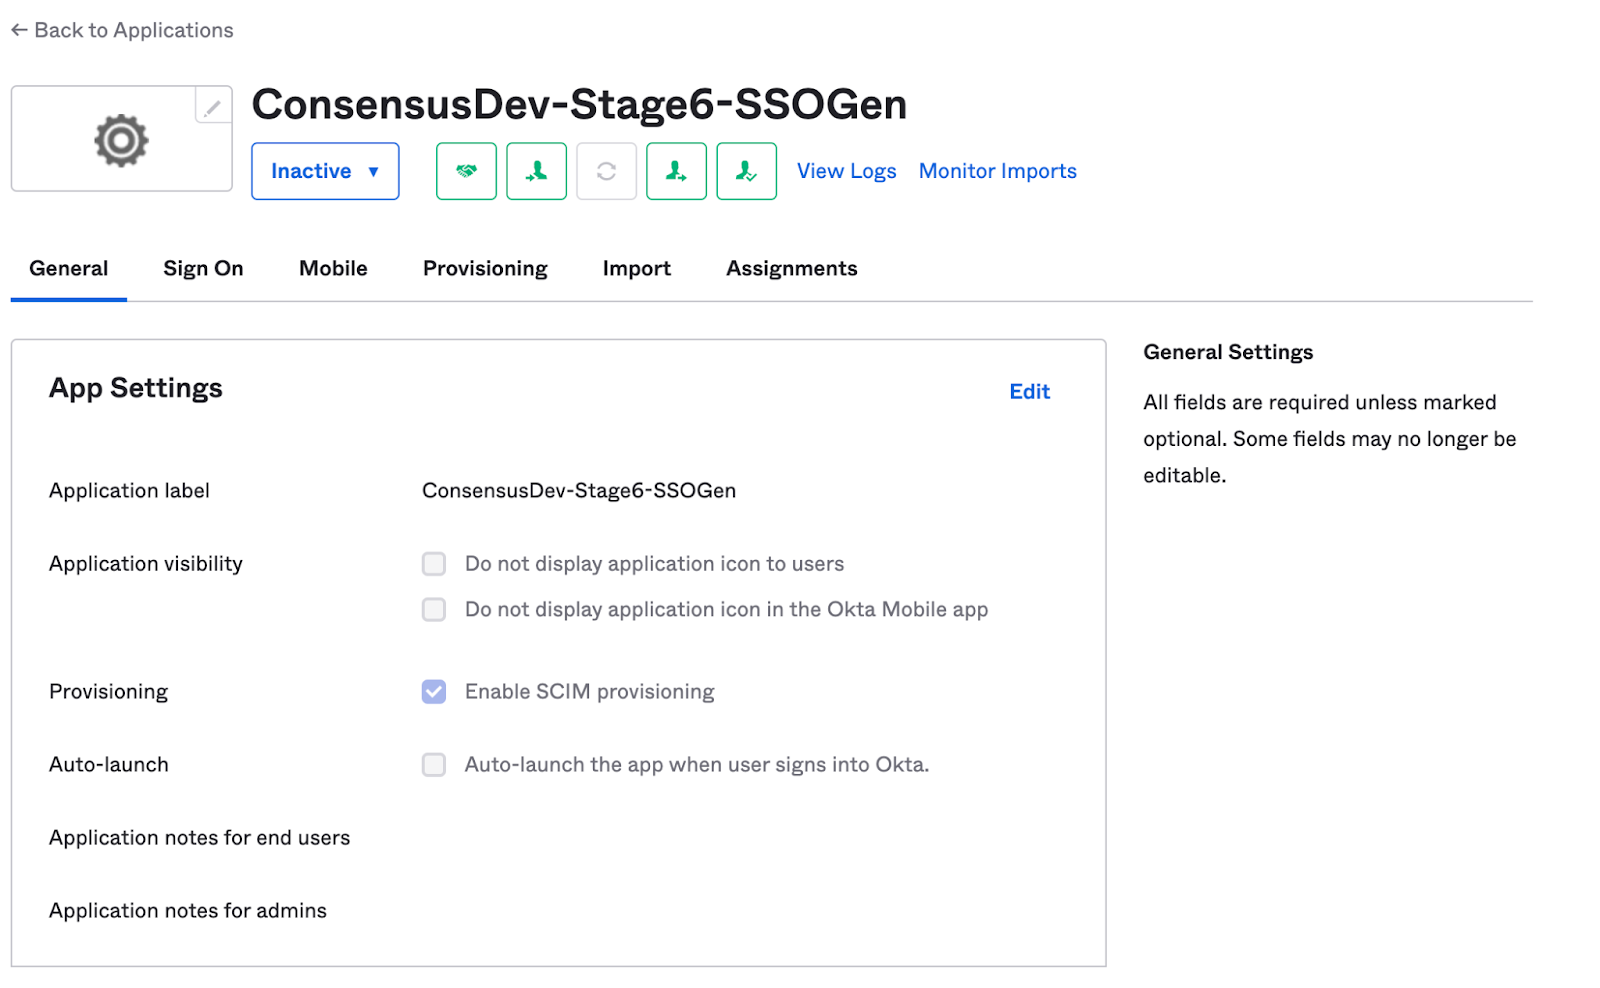
Go to Application “General” settings > Edit > Select checkbox “Enable SCIM Provisioning”
Step 3: Configure SSO Provisioning within Okta
After provisioning is enabled, from Consensus web app go to Settings > Integrations > SSO > scroll down to SSO Provisioning. You will see a SCIM connector base URL and a SCIM Authorization Header.
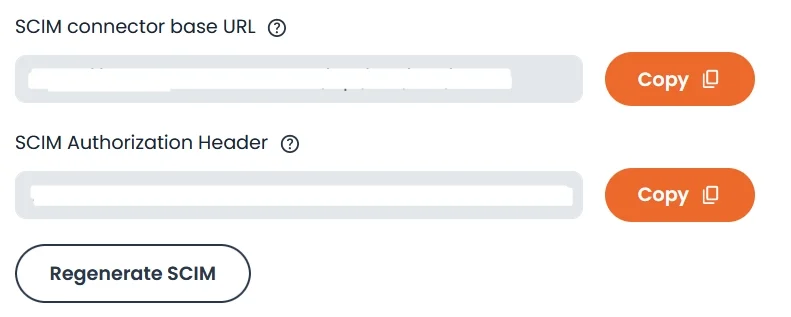
Keep this screen open. Then, go into Okta > Applications > Consensus > Provisioning > click ‘Edit’ and finish setting up the SCIM connection using the keys SCIM connector base URL and Authorization Header values that you obtained from Consensus.
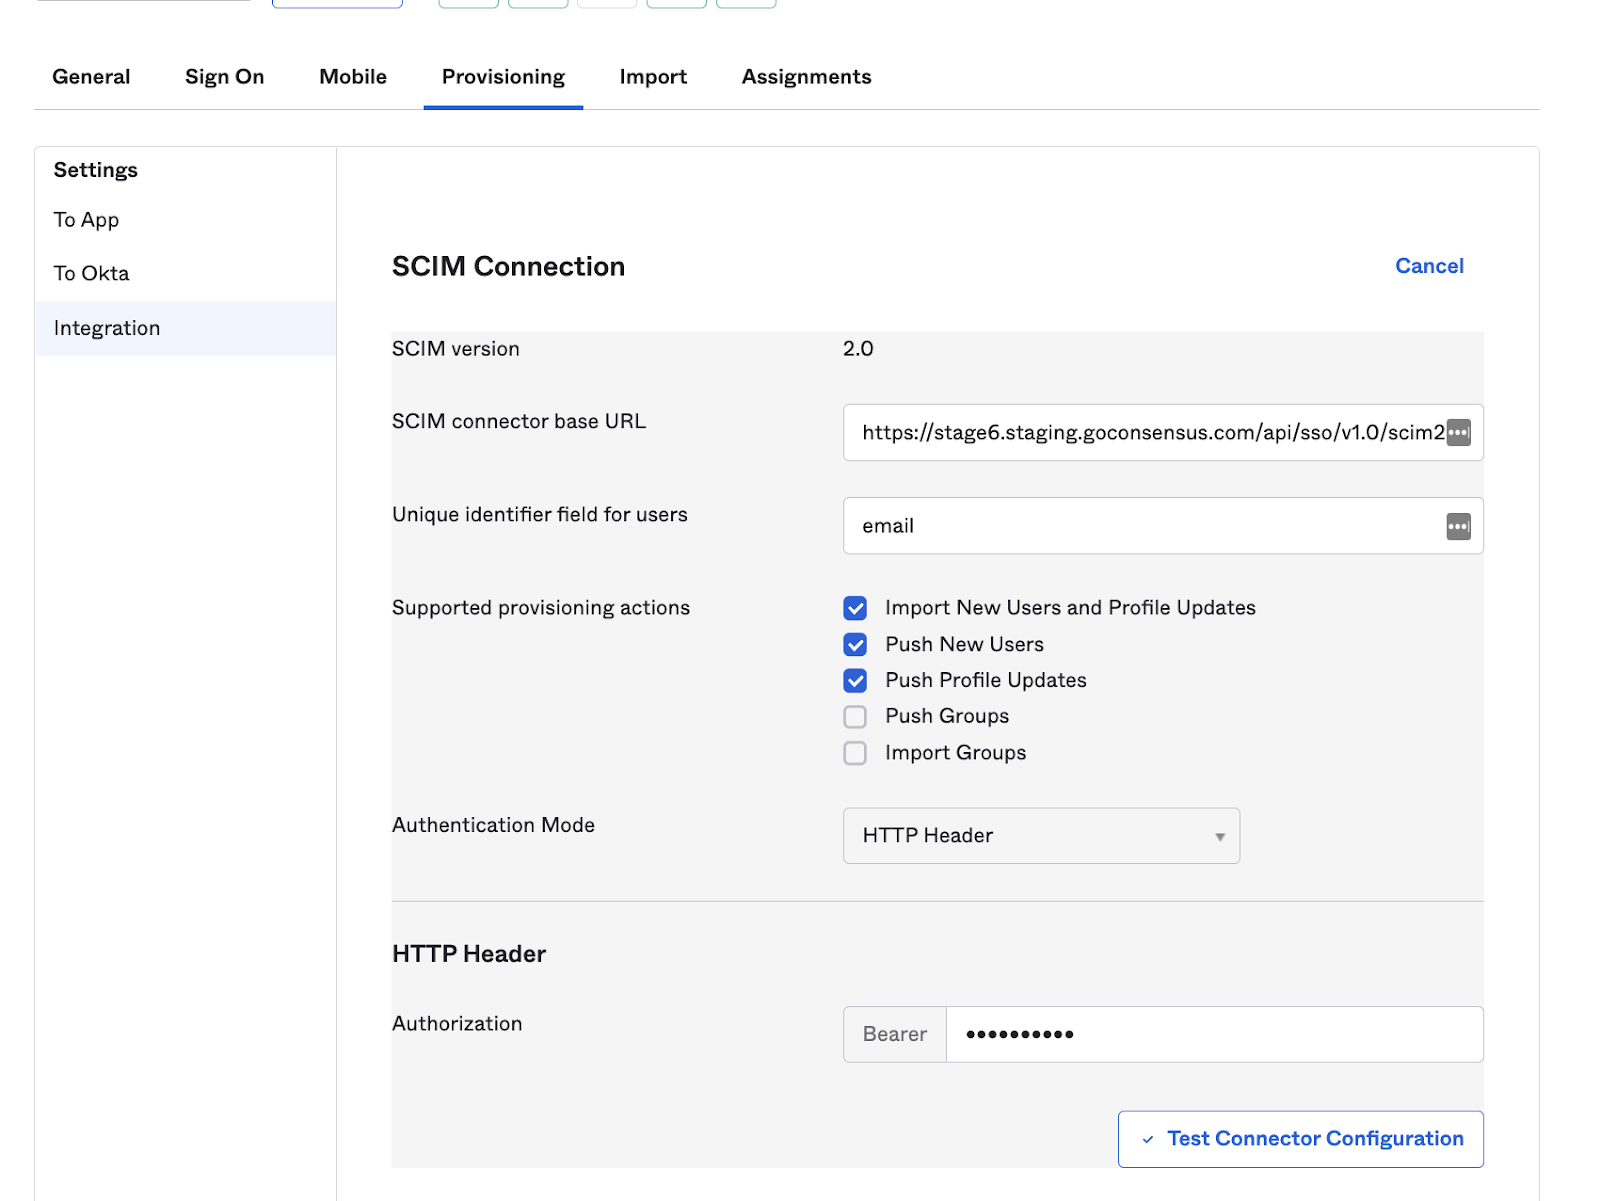
- For SCIM Connector base URL, paste the SCIM Connector base URL value from Consensus.
- For ‘Unique identifier field for users’, insert "email".
- For Supported Provisioning Actions, check the first 3 checkboxes
- Import New Users and Profile Updates
- Push New Users
- Push Profile Update
- For Authentication Mode select HTTP Header
- For Authorization, paset the SCIM Authorization Header value from Consensus.
Additional SCIM Settings:
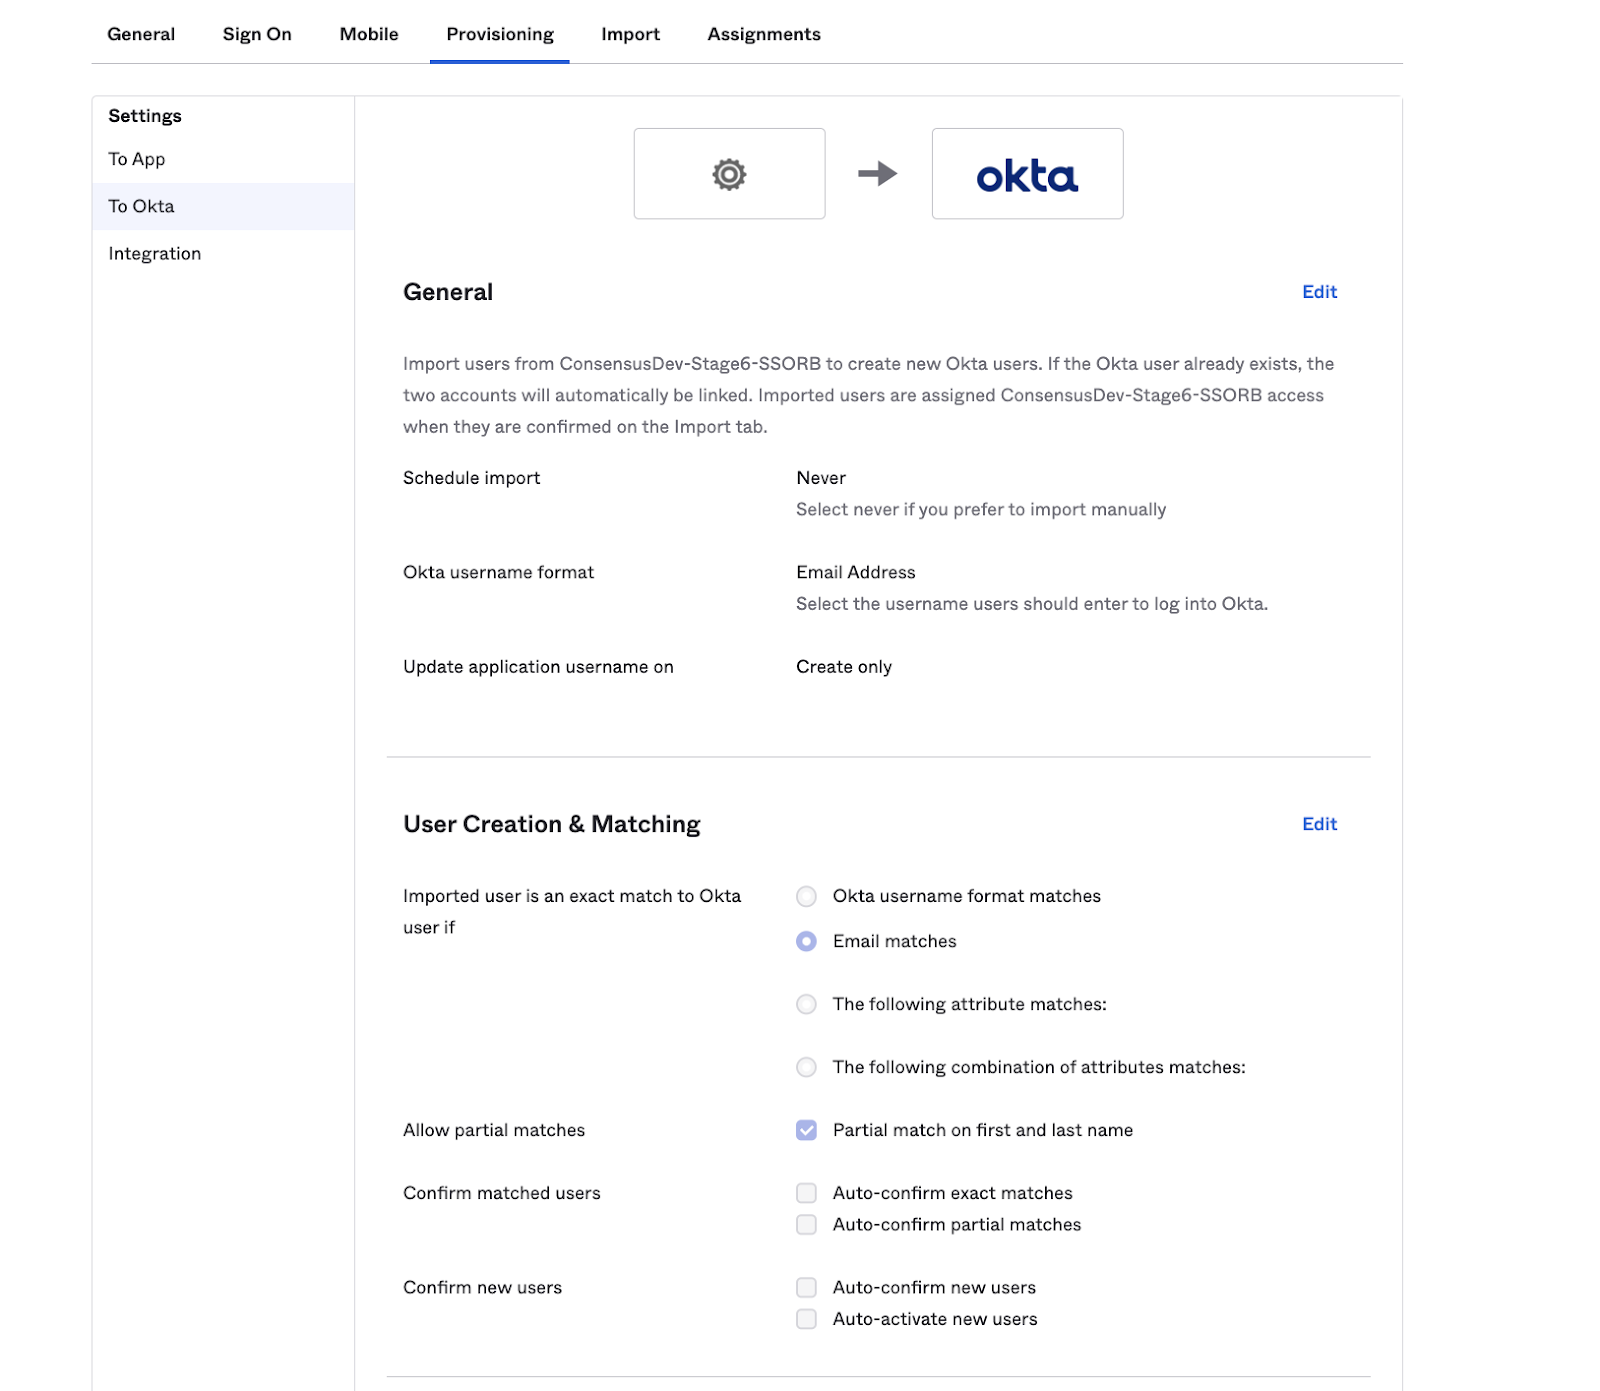
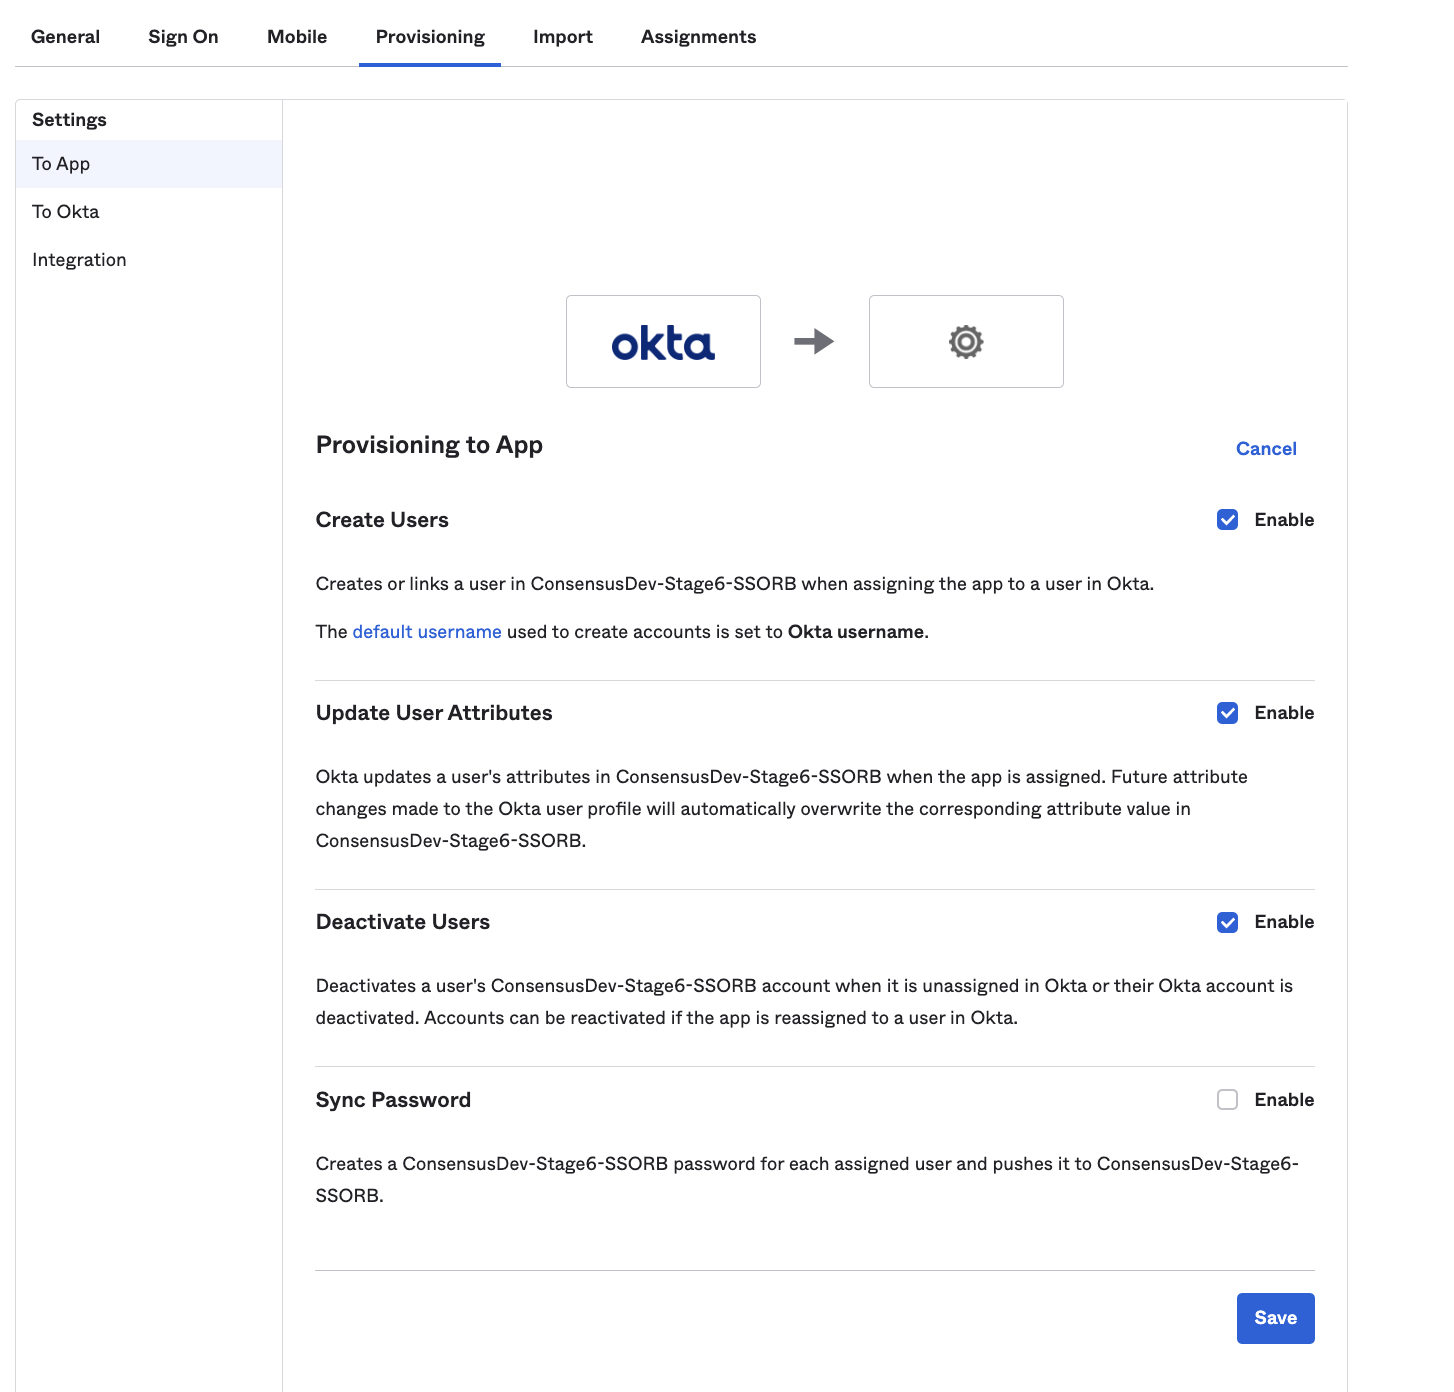
Once you’ve enabled SCIM and setup/tested the connection with Consensus, please make sure you duplicate the below settings for both the “To Okta” and “To App” configuration pages:
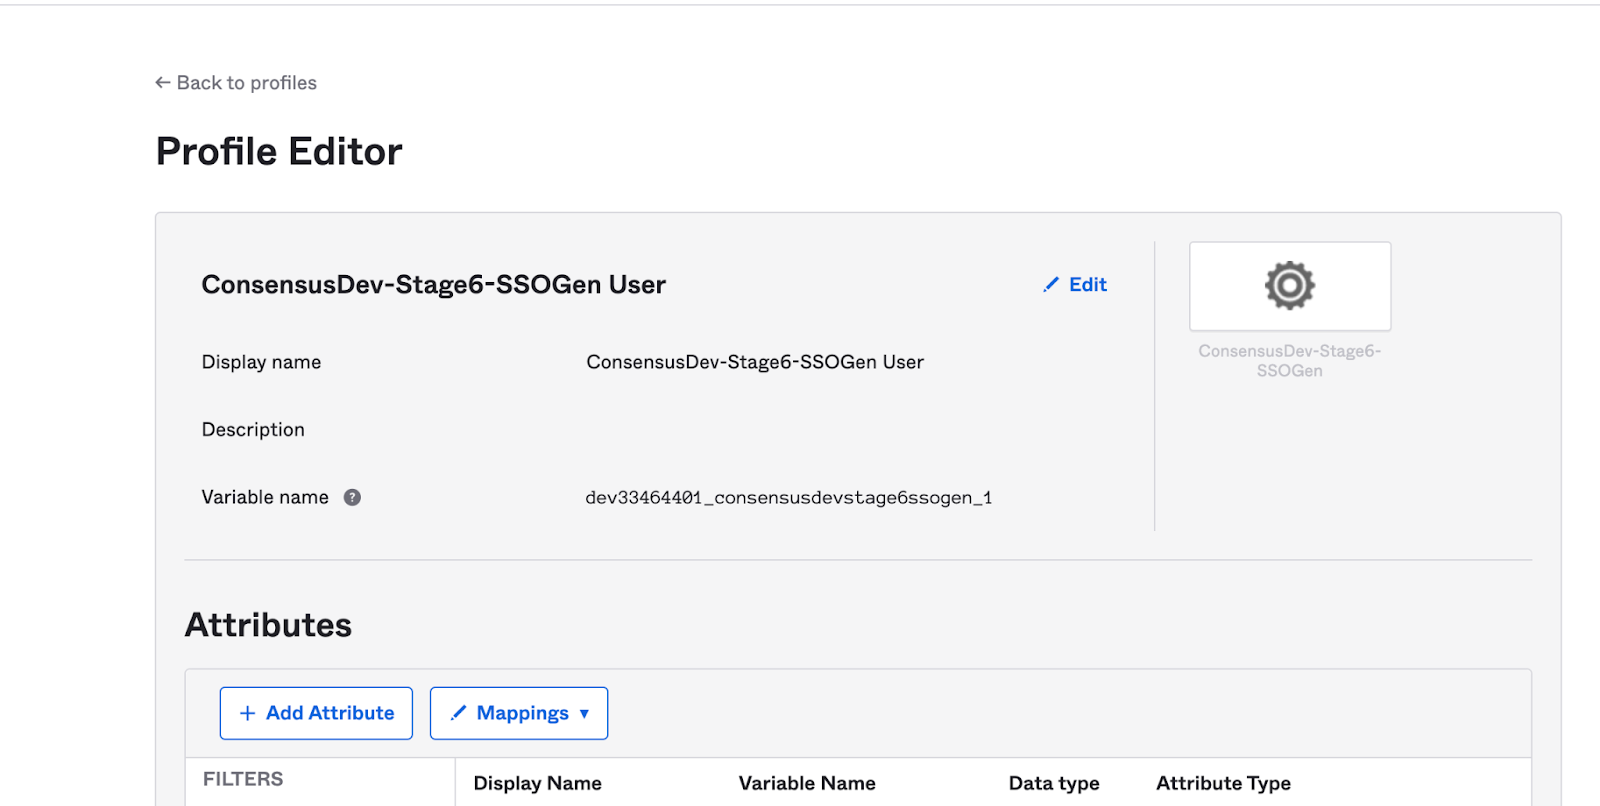
Step 4: Configuring Consensus Group and Role Custom Attributes
After configuring the SCIM connection, you will now need to setup additional Custom Attributes called “Consensus Group” and “Consensus Role(s)” in the Profile Editor as new custom attributes created for the Consensus Application.
Please follow these additional articles to manually set up these attributes with the correct group and role values before proceeding to step 5 and running an import, OR provisioning any users.
Setting up Group Attribute
Setting up Role Attribute
Once you are done with this step, you should see custom attributes for Group and Role.

*Note: If you want to have Consensus manage the group and role values for you automatically, you can follow this article below. It requires you to enable group and role sync from the SSO page in Consensus, and then we use an Okta token to use the Okta API for automatic creation and ongoing management of of the custom attributes and their values.
(Optional) Set up Automatic Group and Role Sync w/ Okta
Step 5: Importing Users from Consensus
After you've set everything up, it is best practice to run an initial import process from Consensus to Okta once you’ve finished setting up the integration.
Visit the “Import” tab from within the Consensus application and select “Import Now.”
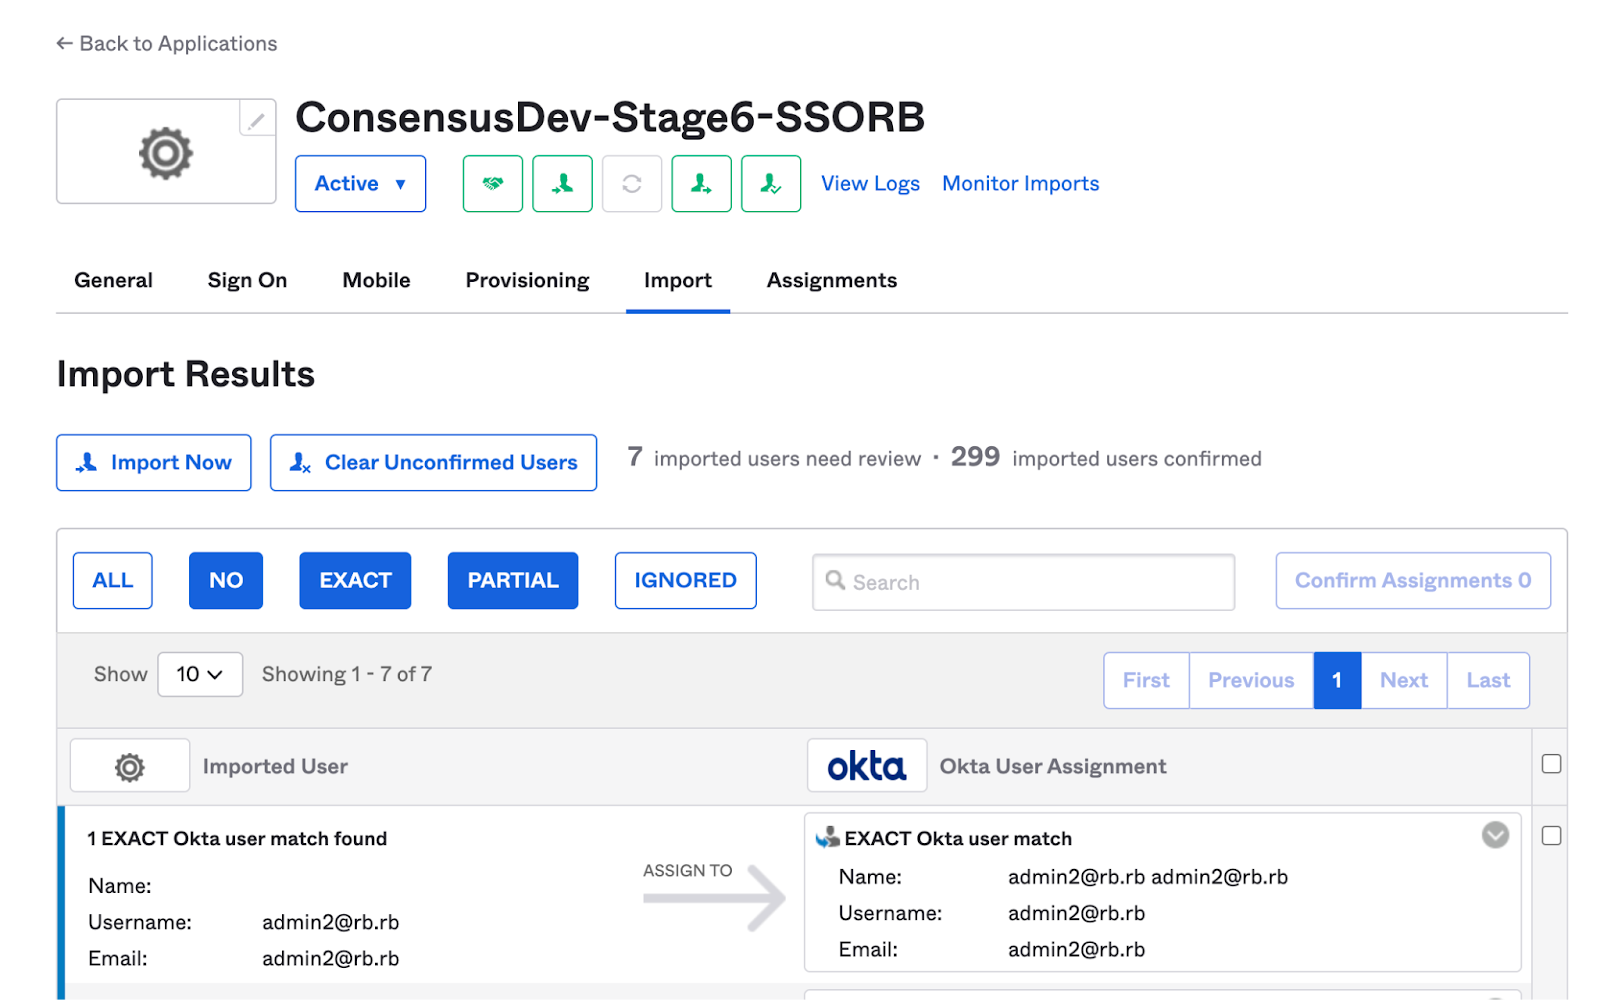
This will import all existing users from your Consensus account and match them using their primary email address to any users/people in your Okta account.
If a user is matched via their email address, they will automatically be assigned to the application and information for assigned Groups and Roles will be populated inside of the custom attributes for the user’s profile.
Managing the Integration
Creating and Updating Users
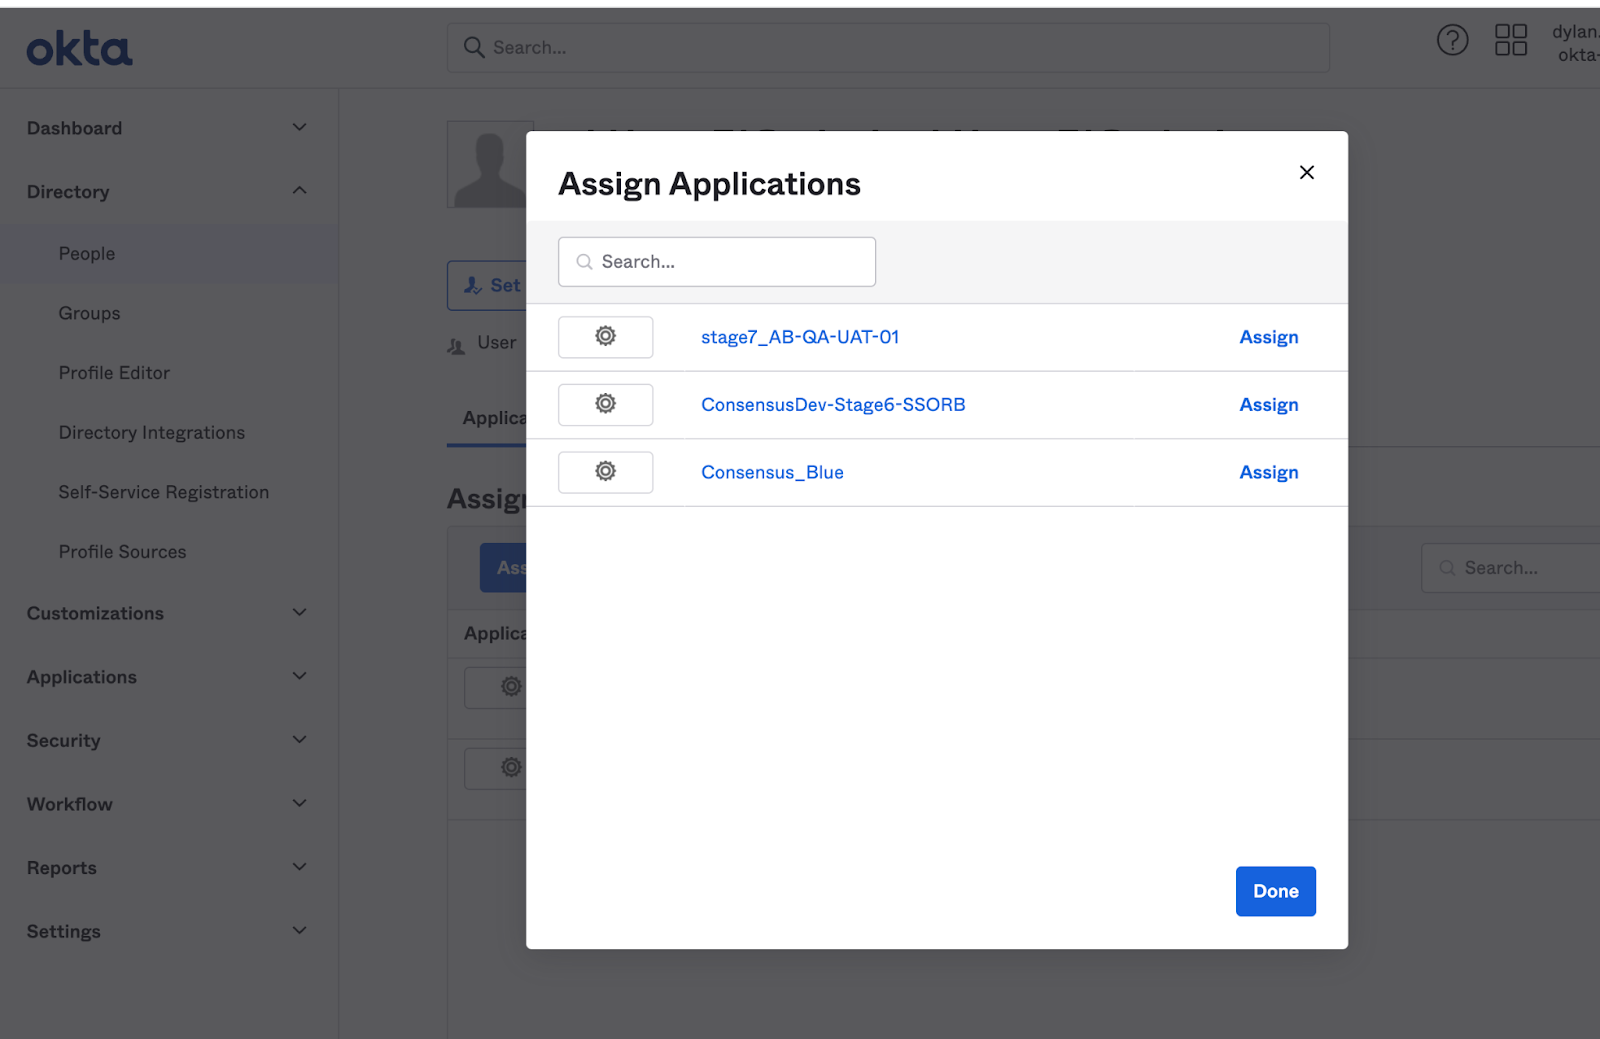
- Once SSO Provisioning in setup and enabled with Consensus, you must make sure that all new users are assigned access to Consensus from within Okta.
- From the user’s profile in Okta, choose “Assign Applications.”
- Choose the Consensus Application
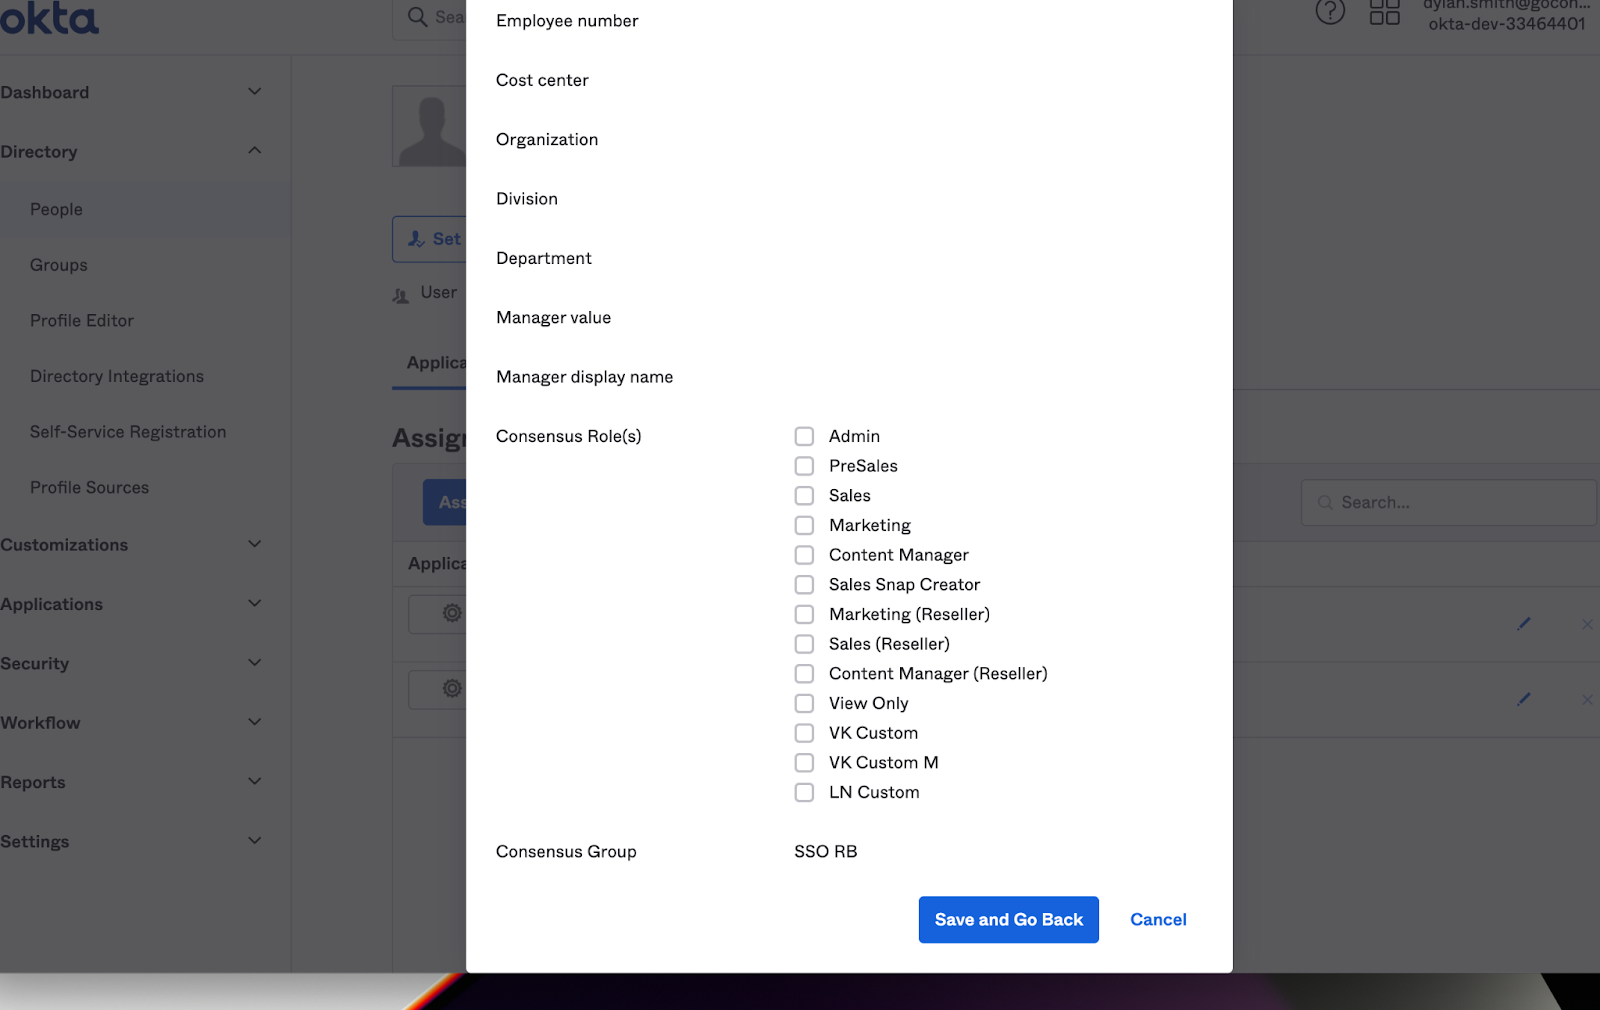
- Assign to proper Role and Group values
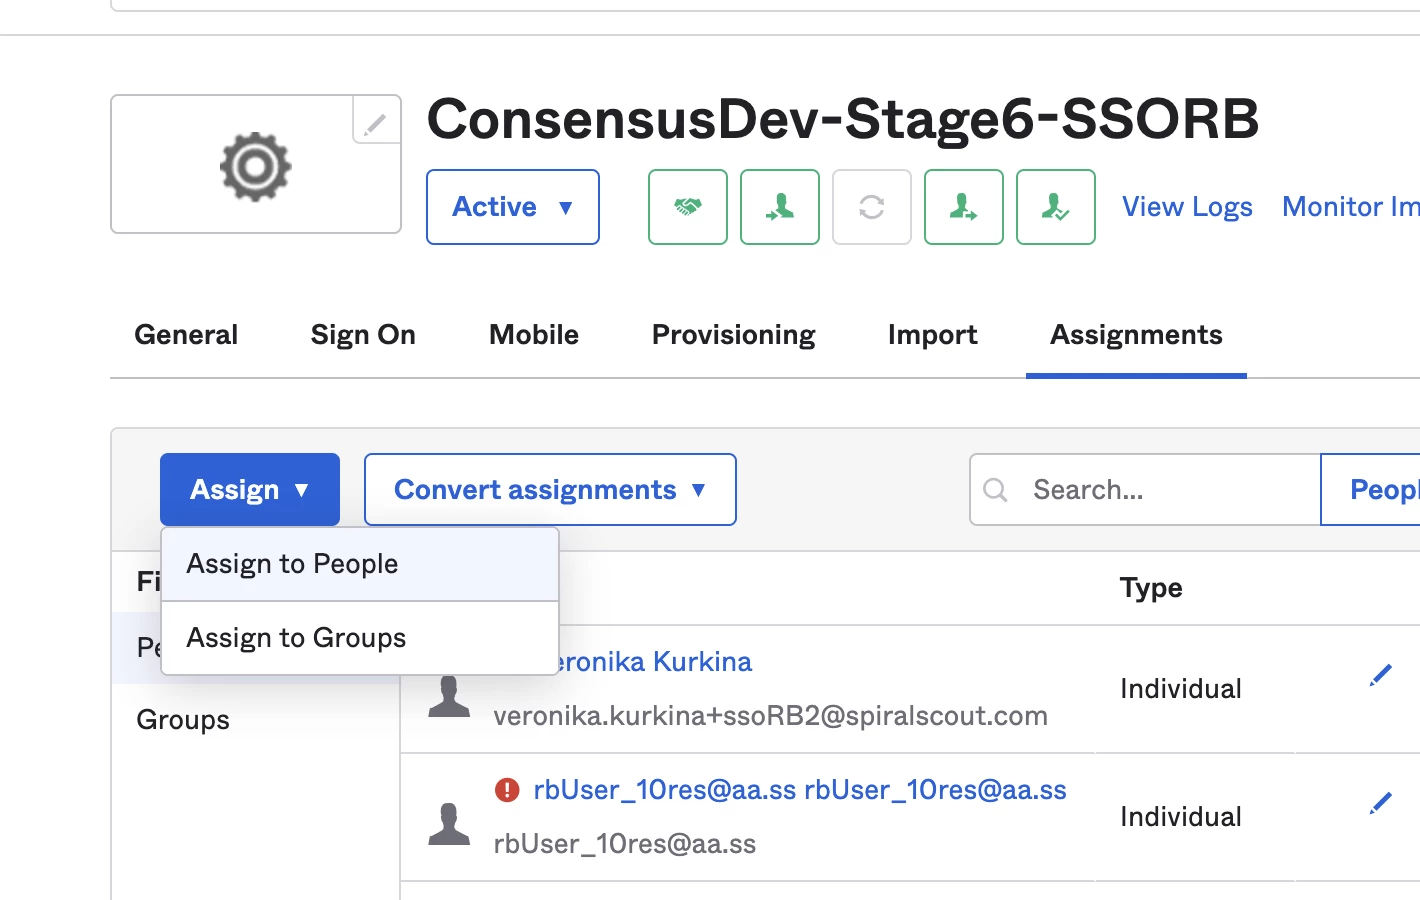
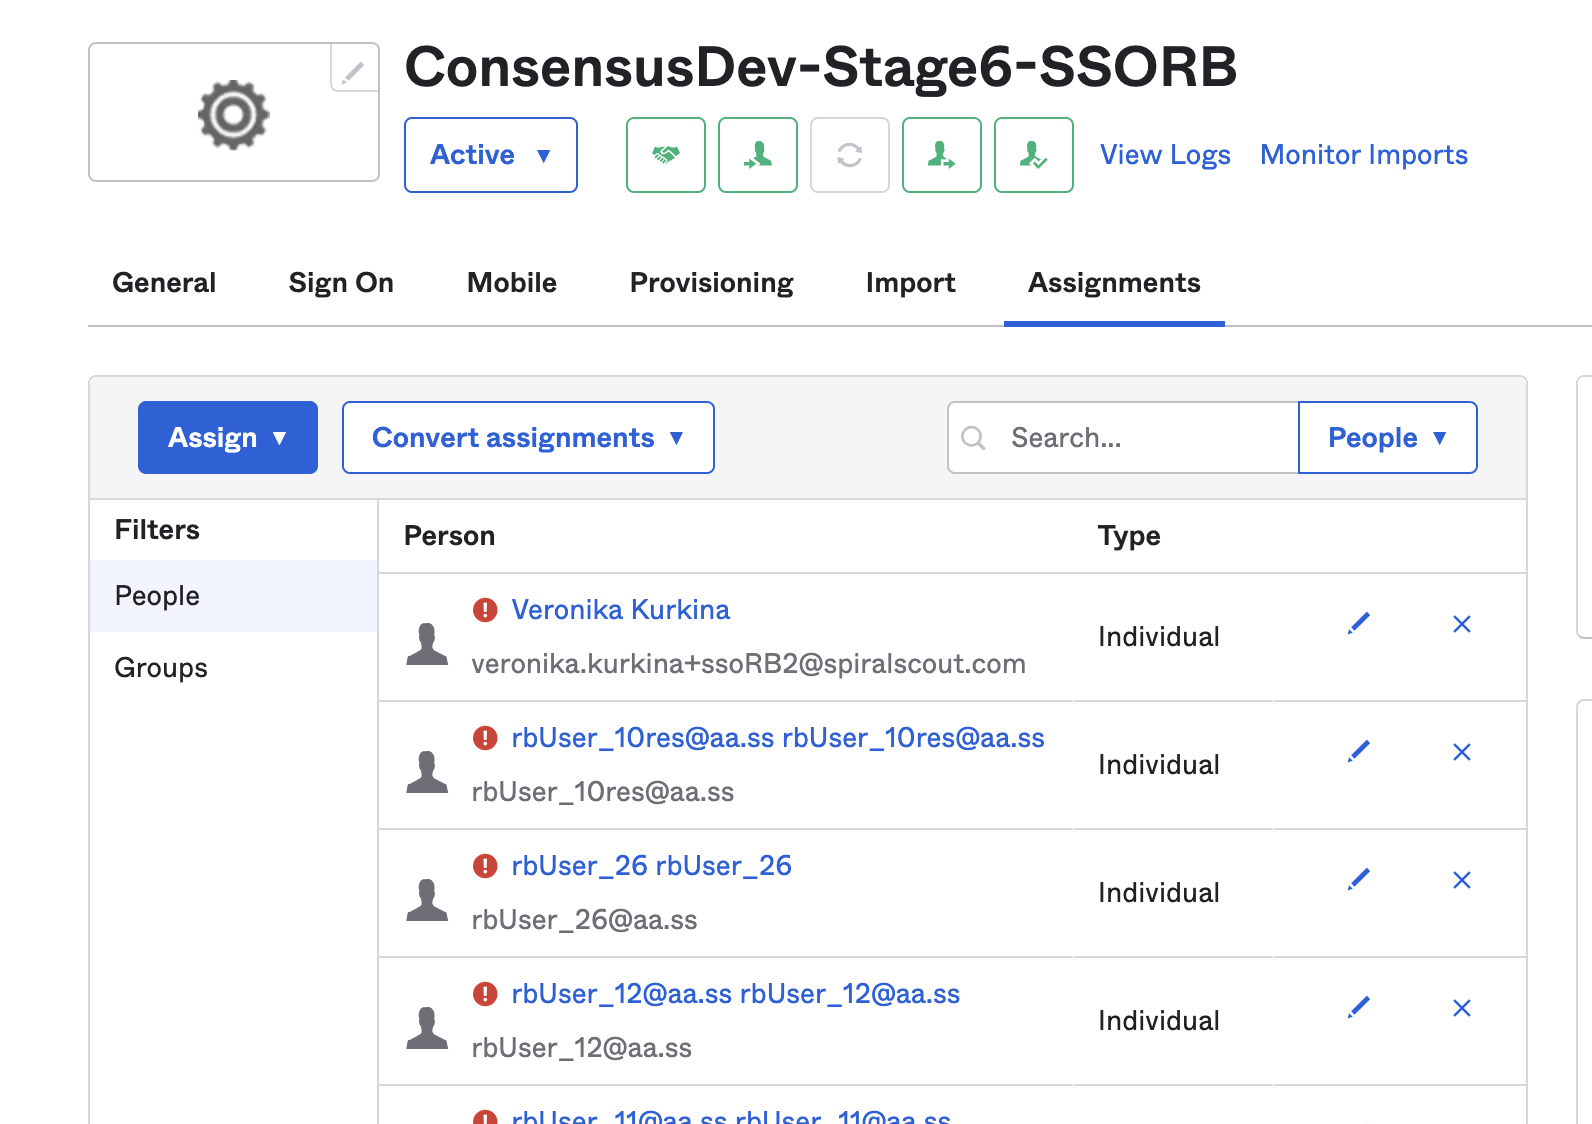
You can also assign users to the app from the “Assignments” tab inside of the application. Choose “Assign to People” and you will be prompted with a similar screen to select users and individually assign them.
Unassigning Users
- If a user leaves your company or no longer needs to have access to Consensus, you can un-assign them from the application in Okta.
- This action will deactivate them in Consensus and instead of deleting their user information altogether, will simply update their status to “Disabled” instead of “Enabled.”
You can visit the “Assignments” tab on the Consensus Application within Okta, and simply select the “X” next to a users name to unassign them from the app.
Other Key Aspects About The Integration:
- You must have SCIM settings enabled to create/update users from Okta into Consensus. If disabled, new and updated user details will not be sent to Consensus.
- Initially assigning user will provide an error message IF the CREATE action is not enabled in SCIM to find/sync new users.
- Changes made while the SCIM sync settings are disabled will not be queued and sent to Consensus later/in bulk.
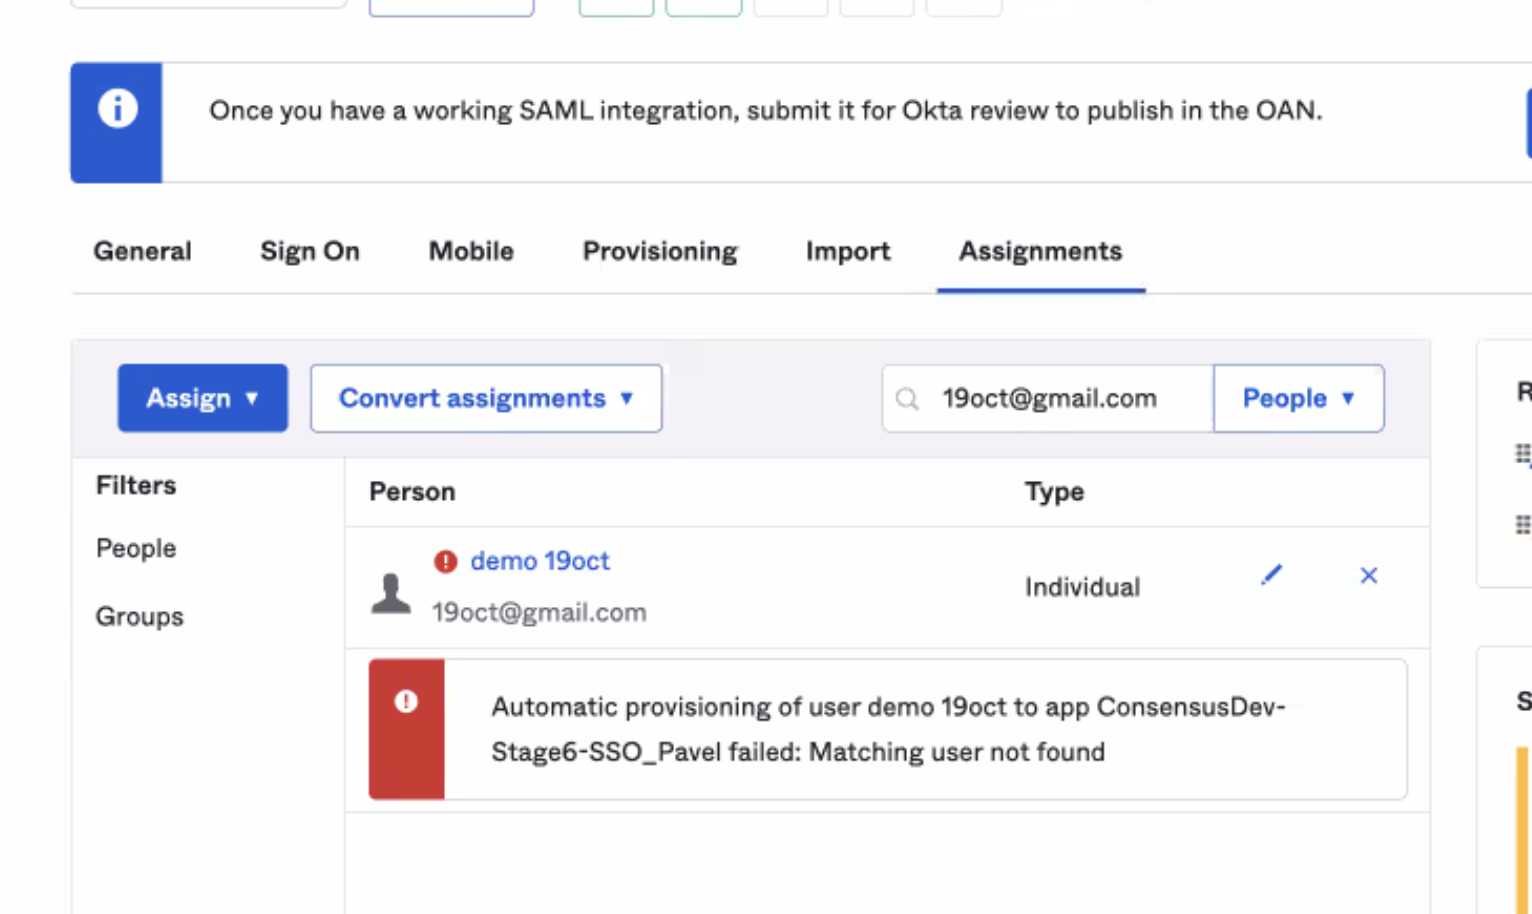
- If you try to assign an email address to a user that already exists in Consensus, this error will appear after attempted sync.
-
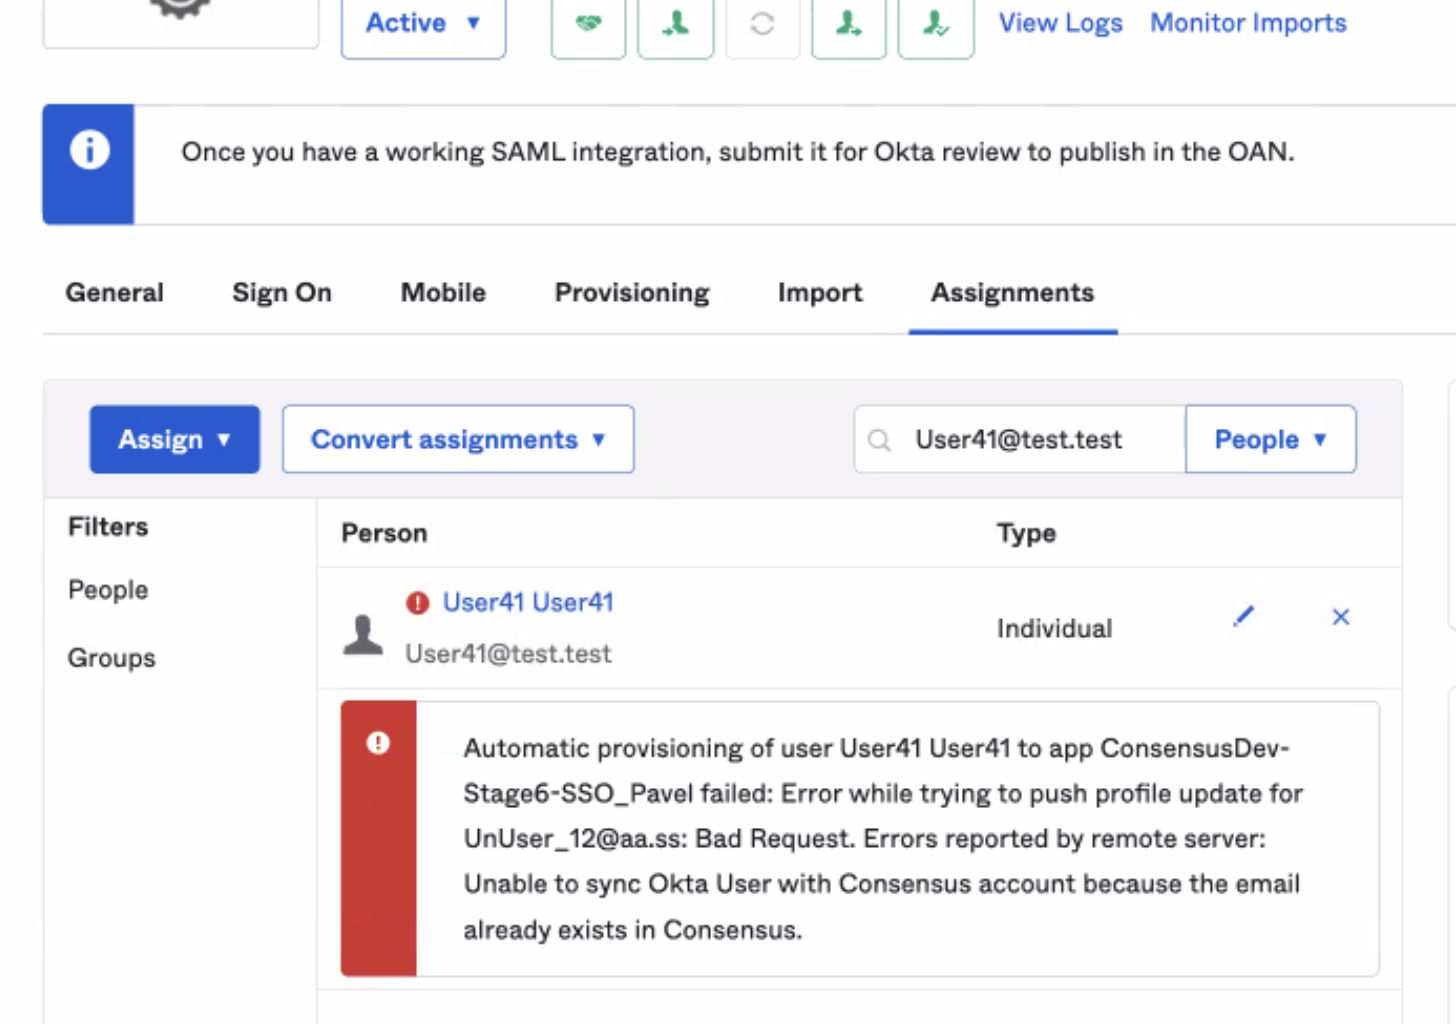
- Email must be unique
-
- If you need to add a New Roles or Groups, you should add this in the Consensus application first, and then sync it in using the Import functionality from the application.
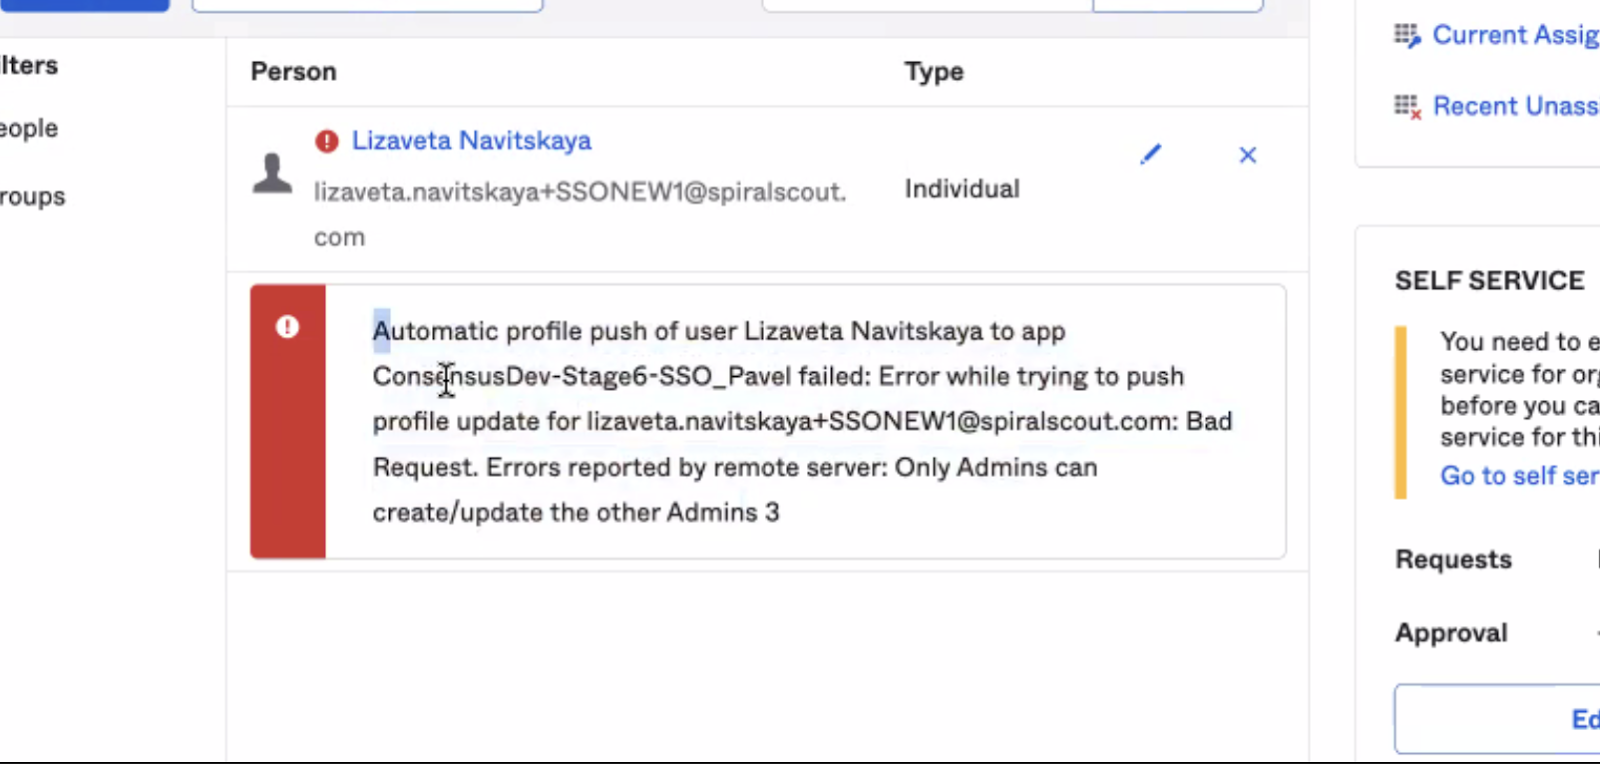
- A note on creating Admin users from Okta.
Admin users
- Currently, you can not create or update an Admin user role from Okta right now.
- These users must be initially imported/matched to your application.
- If you attempt to make an update to this level of role, you’ll see this error.
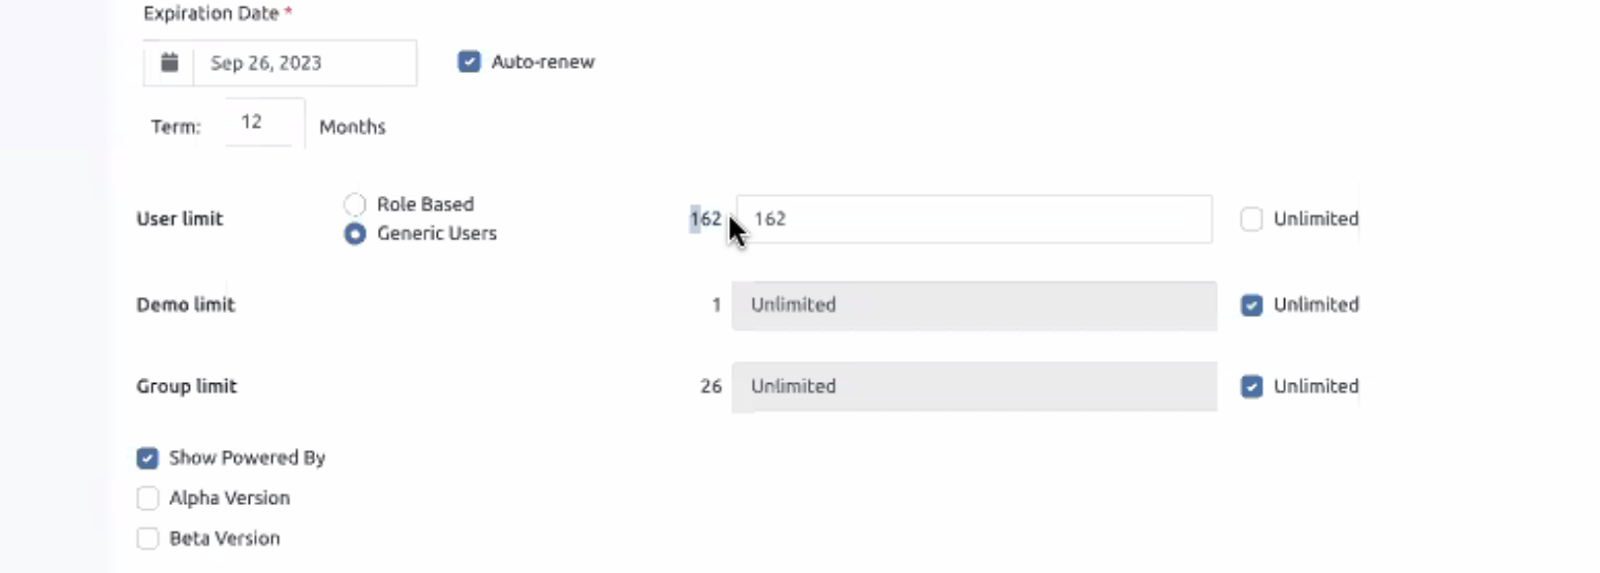
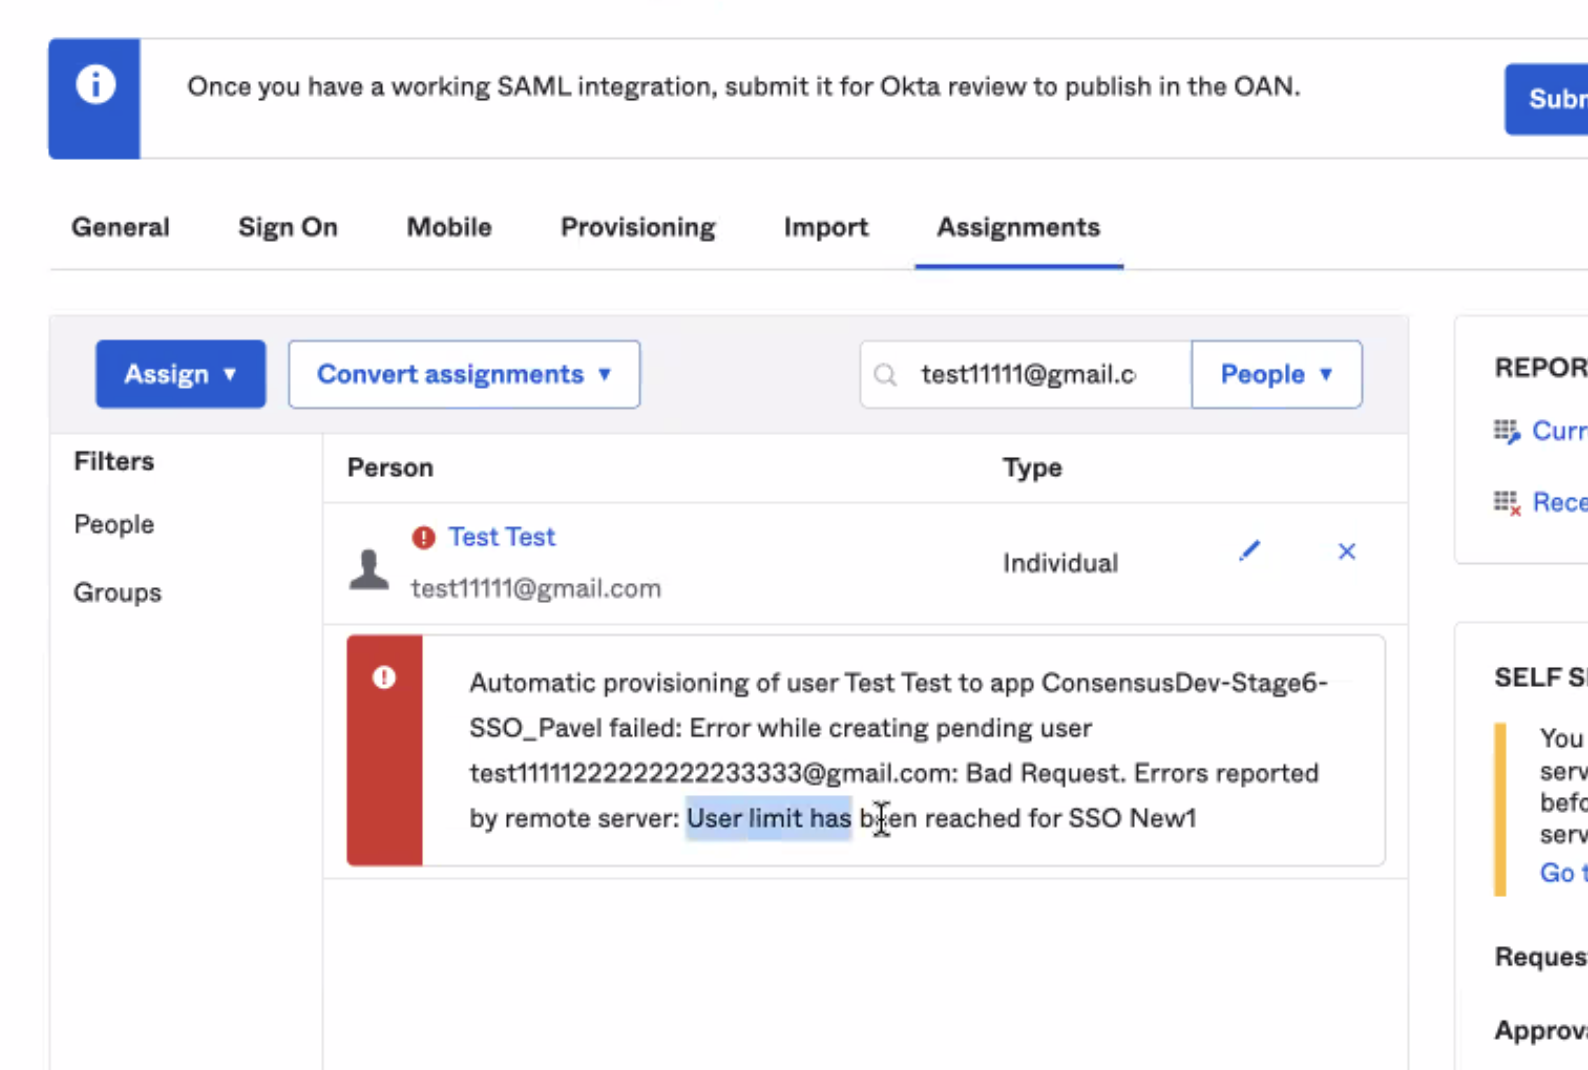
Reaching License Limits in Consensus
User limit has been reached - not enough licenses in Consensus
If you have provisioned more users to Conesnsus than you have available licenses for, you’ll begin to see errors within Okta for each user assignment.
-