Application Install
- Provide your Eloqua "Company Name" to your Consensus CSM.
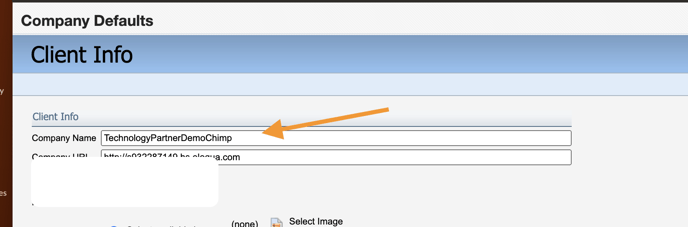
- Go to the Admin > Display Preferences > Company Defaults
- Copy the Company Name
- Follow the installation link provided by your Consensus CSM.
- Eloqua will request authorization
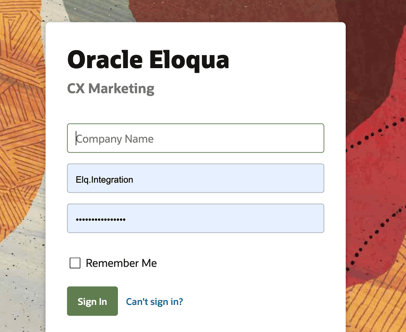
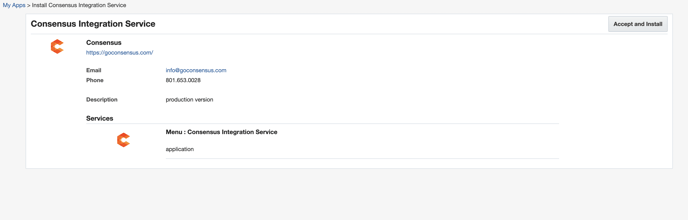
3. After logging in, you'll be directed to an install page for our application.
Click Accept and Install
4. Consensus Integration Service appears in Apps. Double click the application, and then click the wheel icon (Configure).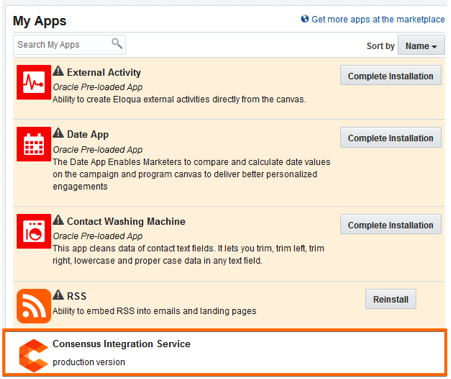
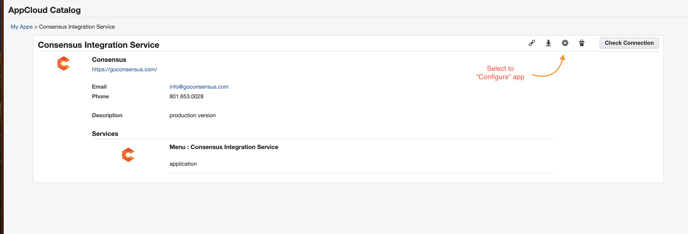
5. When you click "Configure" a new authentication window appears. Please select "Authenticate Now"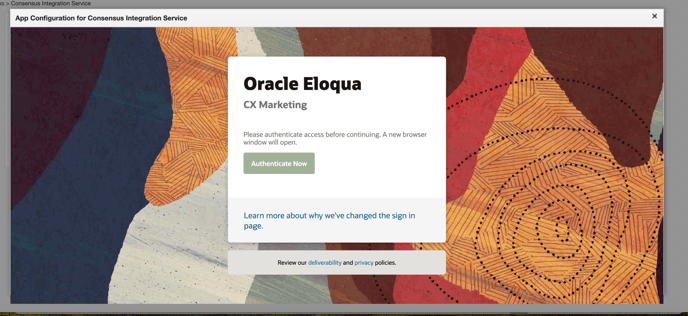
6. IMPORTANT! There is a known issue with the redirect for the popup authentication that lets you configure our app. Please copy the full URL from the popup and open the link in a new tab on your browser to access our config screen.
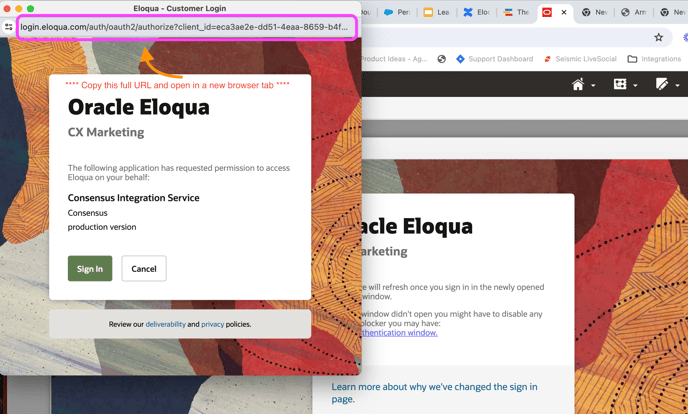
7. Select "Sign in" and then "Accept" to gain access to our application configuration page.
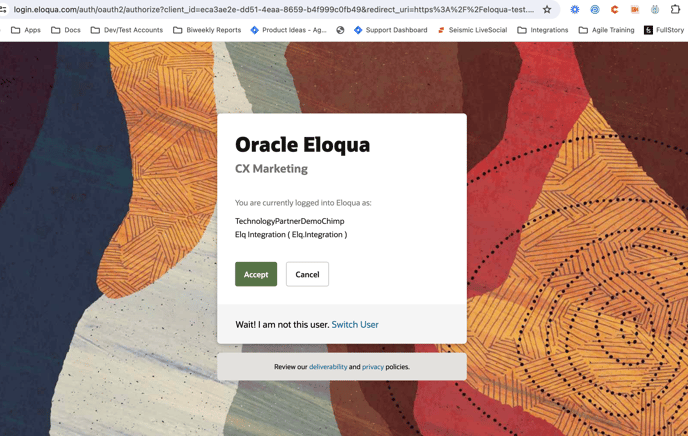
You'll then be directed to our configuration page!
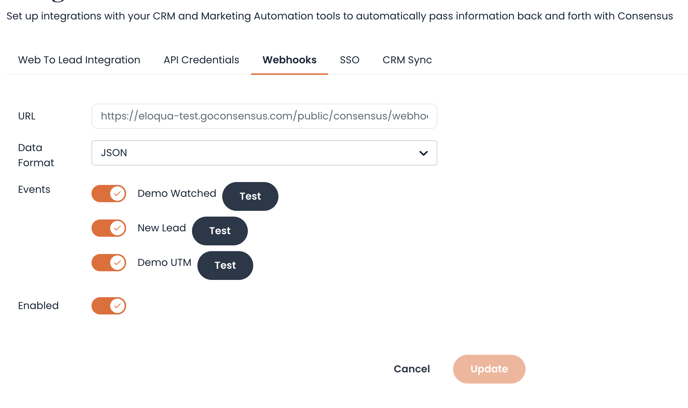
8. Webhook Creation: The Consensus app will create a new webhook inside of Consensus to allow for sending information about watched demos by and qualified leads via webhooks to the integration service. It will look something like this.

You can control the flow of data to Eloqua for Leads and Demo Views, be editing this webhook and toggling on/off the different events.
Application Configuration
Next, open a window into Consensus and navigate to Settings in the left-hand navigation, and then click Integrations.
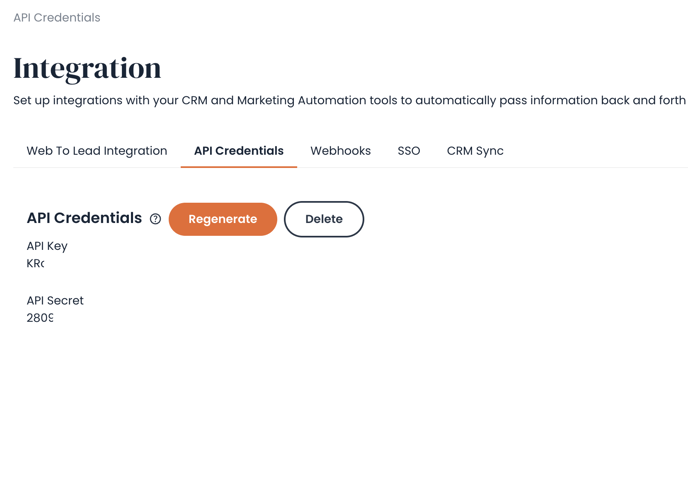
- If the API keys are not present, click the Generate button. Use the API Key and API Secret for the Consensus Integration Service.
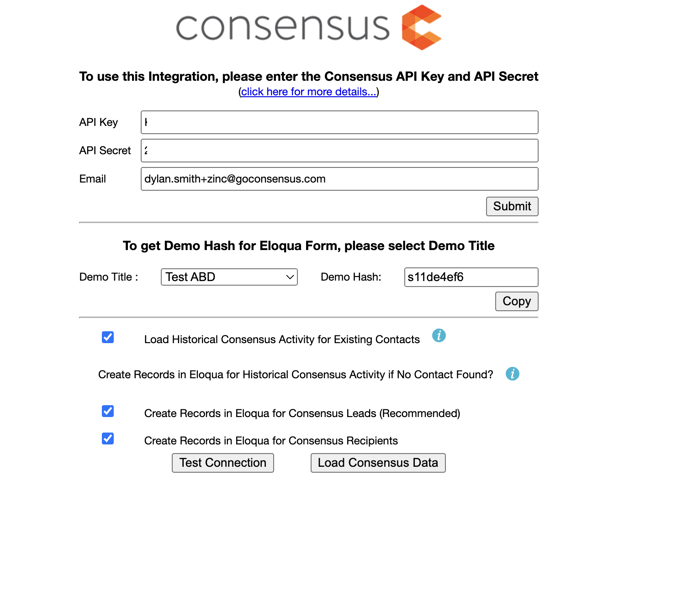
2. Back inside of the Consensus Integration Service, paste the API Key and API Secret and enter the email address used to log into Consensus. Once this is complete, click Submit to test the connection.
3. Consensus Custom Objects and Loading Historical Data
Note: this process may take a while depending on how many records is in Consensus. Loading the Consensus data is necessary to prompt the creation of our custom objects.
Custom Objects:
We create 3 custom objects to store lead data and view demolytics inside of Eloqua.
- ConsensusLeadView
- Stores data about qualified leads. This record links directly to any contact we create into Eloqua as a new "lead." You can see it as a Linked Record when viewing the contact.
- ConsensusUniqueInvitationData
- Stores invitation data if a historical contact in Eloqua is invited to a demoboard.
- ConsensusUniqueInvitationView
- Stores view data if historical contact in Eloqua views a demoboard.

A review of sync options:
Load Historical data for existing contacts (Recommended):
- This will load "view" data into our custom invitation and view objects for existing contacts that we find matching email addresses for.
Create Records in Eloqua for Consensus Leads (Recommended):
- This will create/update contacts in Eloqua for any qualified lead that occurs in Consensus via a complete lead gate form on a Consensus public link.
Create Records in Eloqua for Consensus Recipients (Recommended):
- This will create/update contacts in Eloqua for any demoboard recipients that we don't find a matching email address for.
4. Run the Data Sync
At this point, Eloqua is configured and will automatically import Leads and demo view data from Consensus.
Additional Options:
After successful establishment of connection between Consensus and Eloqua system, you can optionally configure some additional features of the application.
a. Using Eloqua Forms as ‘Lead Gate’
c. Review additional information about the Historical Import: