Salesforce is a powerful tool that allows you and your teams to manage their prospects and opportunities. The Consensus Salesforce Professional integration allows you to include the Demo View data collected from Consensus directly within your Salesforce account. This enables you to not only see Demo views right within Salesforce, but also allows you to include this data within your reporting. In this article, we will cover:
- What the Consensus Salesforce Professional App can do
- Installing the Consensus Salesforce Professional App
- Configuring the Consensus Salesforce Professional App
- Adding the Consensus Component to Page Layouts
- Setting up New Lead pass into Salesforce
- Uninstallation
What the Consensus Salesforce Professional App Can Do
Depending on your configuration options, here are some of the things the Consensus Salesforce Professional App can do. The app:
- Loads historical Consensus engagement data into Activity Records in the Salesforce lead or contact record
- Allows Salesforce users to see detailed video engagement data when contacts or leads engage with Consensus demos
- Creates new activity records for leads or contacts that engage or share Consensus demos
- Creates new lead records for historical leads or demo recipients inside Consensus
- Loads new lead data and updates to Salesforce using Webhooks (push method) for more instantaneous information inside your CRM
- Loads analytics data into custom objects so you can create custom reports and dashboards inside Salesforce based on Consensus engagement activity
- Allows users to create and send custom DemoBoard links from within the app to leads or contacts
- Shows up-to-date Consensus engagement analytics for leads, contacts, and opportunities
Installation
To install the Consensus Salesforce Professional App:
- Login to Salesforce as a System Administrator.
- Copy the Consensus Salesforce Professional App package install link you received from your Account Manager
- Paste it after the Salesforce domain in the browser: https://[your domain prefix].salesforce.com/[paste the install package link here].
- The Consensus Salesforce App displays these installation options.
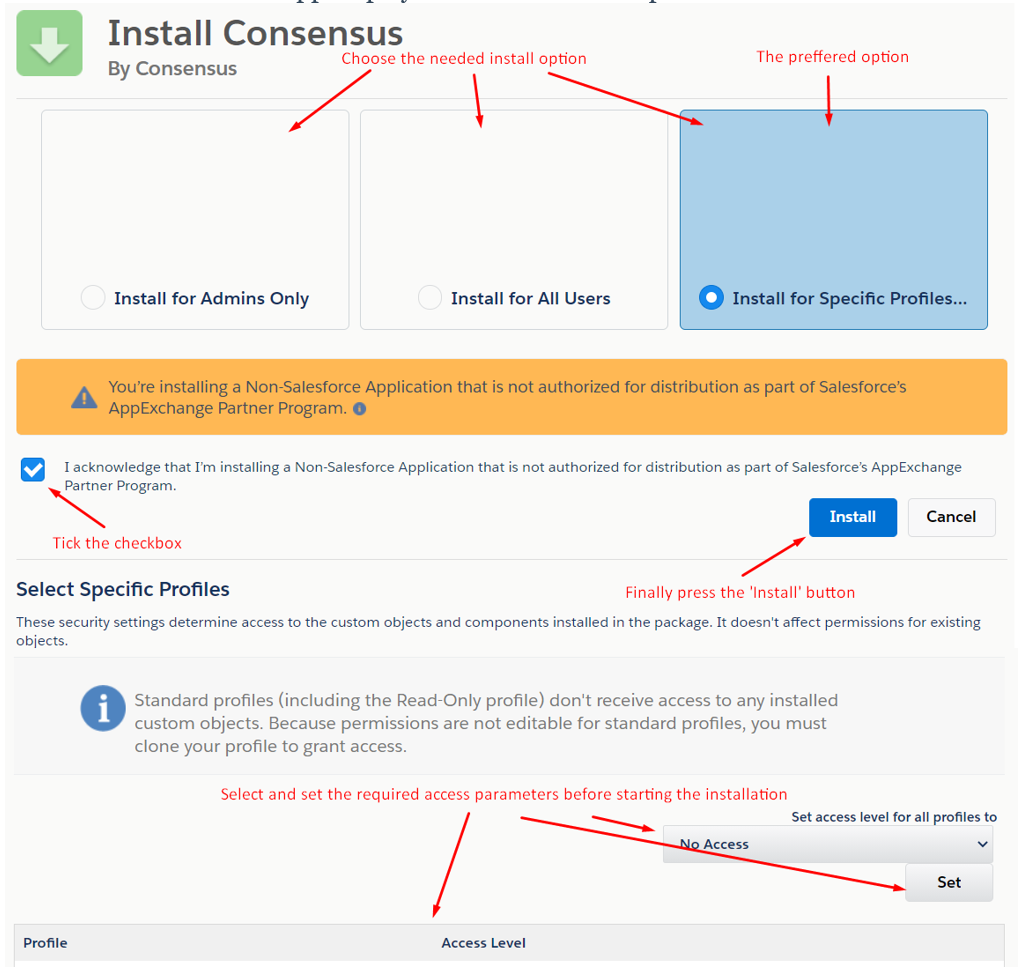
- Choose which user types require the Consensus Salesforce App.
If installing for specific profiles, choose Consensus System Administratorfor users that need access to Configuration tab (usually the user or users that you want to complete the configuration for the Consensus Salesforce App.
For other profiles assign Consensus Standard User.
Click to acknowledge that you are installing an application that is not part of the AppExchange (we are in the process of getting it approved).
Configuration
Configure a Domain Name
NOTE* If you already have a Domain name for your Salesforce instance you can skip this paragraph.
Click the Setup.

Type the ‘domain’ word into the Quick search box on the top left corner of any page

And choose the ‘My domain’ menu item and click on it to open a My domain page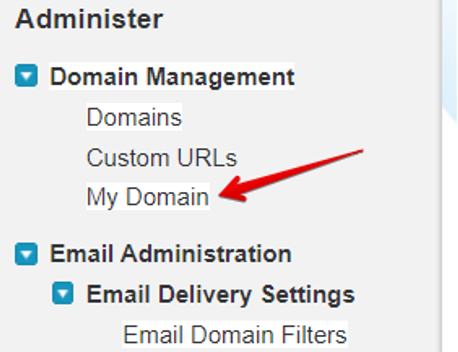
Follow the instructions: enter the name of domain that you prefer (it must be unique for all Salesforce instance), click Check Availability and then Register Domain if it is available.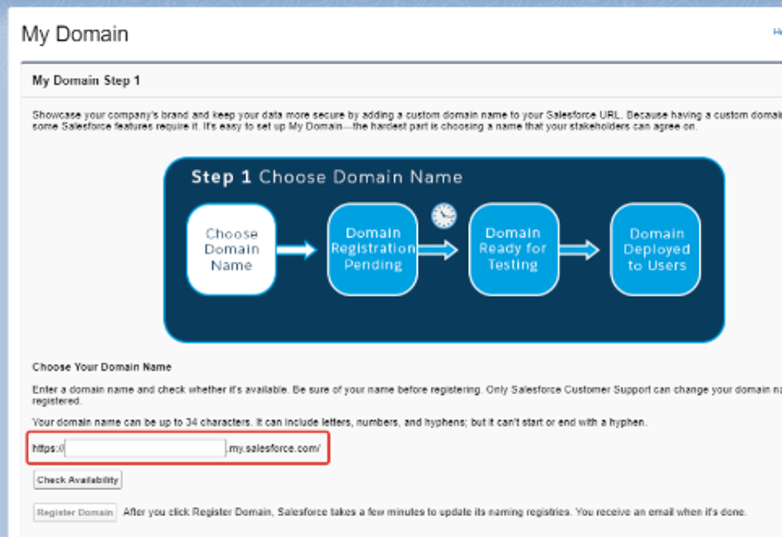
When the installation process is completed, switch to the Consensus application.
Accessing the Configuration Page
Switch to the Consensus application:
Please click the application picklist near the top-right corner and choose the Consensus item in the list of applications.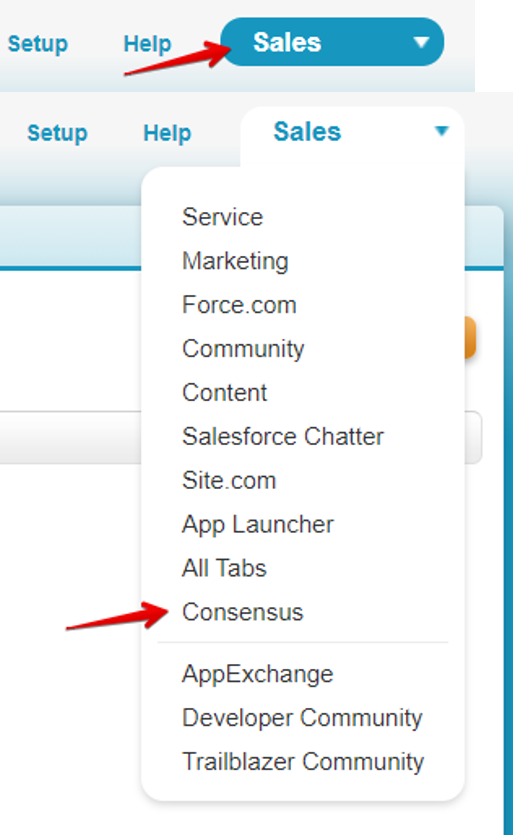
Click the Configuration tab
Please see the instructions for ‘Configuration Page’.
Configuration Page
NOTE* Access to perform a ‘Test Connection’ is granted for Admin users only.
Select the ‘Configuration Mode’. Choose Consensus Customer unless you are an internal Consensus employee.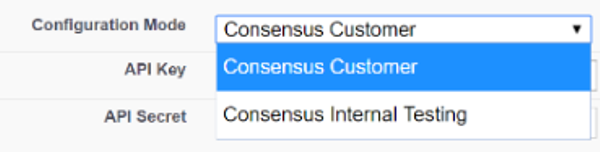
Add the Consensus ‘API key’ and ‘API secret’.
Get the values from Consensus in the Integration area (app.goconsensus.com>Settings![]() >Integrations>API Credentials tab):
>Integrations>API Credentials tab):
Click Test Connection to test the API settings. Consensus displays a success message if it is communicating with the API properly.
To setup Schedulers correctly read the instruction carefully.
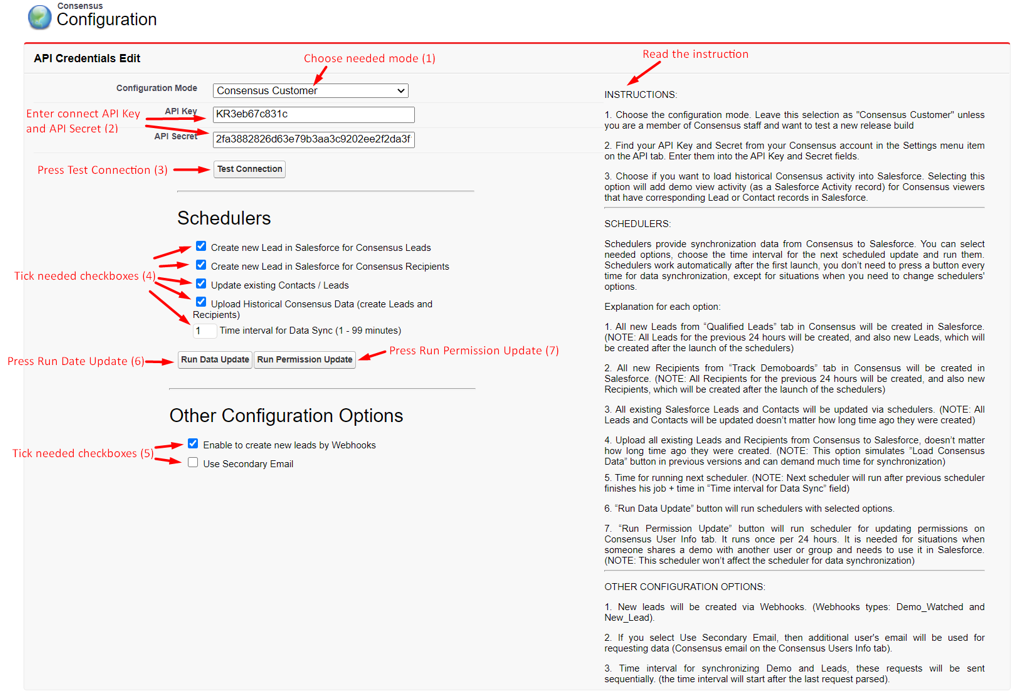
Select the option ‘Enable to create new leads by Webhooks’ if you want Salesforce create a new lead from Consensus Recipient when receives a ‘Demo Watched’ or create a new lead form Consensus Lead when receives a ‘New Lead’ webhooks from Consensus.
Select the option ‘Use Secondary Email’ if you want Salesforce send ‘Consensus email’ instead of ‘Salesforce email’ in requests to Consensus for Users within the Account which have ‘Consensus email’ on the ‘Consensus User Info’ setup.
Consensus User Info Setup
Salesforce Administrator only has access to that page. Administrator is able to configure the list of Users within an account which can have access to Consensus data.
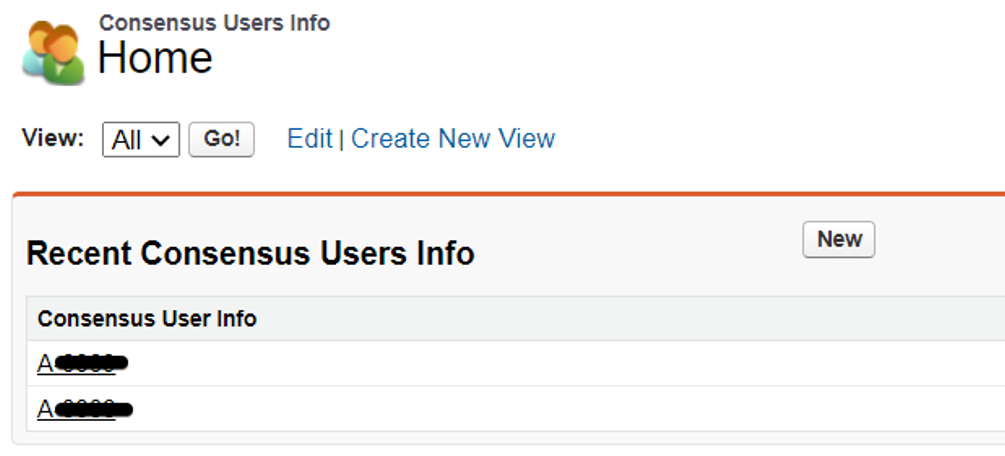
Open a ‘Consensus Users Info’ page by clicking on the Consensus Users Info tab

The list of added Users is displayed on the page
To add a new User, click New in the top right corner
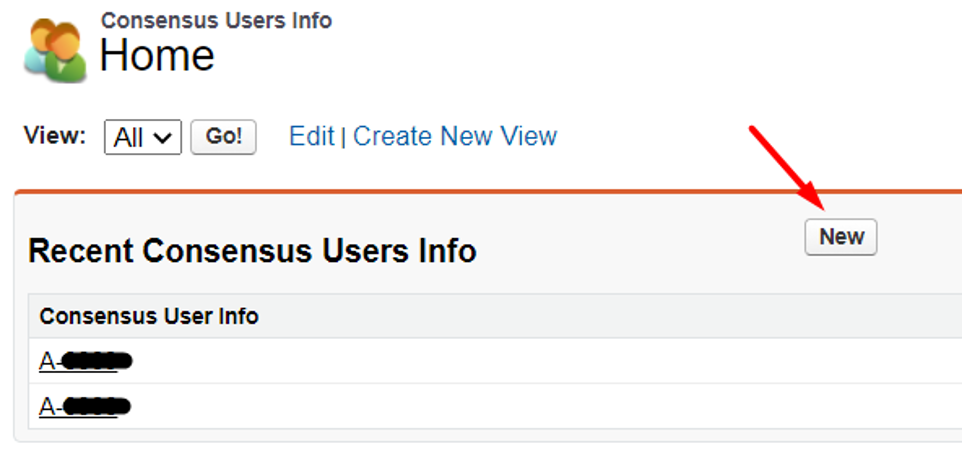
Fill in needed fields and Save
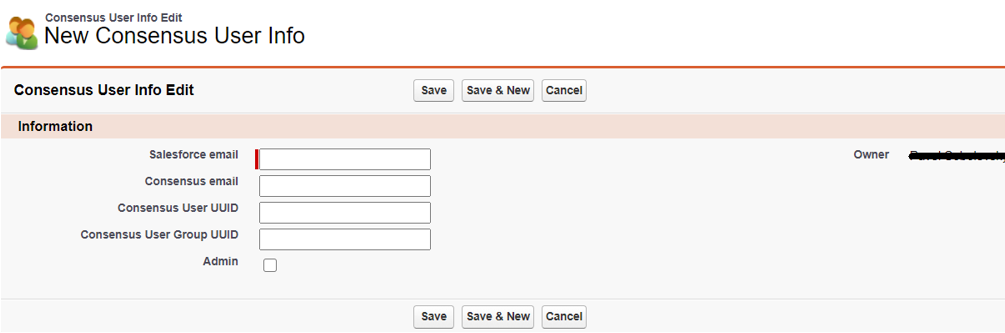
NOTE* if User has the same Salesforce and Consensus emails it is no need to fill them both, it is enough to fill a Salesforce email
You can mark a User as an Admin when create/update User. When User is marked as an Admin, the system will receive the whole list of Leads (Recipients in Consensus) within the Consensus Account if that User is also an Admin within Consensus Account. Also, User marked as an Admin will see the whole list of Leads, Accounts, Contacts or Opportunities within the corresponding pages (while non-Admins will see the data, they have access to).
‘Consensus User UUID’ and ‘Consensus User Group UUID’ are filled automatically. For that after adding a new User open the ‘Configuration’ tab and click Test Connection (if there is any User in the list of users with different Salesforce and Consensus emails, the checkbox ‘Use Secondary Email’ should be checked). If all data is correct, values for the ‘Consensus User UUID’ and ‘Consensus User Group UUID’ fields will be automatically added to the ‘Consensus Users Info’ tab (It might take 5-10 seconds)

Importing Consensus User Emails into Salesforce
Open Consensus App and click Settings and select Manage Users & Access

Within the 'Users' tab you will see the 'Download Manage Users Report' button. Select this button to download the report that will contain the Consensus Users emails for your Users.

You can now use this CSV along with the Users Salesforce Email to add their Consensus Emails within Salesforce.
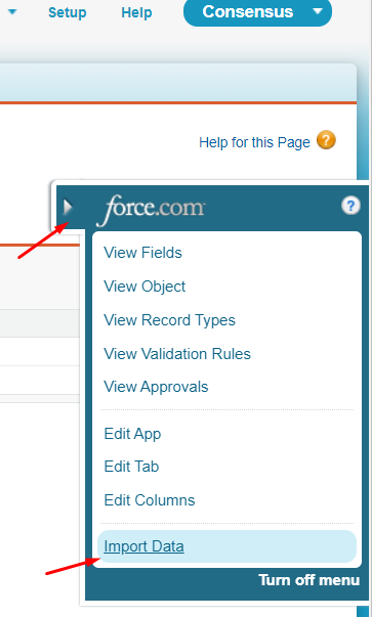
Open a ‘Consensus Users Info’ tab in Salesforce and select Import Data within the additional menu in the top right corner.
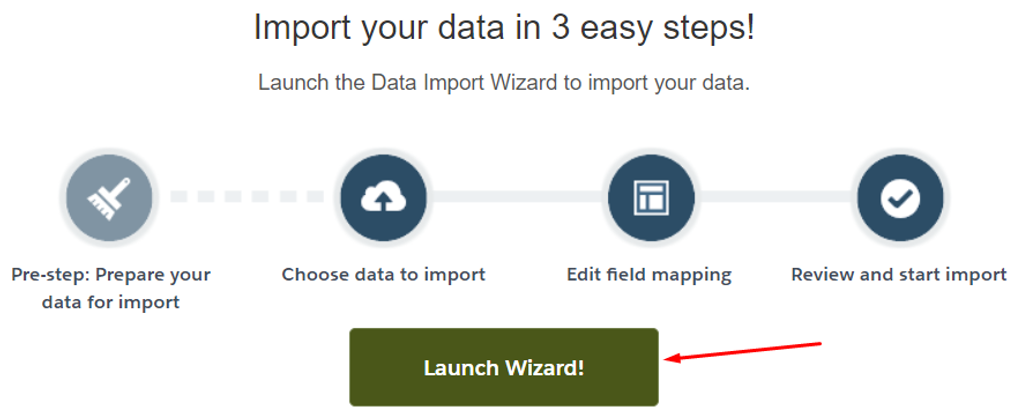
Click Launch Wizard! under ‘Import your data in 3 easy steps!’
Select the “Custom objects” tab and click on the “Consensus User Info” object.
Select one of possible actions (“Add new records” as example).
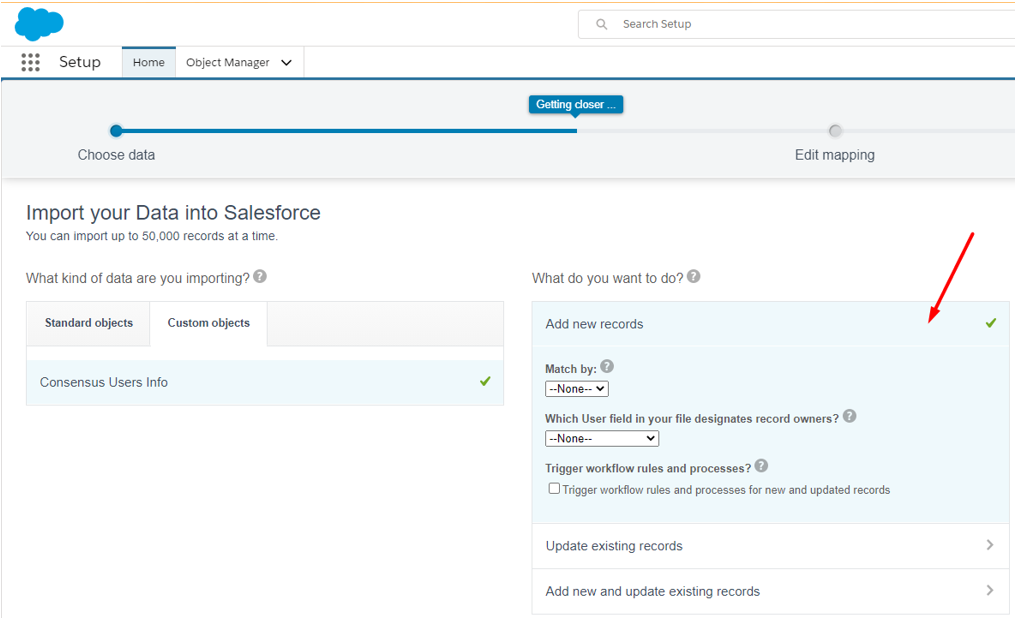
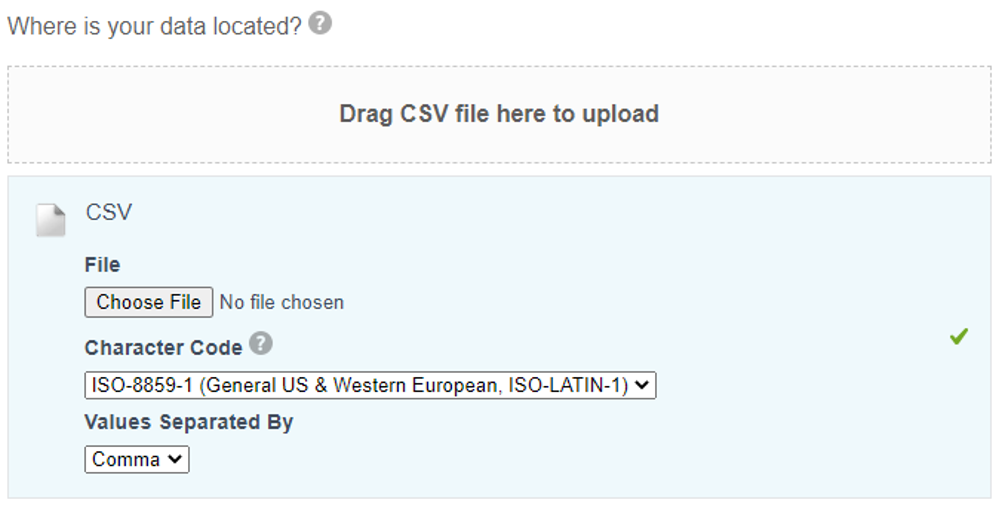
Upload a CSV file by dragging it or choosing from computer memory and click Next
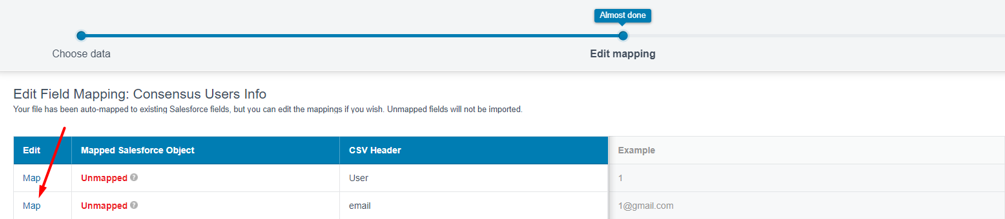
Click on Map
Select ‘Consensus email’ and ‘Salesforce email’ fields and click on the Map button.
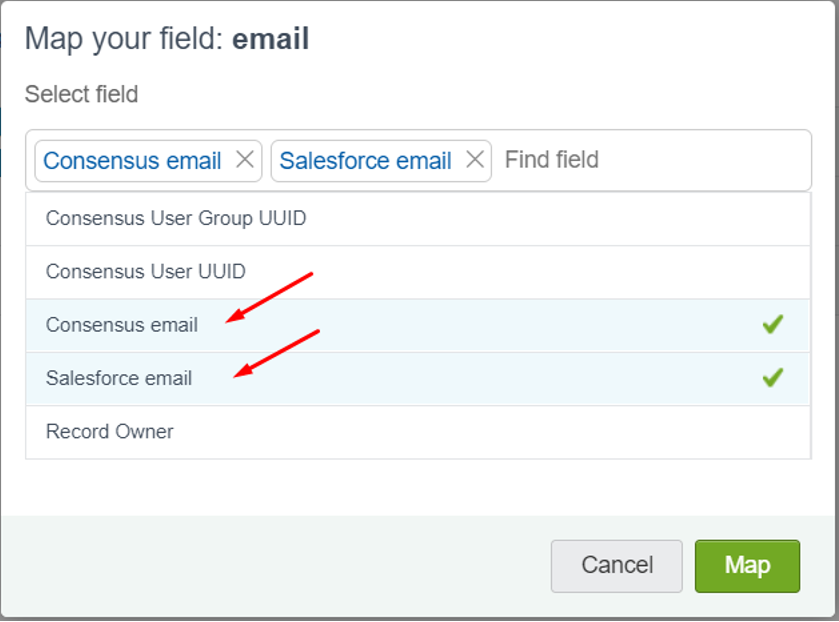
NOTE* Make sure that all Users have the same email in Consensus and Salesforce. Otherwise you will need to update Salesforce emails for Users who has different emails on the ‘Consensus User Info’ tab
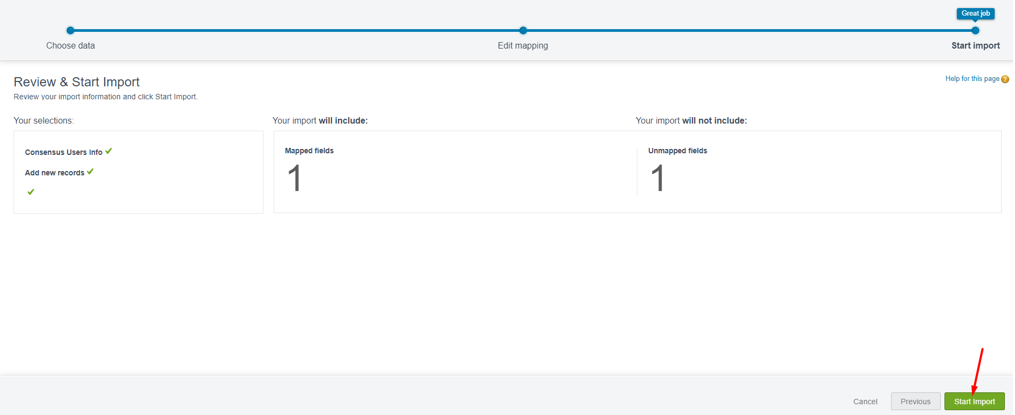
Click Next and then Start Import button
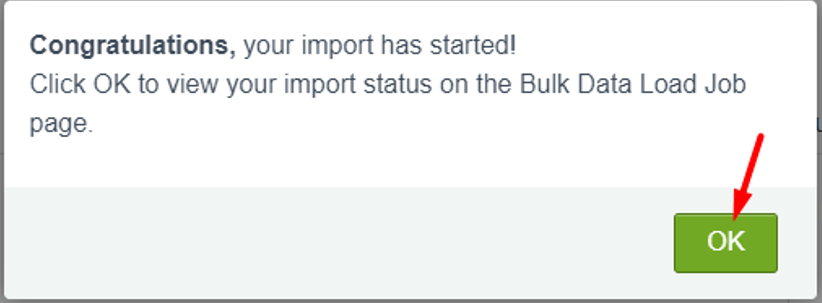
Click OK on the popup
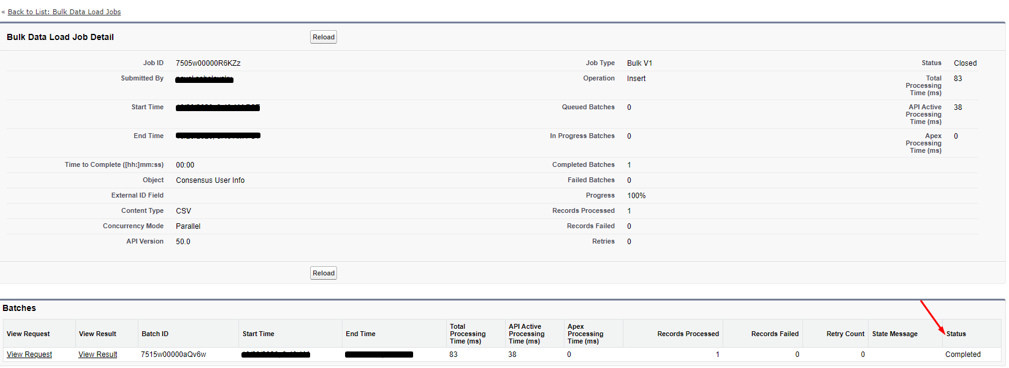
Check the status of Uploaded email(s).
After importing Consensus User Emails, you need to open the ‘Configuration’ tab and click Test Connection (if there is any User in the list of users with different Salesforce and Consensus emails, the checkbox ‘Use Secondary Email’ should be checked). If all data is correct, values for the ‘Consensus User UUID’ and ‘Consensus User Group UUID’ fields will be automatically added to the ‘Consensus Users Info’ tab (It might take 5-10 seconds)

Adding the Consensus Salesforce App Component to Page Layouts
The Consensus Salesforce App includes a Consensus component that shows detailed analytics about the lead or contact you have open.
To make the component appear in other predefined applications (such as Sales), open any Lead record and click Edit Layout link
Find the best place on the layout to put the plugin component. It must be a section with 1-Column layout. You can choose any existing section, for example, ‘Description Information’ section, or create a new own section by dragging the ‘Section’ field from the group of objects up at the top where you want to create the new section.

Use ‘Section Properties’ sign to configure a section parameter ‘1-Column layout’ and also fill the name of section and needed visibility checkboxes.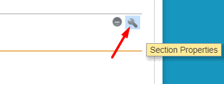
For example:
Then choose the Visualforce Page item from the page layout configuration menu, find the plugin component ‘Demo_Lead_Page’, and click and drag it to your section.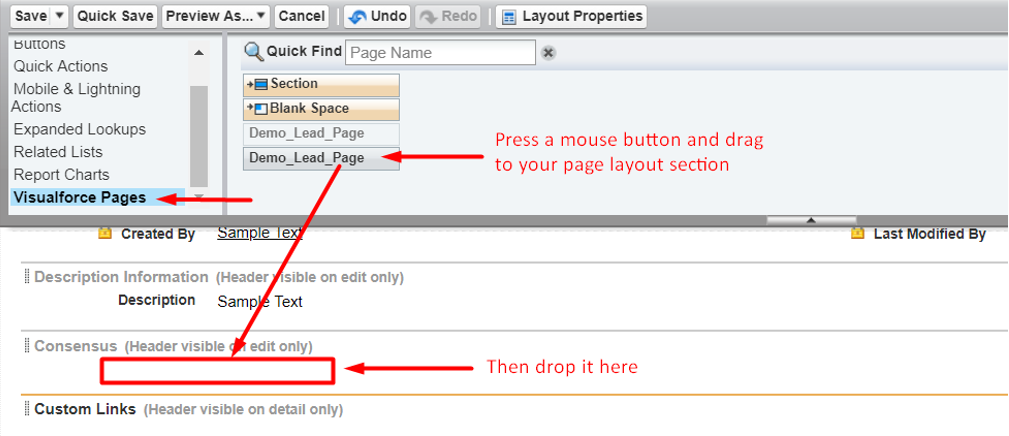
Finally, configure the plugin component for better data representation.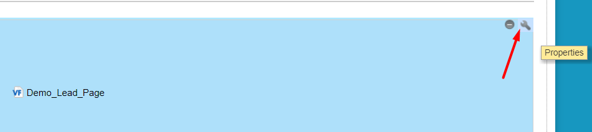
We recommend you use values 100% for the Width and 500 (pixels) for the Height.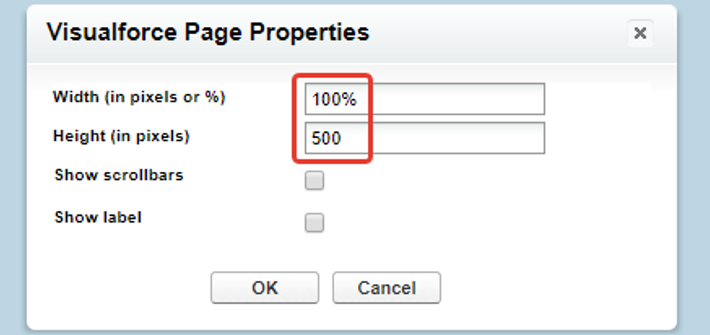
After that, save all changes for this page layout.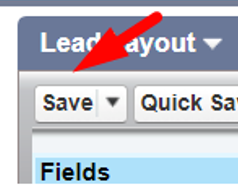
Repeat the same steps for other Lead, Account, Contact or Opportunity page layouts where you want the component to appear.
*NOTE: Once you have completed all the above steps you will need to configure Secure API for Consensus using these articles:
https://support.goconsensus.com/creating-a-salesforce-connected-app-for-secure-api
https://support.goconsensus.com/setting-up-salesforce-sites-for-consensus-sfdc-9.1-required
*NOTE: Once you have completed all the above steps you will need to configure SFDC Profiles for your Consensus users using this article: https://support.goconsensus.com/configuring-standard-user-profiles-for-sfdc-updated-08/21
Creating a DemoBoard Invite
You can create a DemoBoard invite for any Lead, Account, Contact or Opportunity within the Consensus Salesforce App Component.
Open the detailed information about any Lead, Account, Contact or Opportunity and click ‘Create Demo Invite’
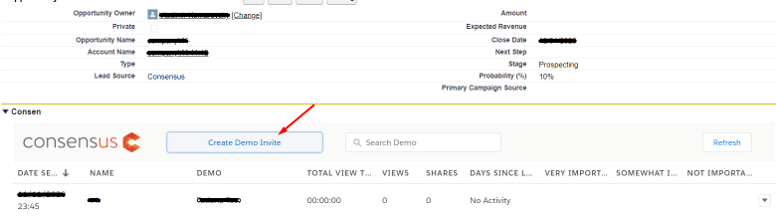
This will bring you into the Create Demo Invite page
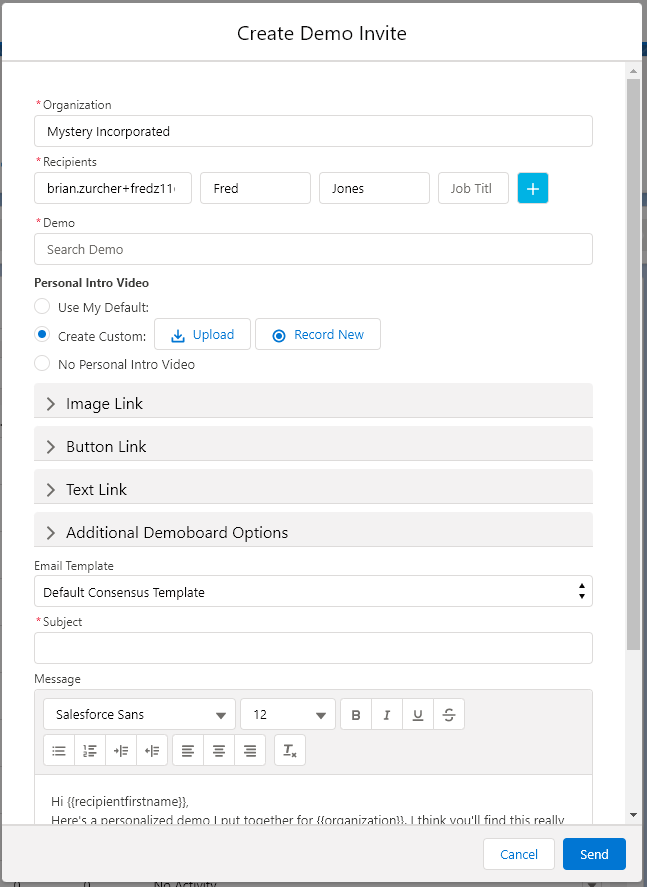
Fill in Organization, Recipient information (it might be a multiple list of Recipients), select a Demo, Subject and the message body. For you can use Merge fields (below is described how to use it).
NOTE* Organization, Recipient information are added automatically based on Lead, Account, Contact or Opportunity data. You can update it.
You can also insert a Button/Text link to the email.
Button link.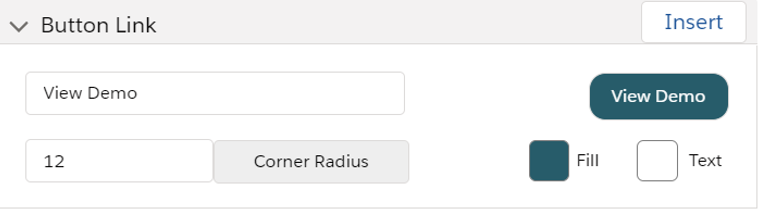
You can manage the Button link name, button corner radius, color of the button and color of the text. When you finished all button customization press ‘Insert’ and the button will be added to the message body.
Text link.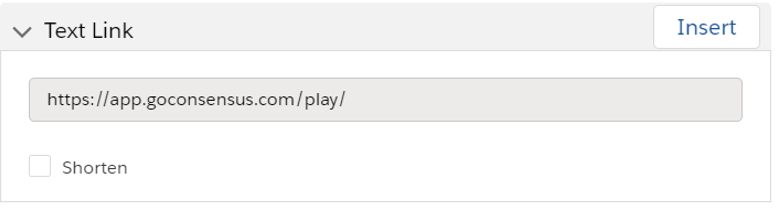
You can manage what type of the link to use – regular or shorten. When you finished all customization press ‘Insert’ and the link will be added to the message body
How to use Merge Fields
When you send a demo from within the Consensus Salesforce App, Consensus sends demos through the API and will be sent via the Consensus email service (it uses the SendGrid SMTP service).
When composing the subject line or body of your email you can use the same merge fields as you can use within the Send a Demo page inside the Consensus web application:

Setting Up New Lead Pass from Consensus to Salesforce
‘Pull’ vs ‘Push’
Every time you open a Lead, Account, Contact or Opportunity page that has the Consensus app component on it, Consensus retrieves analytics information for those leads or contacts. This is what is called a ‘pull’ request, meaning that at the time you open the page, the app sends a request to get the latest information for those leads or contacts.
If you want to have the activity records in Salesforce updated at the time the New Lead is created in Consensus, you need to set up Webhooks to ‘push’ the data from Consensus at the time of the event, for example.
Add new site
To add new site you need to the page SETUP Sites:
- Click the Setup in the right top corner
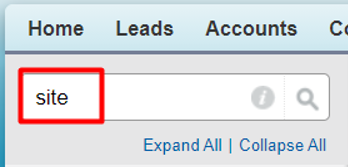
- Type the ‘Site’ word into the Quick search box on the top left corner of any page
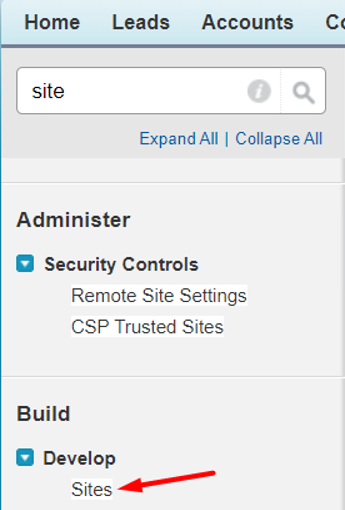
- And choose the Sites menu item and click on it to open a SETUP Sites page
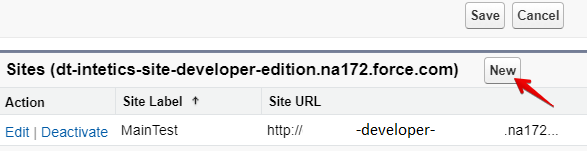
- Open the Site creation page by clicking New
- Fill in all required fields
- For the field ‘Active Site Home Page’ use the value Demo_Contact_Page OR Demo_ Lead_Page
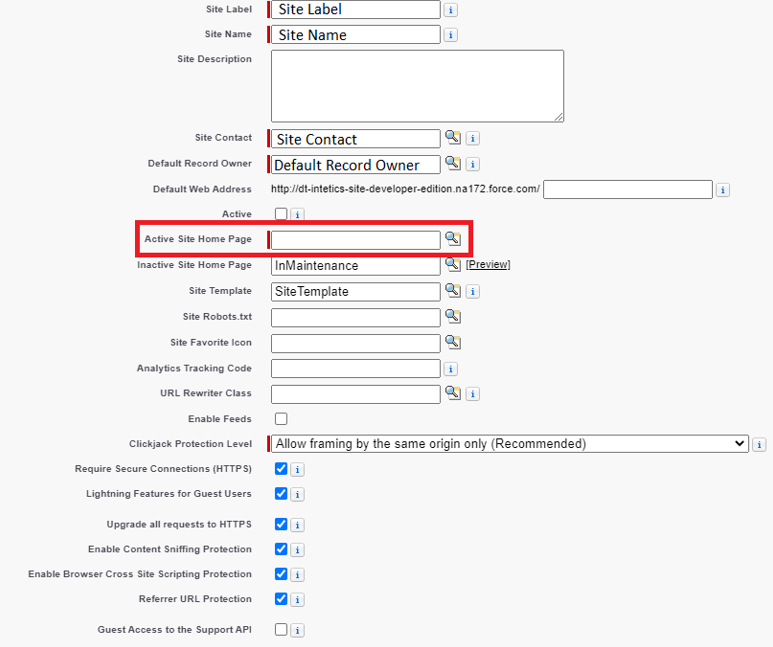
- For the field ‘Active Site Home Page’ use the value Demo_Contact_Page OR Demo_ Lead_Page
- Click Save button
New Lead Flow from Consensus into Salesforce
There are two ways to get new leads from Consensus into Salesforce:
- Webhooks(Recommended) - By configuring a Webhook, your lead data will flow into Salesforce immediately and more securely, however there is limitations to field mapping options.
- Web to Lead.By configuring the Web to Lead settings in Consensus, Consensus will send the data through Salesforce’s WebToLead functionality. This allows more custom mapping of lead form fields to fields in Salesforce but takes longer to arrive in Salesforce because it relies on Salesforce’s WebToLead processing queue.
Configuring Webhooks to Work with the Consensus Salesforce App
To configure Webhooks you’ll need an active domain and site defined in Salesforce.
Setup -> Build -> Develop -> Sites
NOTE* Make sure to click Activate to activate the site.
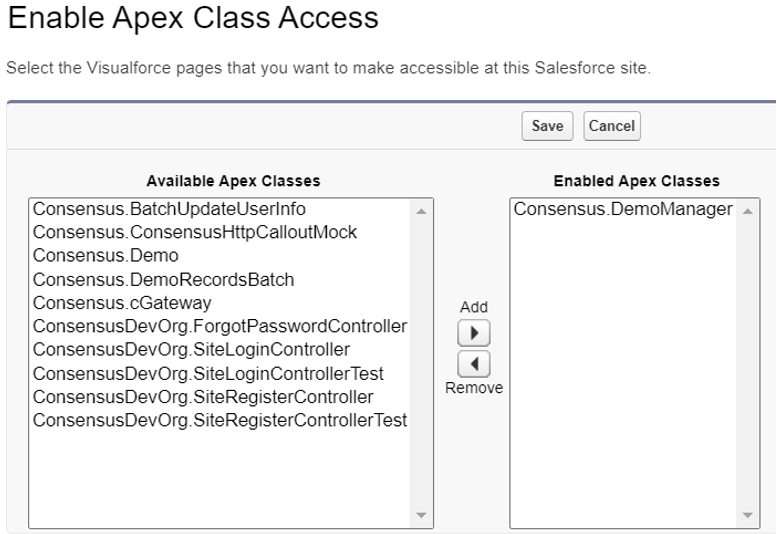
Add the DemoManager web service class to the site with public access permissions
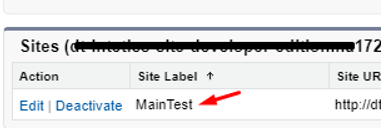
- To do this, open the Sites page, then click on your Site Label:
- Click on Public Access Settings:
- Next find and open Enabled Apex Class Access, press Editbutton and add the "Consensus.DemoManager" apex class.
- After saving these settings in Salesforce, configure Webhooks settings in Consensus Settings(app.goconsensus.com>Integrations>Webhooks tab):
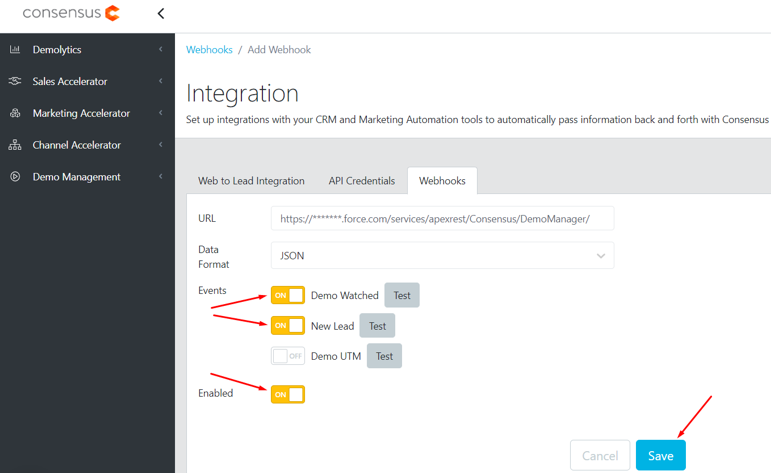
- In our example we used the URL: https://*******.force.com/services/apexrest/Consensus/DemoManager/
- NOTE*Please pay attention that Salesforce accepts POST requests (webhooks) through HTTPS only.
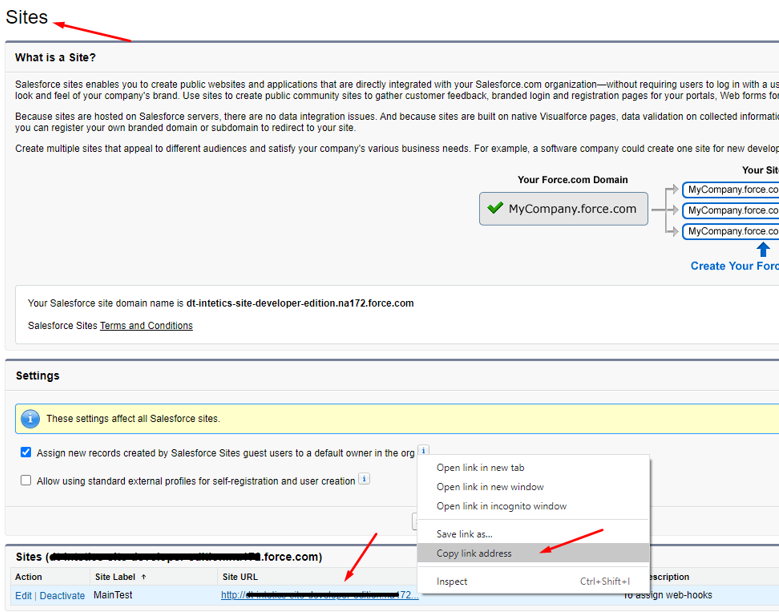
- Now, take the first part of the ‘Site URL’ (https://*******.force.com/) from your ‘Sites’ page (see the screenshot below), replace the HTTP by HTTPS and add the rest to the webservice class: services/apexrest/Consensus/DemoManager/ OR /services/apexrest/Consensus/DemoManager/ if you use additional ‘Path’ to your Site URL
- Save your settings and test the webhook from within Consensus by clicking the Testbutton next to each type of webhook (Demo Watched, New Lead).
- Next, add Read and Edit privileges for ‘existInConsensus’:
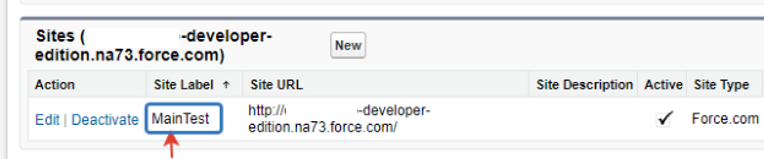

- Go to ‘Sites’, then click on the Site Label name then click Public Access Settings, find the section ‘Field-Level Security’
- Once on this page, find ‘Leads’, then click View and lastly click Edit. Make sure Read and Edit Access are checked for existInConsensus
- Click Save, then Back to Profile
These next two should just need to be verified:
- Open the Sites page, then click on your Site Label
- Find and click Public Access Settings button
- On the ‘Public Access Settings’page, find ‘Standard Object Permissions’section and then ‘Leads’.
Make sure ‘Read’ and ‘Create’ are enabled.
- Under ‘Administrative Permissions’make sure ‘View All Custom Settings’is enabled.


Configuring Web-to-Lead to Work with the Consensus Salesforce App
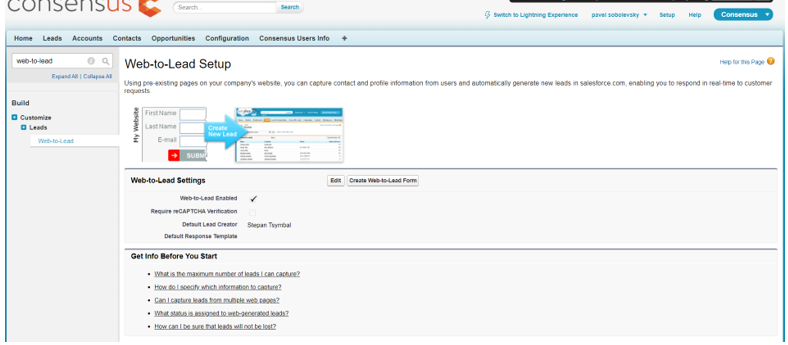
First, we need to generate the Web-to-Lead form:
- Click on Setup, then in the Search box on the left-hand side, type "web-to-lead". Click the Web-to-Leadlink under Marketing, and then Create Web-to-Lead Formin the middle of the page.
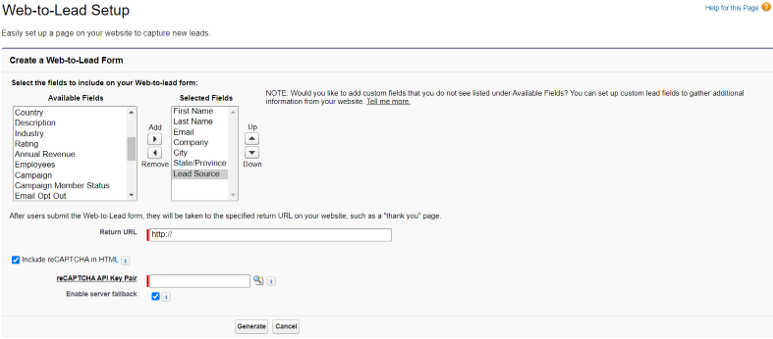
- Now inside of the Web-to-Lead Setup, find the value Lead Source. Highlight that field, and click the Add button to move these fields into the Selected Fields box
- Once the Salesforce web-to-lead form is ready you will need to generate the HTML and line it up with the fields inside of your Consensus. Below is a sample of what the HTML will look like.
NOTE* The highlighted fields will be required when configuring Consensus. 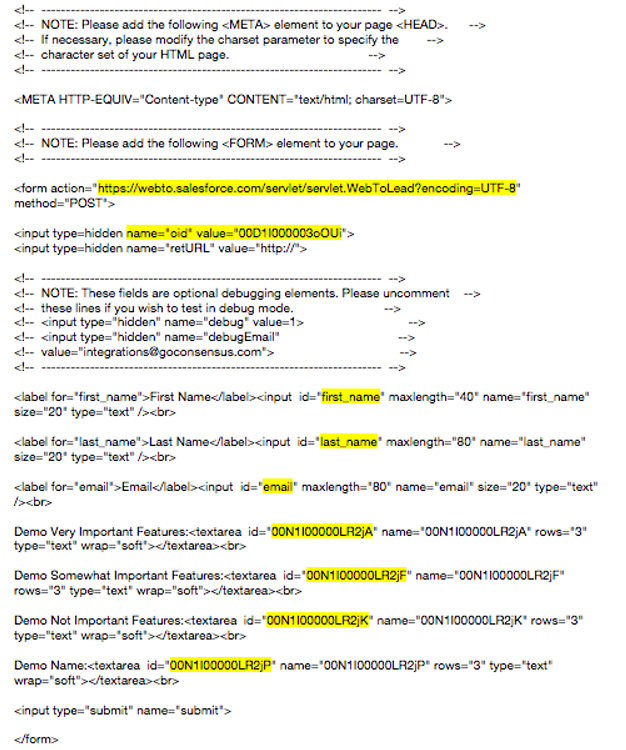
- Now we need to configure the Web to Lead within your Consensus Account. You can access the Web to Lead integration by clicking the gear icon in the upper right-hand corner, then Integration, then Web-to-Lead Integrationunder the Adminsection within settings in the Web to Lead Integration You will need to add the ID/Name of the Salesforce Fields inside of the ConsensusWeb to Lead section. Below is a quick snapshot of how this will look:

- URL value is found near the top of the HTML from Salesforce:
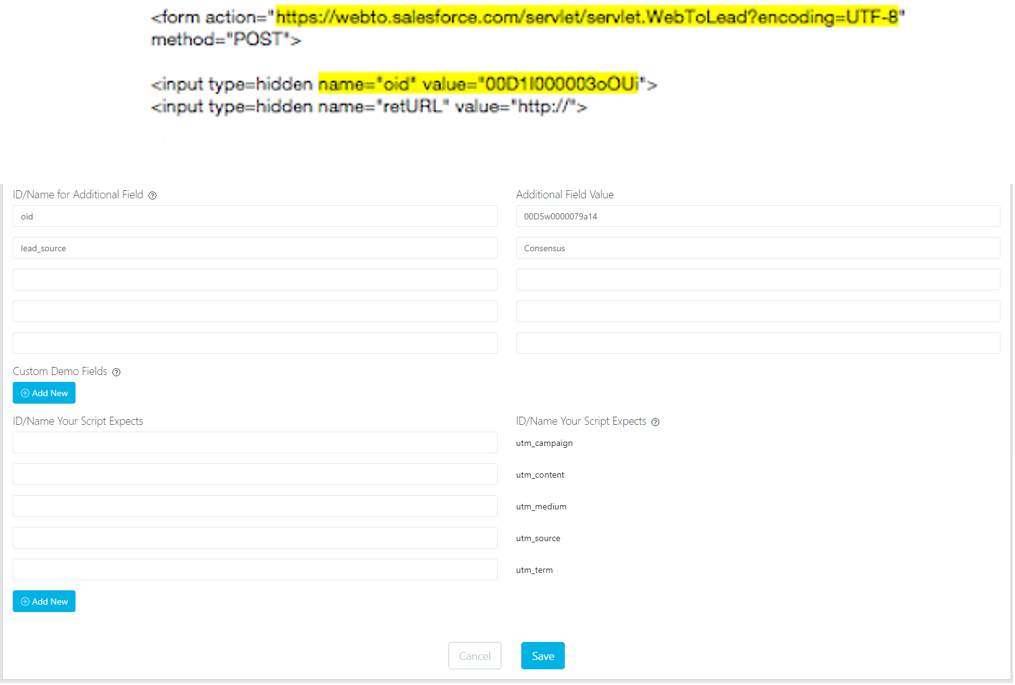
- oid value is found near the top of the HTML from Salesforce:

- Lead Source is found at the bottom of the HTML:

- URL value is found near the top of the HTML from Salesforce:
Consensus also supports passing UTM Parameters for tracking different campaigns (Google, Yahoo, etc…). These are tags that are added at the end of a URL. For example:
https://goconsensus.com/app/view/p/6hg?utm_campaign=blogpost&utm_medium=social&utm_source=facebook
NOTE* You will need to add the corresponding fields within the Salesforce Lead Form where we can pass the information. Once you have everything set up in the tag, click Save and all new leads that come in from filling out the Consensus Lead Capture Form will be passed into your Salesforce Account.
Uninstallation
Before uninstalling the Consensus Salesforce App Component, you need to remove the plugin component from all Lead, Account, Contact and Opportunity page layouts for Classic and Lightning modes.
To delete Consensus Salesforce App Component open a page layout in ‘Edit’ mode by clicking an Edit Layout button on any records or from the appropriate menu on the ‘Setup’ page. 
OR

Find the plugin component on the page layout and click on Remove sign
Or use drag-and-drop functionality to remove the plugin component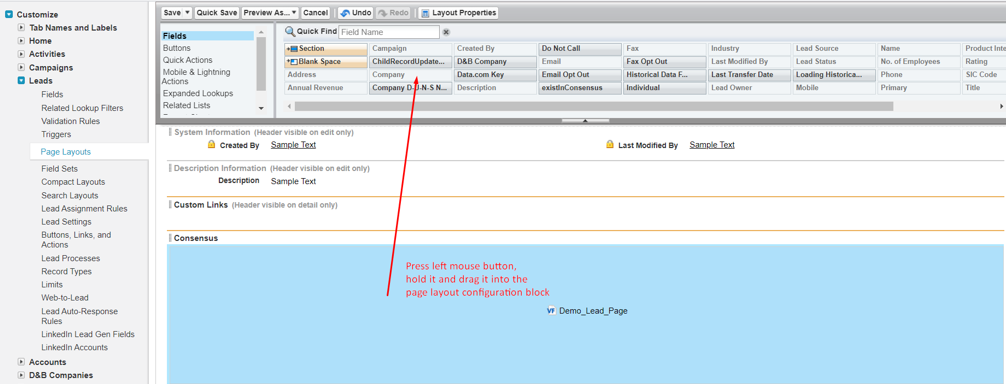
Repeat the process for each Lead, Account Contact and Opportunity page layouts which contain the Consensus Salesforce App component.
Save the page.
Repeat the process for each Lead, Account, Contact and Opportunity page layouts which contain the Consensus Salesforce App component.
When the all plugin components are removed open the ‘Installed Packages’ Salesforce page by typing the word ‘install’ in the ‘Quick Search’ box on the ‘Setup’ page.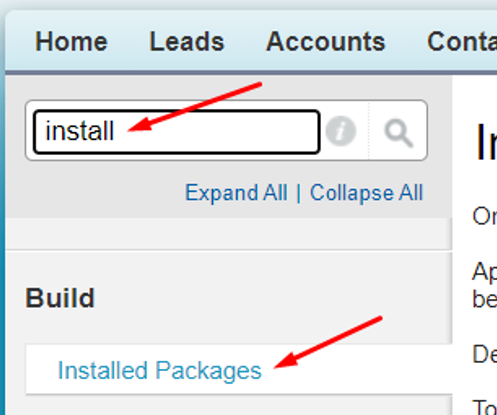
Now click the Uninstall link.
Read the instructions and notes about uninstalling and scroll down to bottom of the page. Click Yes, I want to uninstall this package and permanently delete all associated components then click Uninstall and wait for the email notification that tells you that your uninstallation was successful.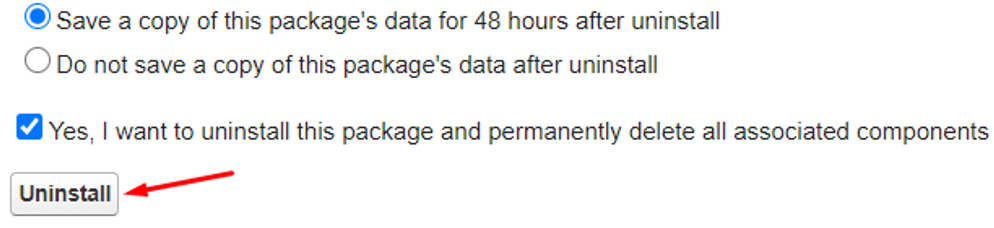
All successfully uninstalled packages placed to the ‘Uninstalled Packages’ section and you can delete it permanently or stay there for history.